Doom Eternal's Nightmare Difficulty: Mastering the Ultimate Challenge for Speedrunners

Alright, demon slayers! You've conquered Ultra-Violence, perhaps even flirted with Ultra-Nightmare, but are you truly ready to face the inferno that is Doom Eternal's Nightmare difficulty? This isn't just about surviving; it's about absolute domination. If your heart pounds for that electrifying challenge and you dream of shaving precious seconds off your runs, you've come to the right place. We're talking about a difficulty that demands perfection, insane reflexes, and a deep understanding of the Slayer's arsenal. Forget casual play; this is where the real speedrun potential shines.

Understanding Nightmare: What Sets It Apart

Let's get one thing straight: Nightmare difficulty in Doom Eternal is not for the faint of heart. It's a brutal gauntlet where every mistake is punished severely. Enemies hit harder, move faster, and are far more aggressive than on lower settings. Your precious ammo and health pickups are rarer than a friendly Pinky, forcing you to be incredibly judicious with every shot and every dodge. This is where true mastery of the game's mechanics is tested to its absolute limit. It's less about brute force and more about calculated aggression and flawless execution. For a speedrunner, this means every second counts and every encounter must be optimized.

The core loop of Doom Eternal is about resource management and aggressive combat. On Nightmare, this loop is amplified to an extreme. You can't afford to stand still, you can't miss shots, and you certainly can't afford to take unnecessary damage. Each engagement is a deadly dance where survival depends on your ability to exploit enemy weaknesses, utilize your full arsenal, and maintain momentum. It’s a difficulty designed to push even seasoned players to their breaking point, but for those who persevere, the rewards in terms of skill progression and sheer satisfaction are immense.

Mastering the Slayer's Toolkit: Essential Gear and Upgrades

To even think about tackling Nightmare, your loadout needs to be optimized. Forget about relying on just a few favorite weapons; you need to be proficient with the entire arsenal. The Plasma Rifle can melt shields, the Super Shotgun is your go-to for close-quarters devastation and crowd control via its Meat Hook, and the Ballista offers pinpoint precision. Understanding the specific strengths and weaknesses of each weapon against different demon types is paramount. For instance, a well-timed Chaingun can shred a Mancubus at range, while the Rocket Launcher's sticky bombs are perfect for staggering heavier threats.

Don't underestimate the importance of your equipment. The Flame Belch isn't just for show; it's your primary source of armor, and mastering its use in combat is crucial for sustain. Similarly, the Ice Bomb is invaluable for freezing groups of enemies, allowing you to focus on high-priority targets or reposition safely. The Chainsaw, while consuming fuel, provides a vital health boost and ammo refill, making its timely use a strategic necessity, especially during intense encounters. In a speedrun, these tools are not just survival mechanisms; they are integral components of your time-saving strategies.

Combat Strats for Survival and Speed

The key to surviving and thriving on Nightmare difficulty lies in aggressive movement and smart target prioritization. Never stop moving. Utilize the dash mechanics, jump pads, and environmental hazards to your advantage. Staying still is a death sentence. Learn to "dance" around your enemies, constantly repositioning to avoid attacks and exploit openings.

Glory Kills are not just stylish finishers; they are a fundamental part of your sustain strategy. Each Glory Kill rewards you with health, and on Nightmare, health is as precious as gold. Prioritize performing them on weaker fodder demons to keep your health bar topped up while dealing with larger threats. This resource loop is central to extended survival. The same applies to the Flame Belch for armor and the Chainsaw for ammo.

"On Nightmare, every second counts. You need to be constantly aware of your surroundings, your ammo count, and the types of demons you're facing. Complacency is the fastest way to a respawn."

When facing multiple high-threat demons, such as a Revenant or a Mancubus alongside fodder, learn to isolate and eliminate them efficiently. Use crowd control abilities like the Ice Bomb or Frag Grenades to manage the smaller threats while focusing your heavy-hitting weapons on the more dangerous targets. Mastering the weapon switch combos, often referred to as "quick-swapping" in the speedrun community, is essential for maximizing damage output and minimizing downtime.

For example, a classic combo involves firing the Ballista, immediately switching to the Super Shotgun, firing, and then switching back to the Ballista. This allows you to deliver devastating damage very rapidly. Experimenting with different weapon combinations and discovering your own efficient attack chains will be a massive boon. Remember, the goal isn't just to kill the demons; it's to kill them as fast as possible while maintaining your own survivability.

Level Knowledge is Power: Navigating the Arenas

Memorizing level layouts is crucial. Knowing where ammo and health pickups are located, understanding the optimal routes through arenas, and anticipating enemy spawn points can mean the difference between success and failure. On Nightmare, you don't have the luxury of exploring; every movement must be purposeful. This is where analyzing speedrun routes becomes invaluable. Watch top players navigate each level and identify their strategies for movement, combat encounters, and resource collection.

Pay attention to environmental features. Jump pads can provide quick escapes or aggressive flanking opportunities. Monkey bars allow for rapid traversal across dangerous areas. Using these elements effectively can drastically improve your time and survivability. For instance, certain arenas have environmental traps that can be used to damage or incapacitate demons, adding another layer to your strategic planning.

"Knowing the exact spawn points for heavy demons and having a plan to deal with them the moment they appear is a critical skill on Nightmare. No time for surprises."

In many arenas, there are specific "hot spots" where multiple threats will converge. Identifying these areas and preparing a strategy – whether it's using an Ice Bomb, setting up your Flame Belch for armor, or preparing a heavy weapon combo – is key. Don't be afraid to retreat momentarily to a safer position if overwhelmed, but always be ready to re-engage aggressively. The flow of combat is dynamic, and your ability to adapt is constantly tested.

Essential Upgrades and Runes

When it comes to upgrades, focus on those that enhance your combat effectiveness and survivability. The mods for your weapons are critical. The Lock-On Burst for the Rocket Launcher can help secure kills on flying or distant targets, while the Shield mod for the Plasma Rifle offers a defensive option. For your suit, upgrades that increase armor or health regeneration are invaluable. Movement speed enhancements are also vital for maintaining that aggressive pace required for speedrunning.

Runes play a massive role in tailoring your playstyle. For Nightmare difficulty and speedrunning, certain runes are almost mandatory:

  • Armored Momentum: Grants armor when dashing. Absolutely essential for aggressive play and sustain.
  • Quick Health: Grants health from Glory Kills. Synergizes perfectly with the core combat loop.
  • Dalek Proximity Mine: Enemies killed by melee attacks drop health. Another fantastic sustain option, especially against fodder.

Experiment with other runes like Saving Throw for a safety net or Blood Fueled for increased movement speed after a kill, but the core three provide the most consistent benefits for surviving and optimizing speed.

FAQ: Nightmare Difficulty

What's the main difference between Nightmare and Ultra-Nightmare?

The primary difference is permadeath. On Ultra-Nightmare, if you die, your save file is deleted, and you have to start the entire campaign over. Nightmare difficulty allows you to respawn at checkpoints, but the enemy difficulty and resource scarcity remain exceptionally high.

Is it possible to beat Nightmare without using quick-swapping?

Technically, yes, but it would be significantly harder and slower. Quick-swapping is a core mechanic for maximizing damage output efficiently, which is crucial for managing tough encounters and achieving good times on Nightmare, especially for speedrunning.

How important is the Flame Belch on Nightmare?

Extremely important. It's your primary way to regain armor, which is constantly depleted on Nightmare. Mastering the timing and positioning for using the Flame Belch on groups of fodder demons is vital for survival.

Are there any specific weapon loadouts that are better for Nightmare?

While proficiency with all weapons is key, having the Super Shotgun and Ballista readily available for high-damage combos is essential. The Plasma Rifle is excellent for dealing with shields, and the Rocket Launcher with Lock-On Burst is great for staggering or finishing off tough enemies. Adapt your loadout based on the specific encounter.

Nightmare difficulty in Doom Eternal is the ultimate test of your skills, pushing you to your limits and demanding near-perfect execution. But the thrill of overcoming such a challenge, mastering every mechanic, and optimizing every encounter for speed is what the #speedrun community lives for. Embrace the chaos, learn from every death, and remember that practice makes perfect. Keep grinding, keep refining your strategies, and you might just find yourself climbing the leaderboards and achieving that coveted #worldrecord.

The path to mastering Nightmare is paved with countless deaths, but each one is a lesson learned. Keep pushing, Slayers. The glory is worth the struggle.

What are your go-to strategies for Nightmare difficulty? Any particular glitches or skips that make a huge difference in your runs? Share your tips and tricks in the comments below, and join our Discord to connect with fellow demon slayers and speedrunners! Let's conquer hell, one frame at a time!
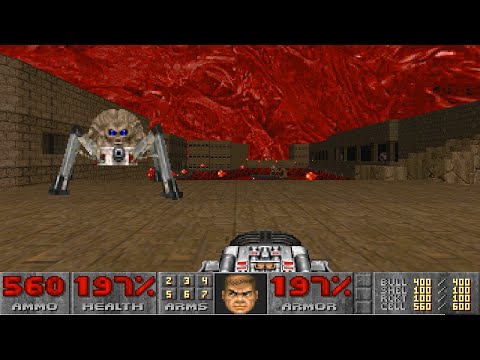
Final Doom: Plutonia Experiment Nightmare! Speedrun Shatters Records in 34:28

Hey there, fellow Doom enthusiasts and speedrun fanatics! You've landed on GamingSpeedrun.com because you're hungry for that adrenaline rush, that perfect sequence of pixel-perfect movements and strategic monster management that defines the ultimate speedrun. Today, we're diving deep into the fiery depths of Final Doom: The Plutonia Experiment, specifically a jaw-dropping Nightmare! category run by the legendary Zero-Master that clocked in at an unbelievable 34 minutes and 28 seconds. Forget your casual playthroughs; this is high-octane gaming at its absolute finest.

Introduction: The Plutonia Nightmare Unveiled

When you think of speedrunning some of the hardest Doom WADs out there, Final Doom: The Plutonia Experiment on Nightmare! difficulty is often mentioned in hushed, fearful tones. It's a brutal test of skill, patience, and pure gaming grit. So, when Zero-Master dropped a new World Record (WR) of 34:28, it sent ripples through the community. This wasn't just a minor improvement; it was a massive leap forward, proving that even the most daunting challenges can be overcome with dedication and a mastery of the game's mechanics. This run is a masterclass in Doom speedrunning, showcasing incredible route optimization and flawless execution.

Run Details: The Anatomy of a Record

Let's break down the core stats of this incredible feat. This run was published on October 29, 2020, pushing the boundaries of what was thought possible for this notoriously difficult WAD.

  • Runner: Zero-Master
  • Date: 2020-10-29
  • IWAD: Plutonia.wad
  • Category: NM-Speed (Nightmare! Speedrun)
  • Map Progression: D2All (Maps 1-30)
  • Source Port: Crispy Doom v5.9.2
  • Total Time: 34:28

The improvement over the previous record, held by S6kana, was a staggering 3 minutes and 32 seconds. Considering the razor-thin margins in most speedruns, this is monumental. Even more impressively, it was nearly 10 minutes faster than Zero-Master's own previous best run. This speaks volumes about the dedication to route refinement and skill development.

Map-by-Map Breakdown: Strategies and Close Calls

What makes this run so fascinating are the specific strategies employed on each map and the moments where disaster could have struck. Zero-Master provides some insightful commentary on the challenges and triumphs within each level.

Map 01: A Welcoming Warm-up?

The opening map often sets the tone. For Plutonia, even Map 01 can be tricky on Nightmare!. Zero-Master notes a smart strat from S6kana: instead of dealing with a single Mancubus head-on, using the chaingun to "painstate" the second one significantly eases the start. This allows for a quicker exit and conserves precious health and ammo.

Map 04: Navigating the Cacodemon's Lair

Map 04 presents a unique challenge. Zero-Master explains a crucial maneuver: moving backward off the starting platform to avoid agitating a Cacodemon that's positioned in an acid pit. This Cacodemon needs to be dealt with if it teleports out, so avoiding unnecessary engagement here is key. Precision is paramount to hitting the switch without being caught off guard by stray fire.

Map 07: The Arachnotron Enigma

Some levels, like Map 07, offer less defined strats due to enemy unpredictability. Zero-Master admits to not having a solid plan for the Arachnotrons after crossing a gap, highlighting the inherent risk and reliance on adaptation in speedrunning.

Map 10: Arming Up for Survival

Map 10 is particularly dangerous because the armor acquired here is vital for Map 12. The strategy involves clearing out some Chaingunners and executing a quick linedef skip on the Revenant closet. The tension is palpable as the runner hopes to avoid Cacodemon fire while securing essential gear.

The need for that armor in Map 10 makes it a high-stakes gamble. One bad hit and the entire run could be compromised before you even reach the next critical stage.

Map 16: A Near-Disastrous Start

The start of Map 16 was, by Zero-Master's own admission, "a real mess." Uncertainty about the number and position of Shotgunners led to a near-fatal encounter when going for a linedef skip. Surviving that initial onslaught was a testament to quick reflexes and a bit of luck.

Map 18: Calculated Risks and Hitscanner Havoc

Map 18 offered a suboptimal start, with Zero-Master preferring to get a Shotgunner to teleport in first for potential infighting with an Imp. The close call came from an Imp while trying to dodge hitscanner fire. Failing to secure the MegaSphere here would have been fatal. The exit Arch-Vile jump, however, proved relatively straightforward.

Map 20: Baron of Hell's Unfortunate Positioning

In Map 20, the second Baron of Hell's movement out of a corridor took an agonizingly long time. Coupled with their unfavorable positioning, Zero-Master had to rely on sheer health reserves to survive. This map exemplifies how enemy AI and placement can drastically impact a run.

Map 22: The Linedef Skip and Spectre Scares

A different setup for the linedef skip on the red key trap, believed to be by JCD, made things a bit easier. However, the yellow key section poses a significant threat. Getting blocked by Spectres on the lowering bridge is a potential disaster, likely leading to a run-ending death.

Map 23: Navigating the 50/50 and BFG Drops

Map 23 has historically been a struggle, often described as a "50/50" level. Recent routing changes, possibly by S6kana, have significantly improved the approach. Starting by grabbing the blue key first (thanks to health from Map 22) is a major advantage. Dropping onto the platform near the yellow key switch with the BFG and executing a glide after clearing monsters near the red key gap are now key strategies for conserving health.

The routing improvements on Map 23 are a perfect example of how the speedrunning community constantly innovates, turning nightmare maps into manageable challenges through clever optimization and shared knowledge.

Map 24: The Arch-Vile Jump Gambit

Map 24 is relatively simple if the Arch-Vile jump is executed correctly. The main risk? Expecting the Arch-Vile to hit you, only for it to be killed by something else, causing the jump to fail. An alternative involves activating the bridge, but this allows the Arch-Vile to advance, potentially causing problems later.

Map 25: Megasphere Mania

Despite heavy initial damage, the plan for Map 25 was always clear: grab the MegaSphere and clear the room swiftly. The rocket jump required is considered easy, making this a relatively smooth segment if executed correctly.

Map 26: Pain Elemental Peril

Zero-Master expresses surprise at nearly dying to Pain Elementals on Map 26, despite having sufficient health. This serves as a stark reminder that even with a health advantage, the sheer number and threat of enemies on Nightmare! difficulty can be overwhelming.

It's moments like these on Map 26 that truly highlight the pressure of a speedrun. Even with a comfortable health buffer, the relentless assault can create unexpected peril.

Map 30: The Cyberdemon Showdown

The final map, Map 30, often involves strategies to weaken the Cyberdemon before engaging it directly. The idea is to prevent it from having a window to respawn after being damaged from below. This final encounter demands precision and a deep understanding of enemy behavior.

The Legacy of the Run and Future Potential

Zero-Master's run is more than just a time on a screen; it's a testament to the enduring appeal of Doom and the incredible dedication of its speedrunning community. The fact that this run was achieved with Crispy Doom, a modern-source port, shows how far gaming technology and technique have evolved.

When asked about how low the time could go, Zero-Master admits, "No idea." This leaves the door wide open for future attempts and innovations. Could we see this time drop even further? With the Plutonia WAD's notorious difficulty, any further improvement will require near-perfect execution and potentially groundbreaking new strategies. It's exciting to think about what the future holds for this classic map set.

For those interested in cooperative runs, Zero-Master mentions that JCD and S6kana might attempt a co-op playthrough on Nightmare!. You can find their previous Nightmare! record and UV co-op record on S6kana's YouTube channel.

The pursuit of perfection in speedrunning never truly ends. Each record broken simply sets a new benchmark, inspiring the next generation of players to push the limits.

Frequently Asked Questions

Q1: What makes The Plutonia Experiment so difficult on Nightmare! difficulty?
A1: Nightmare! difficulty significantly increases enemy damage, speed, and aggression, while also restricting saves. Plutonia itself features extremely challenging map design, traps, and enemy placements, making it one of the hardest official Doom WADs.

Q2: What is a "linedef skip" in Doom speedrunning?
A2: A linedef skip is a glitch or exploit where a player manipulates game physics or triggers to bypass a section of a map by passing through a specific trigger line (linedef) that wasn't intended to be crossed in that manner.

Q3: Why is the armor in Map 10 so important?
A3: The armor acquired in Map 10 is crucial for surviving the increased damage output from enemies in subsequent maps, particularly Map 12, which is known for its intense combat scenarios. Having that extra protection is vital for maintaining run viability.

Q4: Can this run be replicated on other source ports?
A4: While the core strategies are transferable, specific glitches and exploits like linedef skips can sometimes behave differently or be impossible in different source ports due to variations in engine emulation. Crispy Doom is known for its compatibility and faithfulness to original Doom behavior.

This incredible speedrun by Zero-Master is a milestone for Final Doom: The Plutonia Experiment. It showcases the pinnacle of skill, dedication, and strategic thinking in the gaming world. We encourage you to watch the run, study the strats, and maybe even try to beat your own personal bests! What are your thoughts on this record-breaking run? Did any specific map strategy surprise you? Let us know in the comments below or join the discussion on our GamingSpeedrun Discord server!

``` ```json { "@context": "https://schema.org", "@type": "FAQPage", "mainEntity": [ { "@type": "Question", "name": "What makes The Plutonia Experiment so difficult on Nightmare! difficulty?", "acceptedAnswer": { "@type": "Answer", "text": "Nightmare! difficulty significantly increases enemy damage, speed, and aggression, while also restricting saves. Plutonia itself features extremely challenging map design, traps, and enemy placements, making it one of the hardest official Doom WADs." } }, { "@type": "Question", "name": "What is a \"linedef skip\" in Doom speedrunning?", "acceptedAnswer": { "@type": "Answer", "text": "A linedef skip is a glitch or exploit where a player manipulates game physics or triggers to bypass a section of a map by passing through a specific trigger line (linedef) that wasn't intended to be crossed in that manner." } }, { "@type": "Question", "name": "Why is the armor in Map 10 so important?", "acceptedAnswer": { "@type": "Answer", "text": "The armor acquired in Map 10 is crucial for surviving the increased damage output from enemies in subsequent maps, particularly Map 12, which is known for its intense combat scenarios. Having that extra protection is vital for maintaining run viability." } }, { "@type": "Question", "name": "Can this run be replicated on other source ports?", "acceptedAnswer": { "@type": "Answer", "text": "While the core strategies are transferable, specific glitches and exploits like linedef skips can sometimes behave differently or be impossible in different source ports due to variations in engine emulation. Crispy Doom is known for its compatibility and faithfulness to original Doom behavior." } } ] }

Jax Top Lane: The Unstoppable Force of Season 13 - Free Wins and Record Winrates!

What's up, fellow summoners and speedrun enthusiasts! If you've been anywhere near the #toplane in Season 13 of League of Legends, you've probably noticed a certain Grandmaster wielding his lamp post like it's nobody's business. That's right, we're talking about Jax, and let me tell you, the *Jax Top Lane* strategy right now is less "learning" and more "literally free wins." Forget complicated matchups and coin-flip games; this is about mastering a champion that's currently sitting pretty with an absurdly high winrate. In this guide, we're diving deep into the S13 Jax Top gameplay that's making waves. Whether you're aiming for your personal best (PB), climbing the ranked ladder, or just want to see a champion dominate, you've come to the right place. We’ll break down the core mechanics, the most effective builds, and the game-changing strategies that turn Jax into an absolute terror.

What Makes Jax So Strong in Season 13?

Jax's kit has always been potent, but Season 13 has amplified his strengths to an almost unfair degree. His passive, *Martial Cadence*, grants him stacking attack speed with every auto-attack, making him an incredible duelist. This synergizes perfectly with his *Empower (W)*, which resets his auto-attack timer, allowing for devastating burst combos. His *Counter Strike (E)* is a game-changer, providing a crucial dodge and stun that can turn the tables on aggressive opponents or disrupt enemy engages. And let's not forget his ultimate, *Grandmaster's Might*, which grants him significant defensive stats and a powerful on-hit magic damage effect for his third attack. The current meta favors champions who can scale effectively into the late game and exert pressure across the map, and Jax excels at both. His ability to farm safely with his high sustain from items and then snowball hard makes him a terrifying prospect for any laner. The sheer dueling power he possesses means that even if he falls behind slightly, he can often find a 1v1 to reclaim his lead. The early access to powerful items that synergize with his kit, like Goredrinker or Stridebreaker (depending on the build path), combined with his inherent tankiness and damage, creates a champion that's both hard to kill and capable of dishing out immense punishment.

Core Runes and Masteries for Jax Top

The standard rune page for a dominant Jax build revolves around maximizing his offensive capabilities while ensuring sustain. * **Primary Tree: Precision** * **Conqueror**: The absolute king for Jax. Stacks up during extended fights, providing adaptive force and healing, which is crucial for his dueling and sustain. * **Triumph**: Essential for surviving multi-kills and extended trades. The health regeneration is a lifesaver. * **Legend: Alacrity**: Further enhances his attack speed, allowing him to stack his passive faster and melt through targets. * **Last Stand**: Jax often fights when he's low on health, especially when diving or being dived. This rune maximizes his damage output in those critical moments. * **Secondary Tree: Inspiration or Domination (Situational)** * **Inspiration**: * **Magical Footwear**: Free boots are always a win, saving gold for core items. * **Cosmic Insight**: Reduces summoner spell and item cooldowns, crucial for his engage and escape tools. * **Domination**: * **Sudden Impact**: Provides a burst of adaptive force after using his Leap Strike (Q) or Counter Strike (E), increasing his combo damage. * **Relentless Hunter**: Offers movement speed out of combat, aiding in rotations and split-pushing. **Summoner Spells**: * **Teleport**: Essential for top lane. Allows for map pressure, quick returns to lane, and impactful roams. * **Flash**: The universal escape and engage tool.

Item Builds for Maximum Impact

The flexibility of Jax's build path is one of his greatest assets. However, certain items consistently provide the highest winrate. **Mythic Items (Choose One Based on Matchup/Team Comp):** * **Goredrinker**: The go-to for sustained fights and survivability. The active heal and damage, combined with the stats it provides, make Jax incredibly difficult to take down. * **Stridebreaker**: If you need more sticking power and engage, Stridebreaker is a fantastic option. The slow active helps Jax lock down targets and chase them down. **Core Legendary Items:** * **Trinity Force**: A classic Jax item. The Sheen proc, attack speed, ability haste, and movement speed make it a powerhouse for both damage and mobility. * **Blade of the Ruined King (BotRK)**: Crucial against tanky opponents. The % health damage and lifesteal are invaluable for melting high-HP targets and sustaining in fights. * **Sterak's Gage**: Provides a massive shield when Jax is low on health, acting as a powerful lifesaver in teamfights. It also grants tenacity. **Situational Items:** * **Death's Dance**: Excellent against teams with significant mixed damage. The damage delay and healing provide incredible survivability. * **Guardian Angel**: A must-have against burst-heavy compositions. The revive can swing entire teamfights. * **Wit's End**: If facing heavy magic damage threats, Wit's End offers magic resist, attack speed, and on-hit magic damage. * **Black Cleaver**: Good against armor-heavy teams, offering health, AD, and the armor shred effect.

Early Game Laning Strategy: Farming and Trading

The early game for Jax is all about calculated aggression and efficient farming. Your primary goal is to reach level 6 and complete your Trinity Force or Goredrinker. * **Wave Management**: Learn to freeze the wave near your tower if you're against a tough early-game opponent (like Darius or Renekton). This denies them farm and puts them at risk of ganks. If you have an advantage, push the wave to deny the enemy farm and pressure their tower. * **Trading Stance**: Jax excels at short, decisive trades. Use your Leap Strike (Q) to dash in, auto-attack, Empower (W), and then potentially use Counter Strike (E) to dodge incoming damage or stun them as you disengage. * **Level 2 Power Spike**: As soon as you hit level 2 (usually after your first minion wave and the first few of the second), you gain a significant advantage. If your opponent overextends, look for a Q-W-auto trade. * **Level 6 All-in**: Once you hit level 6 and have your ultimate, Jax's kill pressure skyrockets. If you have a slight advantage in items or health, this is often your window to go for the kill. * **Jungle Assistance**: Communicate with your jungler. Jax is a strong gank target due to his E stun, and a successful gank can snowball your lane even further. Be mindful of enemy junglers – Jax can be vulnerable to early invades if he overextends without vision.
The key in the early game is patience. Don't force plays if you don't have an advantage. Focus on farming safely and punishing every mistake your opponent makes.

Mid-Game Power Spikes and Rotations

The mid-game is where Jax truly starts to take over. Hitting your core item breakpoints, especially Trinity Force or Goredrinker plus Blade of the Ruined King, marks a significant power spike. * **Objective Control**: Jax is excellent at taking objectives. His high sustained damage allows him to melt dragons, Rift Heralds, and towers quickly. Prioritize these when possible, especially if you have lane priority. * **Split Pushing**: Jax is one of the best split pushers in the game. His dueling power means most champions cannot stop him 1v1. Push side lanes to draw pressure, forcing the enemy team to send multiple members to deal with you. This creates opportunities for your team to take objectives elsewhere. * **Flanking in Skirmishes**: If grouped with your team, look for opportunities to flank the enemy backline. Your Leap Strike (Q) can be used to engage, followed by Counter Strike (E) to disrupt their carries. * **Teleport Plays**: Use your Teleport wisely. Joining a fight that's breaking out on the opposite side of the map can quickly turn the tide.

Late-Game Teamfights and Split-Pushing

As the game progresses into the late stages, Jax’s role becomes more defined, but also more critical. * **The Split Push King**: If your team has decent disengage or engage tools, your primary role is often to split push. Force the enemy team to make a decision: send multiple people to stop you, allowing your team to take objectives on the other side of the map, or ignore you and risk losing turrets. The pressure Jax exerts in a side lane is immense. * **Targeting Carries**: In teamfights, if you can't effectively split push, your job is to dive the enemy backline. Use your Q to close the distance, E to stun and mitigate damage, and your empowered autos to take down their carries. Be careful not to get cc'd and bursted down before you can make an impact. * **Peeling for Your Carries (Situational)**: In some rare cases, if your team is heavily reliant on its carries and you're the only frontline, you might need to provide some peel. Using your E defensively can disrupt divers and protect your damage dealers. However, this is generally not Jax's optimal role.
Late game is where Jax truly shines. Your ability to 1v1 anyone and take towers faster than almost any other champion forces the enemy to react to you, creating advantages for your team.

Advanced Tips and Tricks for Jax Mastery

To truly master Jax and achieve those "free win" scenarios, incorporate these advanced techniques: * **E-Q Combo**: You can cast Leap Strike (Q) during the activation of Counter Strike (E). This allows you to instantly dash to an enemy and stun them almost simultaneously, making it harder to dodge. * **Auto-Attack Resets**: Remember that Empower (W) resets your auto-attack timer. Practice the Q-W-auto and auto-W-auto sequences for maximum damage output in trades and combos. * **Jump on Minions/Ward for Escape**: If you need to escape and there are no enemy champions nearby, you can use Leap Strike (Q) on a minion or a control ward to reposition. * **Counter Strike Timing**: The timing of your E is crucial. Use it reactively to dodge key abilities (like a Darius pull or a Sett full combo) or proactively to stun an entire enemy team during an engage. * **Empower Crit with Ult**: Your ultimate's bonus magic damage applies to your empowered auto-attack (W), making your burst even more significant.

Common Matchup Breakdowns

While Jax is strong into many matchups, some require specific strategies. * **Darius**: A classic difficult matchup. Focus on dodging his Q’s sweet spot and his E pull. Try to trade only when his passive is down. Freezing the wave is key. If you can get Goredrinker, you can start to duel him. * **Garen**: Garen's silence can be annoying, but Jax's E makes him immune to his spin-to-win damage. Trade when his cooldowns are down. * **Fiora**: A skill matchup. Fiora can parry your E stun, so timing is critical. Focus on out-dueling her with items and aggressive trading. BotRK is very effective here. * **Riven**: Similar to Fiora, Riven is very combo-reliant. Dodge her stuns and try to trade when her abilities are on cooldown. Her mobility can be a problem, so use your Q wisely.

Preguntas Frecuentes

¿Cuál es la mejor build para Jax en la Season 13?

La build más consistente suele incluir un item mítico como Goredrinker o Stridebreaker, seguido de Trinity Force o Blade of the Ruined King, y Sterak's Gage. Los items situacionales varían según el equipo enemigo.

¿Es Jax un campeón difícil de jugar?

Jax tiene una curva de aprendizaje moderada. Dominar sus combos, el timing de su E y las estrategias de split-pushing requiere práctica, pero su kit es bastante gratificante y su poder de duelo es alto.

¿Qué runas son las mejores para Jax Top Lane?

Conqueror es casi siempre la mejor opción en la rama de Precisión, acompañada de Triumph, Legend: Alacrity y Last Stand. Como secundaria, Inspiration (Magical Footwear, Cosmic Insight) o Domination (Sudden Impact, Relentless Hunter) son populares.

¿Cómo gano la línea contra un Darius?

Congela la ola cerca de tu torre, farmea de forma segura y solo tradea cuando su pasiva esté baja o sus habilidades estén en enfriamiento. La clave es evitar su Q y su E. Con Goredrinker y práctica, puedes empezar a ganarle en duelos.

¿Cuándo debo split pushear con Jax?

Siempre que puedas ejercer presión en una línea lateral y tu equipo tenga la capacidad de jugar seguro o de crear una distracción en otro lugar del mapa. Jax es uno de los mejores split pushers del juego. In conclusion, Jax in Season 13 isn't just strong; he's a dominant force that can carry games with sheer mechanical skill and snowball potential. By understanding his kit, mastering the optimal builds and runes, and executing smart laning and map pressure strategies, you'll find yourself racking up those "free wins" and climbing the ranks faster than you thought possible. Whether you're aiming for a #worldrecord #speedrun time in your ranked games or just want to feel overwhelmingly powerful, Jax is your guy. What are your favorite Jax strategies? Found any crazy new item builds or obscure glitches? Drop them in the comments below! And if you're looking for more #gaming insights and #speedrun guides, join our Discord community – let's break down the meta together!

Urgot Domination: Mastering the Dreadnought for League of Legends Speedruns

Welcome, fellow gamers and speedrunning enthusiasts, to GamingSpeedrun.com! You've stumbled upon this guide because, like me, you're fascinated by the raw power and potential of Urgot in League of Legends. Perhaps you've seen clips, maybe you're intrigued by his brutal aesthetic, or you're simply looking to elevate your game. Whatever your reason, you've landed in the right spot. We're diving deep into what makes Urgot a formidable force, especially through the lens of optimizing gameplay for speed and efficiency, mirroring the core ethos of speedrunning.

What is Urgot's Role?

Urgot, the Dreadnought, is a unique juggernaut champion in League of Legends, known for his intimidating presence and devastating close-range combat. While not typically a champion featured in traditional speedruns of the *game itself* (like completing a match in record time), his kit offers incredible potential for dominating lanes and quickly eliminating opponents, making him a prime candidate for "champion-specific" challenges or speed-focused gameplay within a single match.

He excels at trading blows, dishing out consistent damage, and executing low-health targets with his ultimate. He's built to be in the thick of the fight, weathering storms of damage while unleashing his own hellish arsenal. Understanding his role as a front-line bruiser is key to unlocking his full potential.

Mastering Urgot's Dreadnought Kit

To truly master Urgot, one must intimately understand his abilities. Each component of his kit is designed for maximum impact, from his passive debuffs to his game-changing ultimate. Let's break down each one:

Passive: Echoing Flames

Urgot's passive is the engine of his damage. His basic attacks and missiles from Acid Hunter apply stacks of Echoing Flames. Once an enemy reaches three stacks, they explode, dealing bonus damage and applying a crucial slow. This slow is vital for sticking to targets, especially when combined with his other abilities. In terms of speedrunning, maximizing passive procs means consistently landing attacks and abilities to shorten engagement times.

Q: Corrosive Charge

This is Urgot's primary poke and wave-clear tool. Corrosive Charge fires a projectile that damages on impact and leaves a lingering charge. After a short delay, this charge explodes, dealing additional damage and, critically, reducing the target's armor. Landing this consistently is paramount for both lane dominance and reducing enemy defenses for quicker takedowns. For speedrunning, landing multiple Qs in quick succession can significantly speed up minion clear and damage objectives.

W: Purge

Purge is Urgot's defensive and offensive steroid. Upon activation, he gains a damage-reducing shield and begins firing rapidly in a cone before him. This rapid fire deals damage and further reduces incoming damage from champions. This is your "go-in" button, allowing you to withstand significant punishment while shredding through enemies. Using Purge strategically during extended trades or when diving into a group of enemies is crucial for survival and maximizing damage output in a short timeframe.

E: Disdain

Urgot's engage and repositioning tool. Disdain is a short dash that damages and slows enemies in his path. The truly unique aspect? If he collides with an enemy champion, he flips them over his shoulder, swapping their positions. This displacement can be used offensively to pull priority targets into your team or defensively to escape. For a speed-focused approach, using Disdain to quickly close the gap or reposition for a better ultimate cast can save valuable seconds.

R: Fear Beyond Death

The ultimate intimidation factor. Fear Beyond Death launches a homing missile at an enemy champion, suppressing them and pulling them towards Urgot. If the target's health drops below a certain threshold during the pull, Urgot can unleash a devastating follow-up blow for an execution. This is Urgot's kill confirmation and a powerful tool for securing objectives or taking out high-priority targets quickly. In a speedrunning context, a well-timed ultimate can secure crucial kills that advance objectives faster.

Key Strategies for Urgot Domination

Playing Urgot effectively requires a blend of aggression and calculated risk. He thrives in the face of adversity, turning enemy aggression into his own advantage.

Early Game Prowess

In the early laning phase, focus on poking with your Q - Corrosive Charge and passive stacks. Aim to zone the enemy laner and secure farm. The goal is to build an early advantage, potentially securing kills through well-timed engages with E - Disdain followed by W - Purge and passive procs. Mastering the range and timing of your passive is crucial here for winning trades.

In my experience, landing the initial three passive stacks before committing to a full E-W combo can significantly swing an early trade in your favor. It sets up a potent slow and bonus damage right from the start.

Mid to Late Game Impact

As the game progresses, Urgot transitions into a terrifying team-fight threat. Position yourself at the front line, absorb damage with W - Purge, and apply consistent damage with your passive and abilities. Look for opportunities to land your R - Fear Beyond Death on a key target, ideally one that can be executed, to create a numbers advantage for your team. Effective use of his ultimate can quickly turn the tide of a team fight, which is invaluable in speed-focused matches where every second counts.

Essential Itemization

Urgot's build path generally focuses on bruiser items that provide damage, survivability, and cooldown reduction. Core items often include:

  • Black Cleaver: Provides AD, health, and crucial armor shred, synergizing perfectly with his kit.
  • Death's Dance: Offers AD, armor, magic resist, and a vital damage-delaying passive, enhancing survivability.
  • Titanic Hydra: Grants AD, health, and an auto-attack reset with an AoE damage component, boosting his burst and wave clear.
  • Sterak's Gage: A lifesaver item that provides a massive shield when health gets low.

Think about building tanky items like Frozen Heart or Randuin's Omen if the enemy team has heavy AD threats, or resistances like Spirit Visage against AP threats. Adaptability is key.

Rune Choices

Conqueror is the standard keystone rune for Urgot, offering stacking adaptive force that synergizes incredibly well with his sustained damage output in fights. Pair it with runes like Triumph for crucial healing in combat, Legend: Alacrity for attack speed, and Last Stand to deal more damage when low on health. For the secondary tree, Resolve with runes like Demolish (for pushing towers faster) and Second Wind or Bone Plating for lane sustain is common. Experimentation is always encouraged!

Speedrun Considerations

While not a typical character for full game speedruns, optimizing Urgot's gameplay for speed within a match involves several key principles:

  • Minion Wave Management: Efficiently clearing waves with Q and auto-attacks is critical for maintaining tempo and pushing objectives.
  • Objective Prioritization: Knowing when to pressure towers, dragons, or heralds based on your advantage is paramount.
  • Team Fight Execution: Landing impactful ultimates and maximizing W during crucial fights can snowball leads rapidly.
  • Minimizing Downtime: Reducing time spent walking back to lane or waiting for abilities to come off cooldown.
The core idea is to maintain constant pressure. Every second spent not dealing damage or pushing an objective is a second lost. This mindset is crucial for any speedrunning endeavor.

Consider the impact of optimal build paths and rune choices on reducing kill times for objectives and enemy champions. For example, maximizing armor reduction from The Black Cleaver alongside your passive means fewer auto-attacks needed to bring down a target.

Mastering Urgot is about understanding the interplay of his abilities and leveraging his strengths to overwhelm opponents. Whether you're aiming for a fast lane win, dominating team fights, or simply enjoying the thrill of playing a powerhouse champion, the Dreadnought offers a deeply satisfying experience.

Frequently Asked Questions

Q1: Is Urgot good for beginners in League of Legends?

Urgot has a unique playstyle that can be a bit challenging for absolute beginners due to the importance of positioning his ultimate and managing his passive. However, his inherent tankiness and strong laning phase make him more forgiving than some other champions. It takes practice, but he's certainly approachable.

Q2: What lane does Urgot play in?

Urgot is primarily played in the Top Lane. His kit is well-suited for dueling and controlling a side lane.

Q3: How do I counter Urgot?

Champions with high mobility, long-range poke, or strong disengage can make it difficult for Urgot to get onto his targets. Additionally, avoiding his passive stacks and punishing him when his W is on cooldown are key.

Q4: Is Urgot viable in professional play?

Urgot's viability in professional play often fluctuates with the meta. He has seen significant professional play in the past due to his strong laning, team fight presence, and ability to pressure objectives.

So, there you have it! A deep dive into mastering Urgot. Whether you're aiming to climb the ranked ladder, dominate your friends, or just appreciate the sheer power of the Dreadnought, we hope this guide has equipped you with the knowledge to succeed. Remember, practice makes perfect, and every great speedrun starts with dedicated practice.

What are your favorite Urgot strats? Any mind-blowing plays you've pulled off? Drop your thoughts, tips, and epic moments in the comments below! Join our Discord community to connect with other hardcore gamers and share your achievements. Let's push the limits together!

Minecraft's Peaceful Mode Speedrun: Conquering the Unconquerable

Alright, speedrunning community, gather 'round! We all know Minecraft. It's the sandbox king, the ultimate creative outlet, and a playground for some of the most insane speedruns out there. But have you ever stopped to think about tackling Minecraft not with a sword and diamond armor, but in its most unassuming state – Peaceful Mode? The thought alone might sound like a contradiction. Speedrunning typically thrives on challenge, on pushing the limits of what's possible through skill and precise execution. So, what happens when you remove the existential threat of creepers and the fight for survival? You get a speedrun category so unique, so strategic, and so reliant on pure game knowledge that it's become a fascinating niche within the wider #minecraftspeedrun world: The Peaceful Mode Speedrun, often specifically the "Set Seed Glitchless" variation.

What is Peaceful Mode Speedrunning?

At its core, Minecraft speedrunning is about completing a specific objective in the fastest time possible. Traditionally, this means defeating the Ender Dragon. However, the beauty of the speedrunning community is its relentless innovation. When players started looking for new challenges, they turned to less conventional settings. Peaceful Mode, where hostile mobs don't spawn and health regenerates instantly, seemed antithetical to the concept of speed. Yet, this is precisely where the intrigue lies. It shifts the focus entirely from combat and survival to intricate knowledge of game mechanics, resource management, and exploiting the game's world generation.

Think about it: no more worrying about a creeper blowing up your carefully placed blocks, no more frantic moments trying to find food, and no more dodging zombie hordes. This doesn't make it easy, though. It forces runners to rely on incredibly specific methods to achieve objectives that would normally be handled by combat or survival tools. It's a testament to how deeply players understand the #minecraft engine.

The Set Seed Glitchless Philosophy

Within Peaceful Mode speedrunning, the "Set Seed Glitchless" category is king. Let's break down what that means for the uninitiated:

  • Set Seed: This means the game world is pre-determined. The runner is given a specific seed that guarantees a particular world generation. This is crucial because it removes the element of RNG (Random Number Generation) in world generation itself, allowing for optimized and repeatable strategies. You know exactly where structures will spawn, where resources will be, and the layout of the land.
  • Glitchless: This is where the purity of the run comes in. It means no unintended game exploits or "glitches" are allowed. This often includes things like the infamous "BLJ" (Backwards Long Jump) in Mario 64 or specific #game-breaking-glitches in other titles. In Minecraft, this might mean no using out-of-bounds exploits or unintended physics manipulations. The goal is to complete the game using intended mechanics, even if those mechanics are less obvious.

This category emphasizes mastery over the game's intended systems. It's about understanding how blocks interact, how item properties work, and how the game's internal logic can be leveraged to achieve incredibly fast times without breaking the game's fundamental rules. It’s about finding the most efficient path through a known world.

Key Strategies and Exploits

Since combat is out of the question, Peaceful Mode speedrunners have to get creative. Here are some of the cornerstone strategies you'll see:

  • Bed Mining: This is perhaps the most iconic strategy. In Minecraft, beds explode when used in the Nether. Normally, this is deadly. In Peaceful Mode, you can strategically place and detonate beds to break through Netherrack at an incredible speed, allowing for rapid traversal and quick access to Fortresses. This is a prime example of using an intended game mechanic in a highly optimized, non-combat way.
  • Elytra & Fireworks: Once you can reach the End and obtain an Ender Dragon egg (which is the objective for this speedrun category), the #elytra becomes your best friend for fast travel. Combined with fireworks, you can achieve incredible speeds, zipping across the landscape.
  • Precise Block Placement and Redstone: Even without combat, understanding how to efficiently place blocks, create simple redstone contraptions for automation (like automatic furnaces for smelting ores), and navigate terrain quickly is paramount.
  • Villager Trading: For specific resources that might be hard to come by, like enchanted books or diamonds, runners often rely on very specific villager trading setups. This requires meticulous planning to set up the right trades and secure the necessary emeralds. It’s a whole sub-game within the speedrun.
  • Strategic Resource Gathering: Knowing exactly where to find specific ores, wood, and other essential items in a known seed is critical. Every second spent digging or foraging is a second lost.

The entire run is a dance of precision. You're not fighting monsters; you're fighting the clock, and every action must be optimized. You need to know the exact number of blocks to mine, the precise placement for a bed explosion, and the fastest route to your next objective. It's a puzzle of epic proportions.

"It’s not about reacting to threats, it’s about predicting the world and executing the perfect sequence of actions before the game even has a chance to present a challenge."

The Ender Dragon in Peaceful?

This is where it gets really interesting. How do you defeat the Ender Dragon in Peaceful Mode? You can't damage it directly with conventional means. The answer lies in a clever exploit of game mechanics and world generation. While not a "glitch" in the traditional sense, it's a highly optimized and specific strategy. Runners will often use beds to damage the Ender Dragon. When you try to sleep in a bed in the End dimension, it explodes, and since you can't die from bed explosions in Peaceful Mode (they just deal damage and you regenerate instantly), you can repeatedly detonate beds to chip away at the dragon's health. It's a battle of attrition, not combat prowess, and it requires immense precision to execute without accidentally taking too much damage (even though it regenerates, there's still a limit before you're defeated by the explosion itself).

This method requires perfect placement and timing. One wrong move, one poorly timed explosion, and your run is over. It’s a true test of patience and understanding of how damage mechanics interact with player health regeneration.

Why Is It So Challenging?

You might think removing combat makes it easier, but you'd be mistaken. The challenge in Peaceful Mode speedruns comes from:

  • Absolute Reliance on Game Knowledge: Every single aspect of the run needs to be memorized. You need to know the exact seed, the optimal path, the location of every crucial resource, and the precise timing for every action.
  • Meticulous Resource Management: Even though health regenerates, you still need specific items. Getting enough iron for a bucket, diamonds for an enchanting table, and materials for beds requires careful planning and execution.
  • No Safety Net: While mobs don't attack, one misstep in a critical segment, like a poorly timed bed explosion or a missed jump with the elytra, can cost you valuable minutes, if not ruin the entire run. The game doesn't forgive mistakes in terms of time.
  • The "Glitchless" Constraint: This prevents runners from using shortcuts that might exist through unintended mechanics, forcing them to rely on the most efficient *intended* paths, which are often incredibly complex.

It's a category that rewards players who have spent thousands of hours in #minecraft, understanding its deepest workings. It’s less about reflexes and more about intellect and preparation.

Breaking Records in Peaceful

The records for this category are truly astounding, often measured in mere minutes. Runners like Illumina, Nikocraft, and SpoonTy have pushed the boundaries of what's thought possible. They utilize extremely precise #speedrunningstrategies, often involving frame-perfect inputs and near-perfect execution of complex maneuvers. Watching these runs is like observing a high-speed chess match where the board is the entire Minecraft world.

These runs are the result of countless hours of practice, analysis, and community collaboration. New strategies are constantly being discovered and refined, pushing the world record times lower and lower. The dedication of these speedrunners is a testament to the enduring appeal of Minecraft and the competitive spirit of the #speedrunningcommunity.

So, the next time you load up Minecraft, consider the possibilities. Even in its most tranquil state, the game offers some of the most demanding and intellectually stimulating speedrunning challenges out there. It proves that true mastery isn't just about surviving the storm, but about understanding the calm just as deeply.

Frequently Asked Questions

What is the main goal of a Peaceful Mode Minecraft speedrun?

The primary goal in the most popular category (Set Seed Glitchless) is to defeat the Ender Dragon using only intended mechanics and without exploiting glitches, all within the Peaceful difficulty setting.

Why is Peaceful Mode speedrunning considered difficult?

Despite the absence of hostile mobs, it demands an incredibly deep understanding of game mechanics, precise resource management, optimized movement, and perfect execution of strategies like bed-based damage, as there's no combat to rely on.

What does "Set Seed Glitchless" mean in this context?

"Set Seed" means the game world is pre-determined, removing RNG from world generation. "Glitchless" means no unintended game exploits are used, adhering strictly to intended game mechanics.

How do players defeat the Ender Dragon in Peaceful Mode?

Runners typically use the explosion from placing and detonating beds in the End dimension to deal damage to the Ender Dragon. Since health regenerates instantly in Peaceful Mode, this method can be used to defeat the dragon.

Are there any specific exploits commonly used in Peaceful Mode speedruns?

While strictly "glitchless," runners heavily rely on optimized use of intended game mechanics such as bed explosions for breaking blocks in the Nether and damaging the Ender Dragon, efficient villager trading, and advanced #elytra strategies for fast travel.

What are your thoughts on Peaceful Mode speedrunning? Have you tried it yourself? Share your fastest times or your most mind-bending strategies in the comments below! If you’re looking for more in-depth discussions and community insights, join our Discord server!

Wild Rift's Unstoppable Force: Mastering the Broken Lucian Build for Speedrun Dominance

Lucian in Wild Rift showcasing his aggressive playstyle

Alright, summoners, are you ready to absolutely demolish the Rift like it's never been demolished before? We're talking about a level of dominance that'll make your opponents question their life choices. Today, we're diving deep into the electrifying, game-breaking power of the new Lucian build in Wild Rift. This isn't just any build; it's the kind of **Lucian gameplay** that speedrunners dream of, the kind that turns heads and racks up those coveted world records. Get ready to witness pure, unadulterated destruction!

The Lucian Phenomenon: Why He's Back on Top

Lucian, often called "The Purifier," has always been a fan favorite for his insane agility, relentless damage output, and the sheer joy of weaving abilities with auto-attacks. He's the ADC you pick when you want to feel like a hyper-mobile, bullet-slinging machine. With the latest patch hitting Wild Rift, Lucian didn't just get a buff; he got a complete overhaul that's sent shockwaves through the entire community. This new iteration of his kit, combined with a perfectly tuned build, has made him the undisputed king of aggressive ADC play, especially for those chasing those lightning-fast **speedrun** times.

Breaking Down the New Build: Core Components

So, what makes this Lucian build so "broken," you ask? It's all about the perfect storm: the synergy between items, runes, and a masterful understanding of his playstyle. When these elements align, you create a champion that can snowball harder and faster than almost anyone else on the Rift. Let's get into the nitty-gritty of what makes this build an absolute menace.

The Unstoppable Itemization

The foundation of this build is pure, unadulterated power. We're not just building items; we're crafting a weapon of mass destruction. Here's the lineup that will have opponents scrambling:

  • Blade of the Ruined King (BotRK): This is your absolute must-have first item. It's the bedrock of Lucian's sustained damage. BotRK provides a massive boost to your attack speed, crucial lifesteal for survivability, and bonus damage based on the enemy's current health. Its active ability, which slows and damages, is perfect for sticking to targets and amplifying Lucian's natural burst.
  • Rapid Firecannon: Range is king, especially for an ADC. This item significantly extends your poke range, allowing you to safely soften up targets before committing. It also boosts your critical strike chance, synergizing beautifully with Lucian's passive and other crit items. Imagine hitting your autos from an even safer distance – pure bliss!
  • Infinity Edge: The ultimate power spike for any crit-based build. Infinity Edge takes your critical hits from painful to absolutely devastating. This is where your damage output truly explodes, ensuring that every well-placed auto-attack and ability can chunk down even the tankiest of enemies.

Building these core items in sequence allows Lucian to transition from a poking threat to a burst damage monster incredibly quickly, a key factor in shaving seconds off those crucial **world record** attempts.

In my experience, rushing BotRK first is non-negotiable. The sustain and % health damage allow you to take favorable trades early on, which is vital for snowballing.

Runes for Absolute Domination

Items are only half the story. To truly unlock the potential of this broken Lucian build, you need the right runes to complement his aggressive, fast-paced style. These choices amplify his strengths and ensure you can keep the pressure on:

  • Keystone Rune: Conqueror: This is the undisputed king for Lucian. Conqueror rewards sustained combat by stacking adaptive force, making your auto-attacks and abilities hit exponentially harder the longer you fight. It perfectly aligns with Lucian's playstyle of weaving abilities and auto-attacks, turning prolonged fights into victories.
  • Triumph: Essential for surviving those chaotic team fights. Triumph not only grants bonus gold upon takedowns but also a significant health regeneration burst. This is a lifesaver, allowing you to stay in the fight, clean up kills, and continue applying pressure without needing to back off.
  • Legend: Bloodline: Sustain is critical for an ADC, and this rune provides exactly that. Legend: Bloodline grants stacking lifesteal as you accumulate takedowns. This means you heal more with every auto-attack, allowing you to out-sustain opponents in lane and remain offensive during extended skirmishes.

These runes, especially when combined with the item build, create a Lucian that's not only a damage threat but also remarkably resilient, capable of carrying games from start to finish.

Mastering the Playstyle: From Kiting to Combos

Having the right build and runes is fantastic, but Lucian's true power is unlocked through skillful execution. He's a champion that rewards precision and smart decision-making. Here’s how to play him like a true speedrunning pro:

  • Strategic Positioning and Kiting: Lucian excels at dancing around his enemies. Use his passive, Lightslinger, which empowers his next auto-attack after using an ability, to reposition while dealing damage. Kiting effectively with Lucian means constantly moving between auto-attacks and abilities, always staying just out of reach while maximizing your damage uptime. Never stand still!
  • Seamless Combo Execution: The core of Lucian's damage lies in weaving his abilities with his auto-attacks. A fundamental combo often looks like: Auto-Attack -> Piercing Light (Q) -> Auto-Attack -> Ardent Blaze (E) for a dash -> Auto-Attack. Mastering the timing and animation cancels for these weaves is crucial for maximizing your burst damage and is a hallmark of high-level play.
  • Objective Control: As an ADC with high sustained damage, Lucian is invaluable for taking objectives like dragons and turrets. Use your range and damage output to secure these crucial objectives safely and efficiently, which is paramount in any speedrun scenario where every second counts.
The E-Q-AA weave is your bread and butter. Practice it until it becomes second nature. It's the foundation for all your higher-damage combos.

Unleashing Ultimate Carnage

Lucian's ultimate, The Culling, is a spectacle of pure firepower. It fires a barrage of spectral shots in a straight line, dealing massive damage. This ability is incredibly potent for:

  • Securing Kills: If an enemy is trying to escape with low health, The Culling can often finish them off from a surprisingly long range.
  • Team Fight Wipes: Landing a well-aimed ultimate on a clumped-up enemy team can deal catastrophic damage, potentially winning the fight before it even truly begins.
  • Objective Dueling: It can be used to quickly burn down objectives or even secure a last-second dragon steal if timed perfectly.

Remember, The Culling has a relatively long cooldown, so timing its usage is critical. Don't waste it!

The Viral Potential: Why Everyone's Talking About It

It's no surprise that this "broken" Lucian build has taken the Wild Rift community by storm. News of its incredible power spreads like wildfire across forums, Discord servers, social media, and dedicated **#speedrun** communities. When a champion becomes this dominant and fun to play, especially with the potential for record-breaking performances, it naturally becomes the hottest topic. Gamers worldwide are eager to learn, adapt, and try to replicate the success they're seeing. This build isn't just strong; it's a meta-defining phenomenon.

The speed at which Lucian can clear waves and take down objectives with this build is insane. It's perfect for pushing boundaries in speedrunning.

Welcome to GamingSpeedrun! You're currently diving into the electrifying world of the NEW BROKEN LUCIAN BUILD IN WILD RIFT, complete with explosive **Lucian gameplay**. We strive to be the most comprehensive and up-to-date gaming blog on the internet, focusing on everything from the fastest **speedruns** to the most dominant meta builds. Make sure to follow us on social networks and keep an eye on our main page for the latest insights!

If you're into cutting-edge gaming content and want to support the dedication it takes to achieve true hardcore gaming feats, consider checking out our exclusive NFTs. They're a unique way to show your support and grab something special.

Want to connect with fellow gamers, discuss strategies, and get real-time updates? Join our Discord channel! Click here to become part of our growing community.

Frequently Asked Questions

Is this Lucian build viable in regular matches, not just speedruns?

Absolutely! While incredibly potent for speedruns due to its efficiency, this build offers immense power for regular ranked play. Its strong laning phase, burst damage, and sustained threat make it a top-tier pick for winning games.

What are the main counters to this Lucian build?

Champions with strong crowd control (stuns, roots) that can lock Lucian down before he can react, or high-burst assassins who can one-shot him, pose the biggest threats. Additionally, champions with strong defensive capabilities or those who can out-sustain him in the early game can be challenging.

How important is Kiting with Lucian?

Kiting is arguably the most crucial skill for playing Lucian effectively. His identity is built around mobility and weaving auto-attacks with abilities. Without proper kiting, you'll be vulnerable and unable to maximize your damage output, especially against more mobile or tanky opponents.

Can I substitute any of the core items?

While the core items listed (BotRK, Rapid Firecannon, Infinity Edge) provide the optimal synergy, some situational substitutions can be made. For example, if facing heavy magic damage, Hexdrinker might be considered. However, for raw damage and speedrun efficiency, the core build is highly recommended.

ADJUSTED SETT IS NOW OP: A HARD CARRY GUIDE FOR SPEEDRUNNERS

What's up, fellow speed demons and League of Legends enthusiasts! Welcome back to GamingSpeedrun.com, your ultimate destination for all things fast-paced and record-breaking in the gaming world. Today, we're diving deep into a topic that's been setting the Rift ablaze: the unbelievably strong, *adjusted* Sett. If you're looking to become an OP hard carry and dominate your games, you've come to the absolute right place. Forget the meta, forget the nerfs (or buffs!), we're talking about pure, unadulterated power that lets you single-handedly drag your team to victory. This isn't just gameplay; it's a speedrun strategy for climbing the ranks.

Why Is This Sett So Strong Right Now?

The meta shifts constantly in League of Legends, and recent adjustments have catapulted Sett into a tier where he's not just viable, but downright oppressive. His kit, when played optimally, offers incredible sustain, burst damage, and crowd control. The key lies in understanding how his W, "Facebreaker," synergizes with his other abilities and how his passive allows for aggressive trading. In my experience, players often underestimate his sheer damage potential, especially when he hits his power spikes. This guide is designed to exploit that, turning you into the undisputed hard carry your team desperately needs.

The Core Hard Carry Strategy

At its heart, the "hard carry" strategy with Sett revolves around maximizing his teamfight presence and split-pushing potential. You want to reach a point where your damage output is so high that enemies must focus you, drawing aggro and creating opportunities for your team, or you can simply destroy objectives single-handedly. This means prioritizing damage items while maintaining enough survivability to not get instantly blown up. It’s a delicate balance, but when executed, it's incredibly rewarding. We're aiming for a consistent performance, minimizing RNG reliance where possible, though sometimes the universe gives you that sweet, sweet gaming RNG.
Mastering Sett's core loop – landing his Q for mobility and bonus damage, W for the devastating true damage finisher, and E for the crowd control stun – is paramount to becoming an OP carry.

Runes and Summoners: The Foundation

For runes, speedrun enthusiasts and hard carry aspirants often gravitate towards **Conqueror** as the primary keystone. It stacks incredibly well with Sett's sustained damage output, providing crucial AD and healing in extended fights. * **Primary Path (Precision):** * **Conqueror:** Essential for sustained fights. * **Triumph:** Vital for surviving all-ins and turning fights. * **Legend: Alacrity:** Provides attack speed, crucial for stacking Conqueror faster and overall DPS. * **Last Stand:** You deal more damage when you're low – perfect for Sett's W playstyle. * **Secondary Path (Resolve or Domination, depending on matchup):** * **Resolve:** For survivability, consider **Second Wind** against poke lanes or **Bone Plating** for early all-in protection. **Overgrowth** is always a solid pick for scaling health. * **Domination:** If you're feeling aggressive and confident, **Sudden Impact** (for lethality after W grit) and **Relentless Hunter** (for roaming and map presence) can be potent. **Summoner Spells:** * **Flash:** Non-negotiable. For engages, escapes, and repositioning. * **Teleport:** Ideal for split-pushing and joining crucial teamfights across the map, maximizing your impact. Ignite can be considered for kill pressure in lane, but Teleport offers more strategic depth for carrying.

Itemization Path: Building the Monster

This is where the "adjusted Sett is OP" truly shines. The goal is to hit a critical mass of AD, attack speed, and survivability. * **Starting Items:** Doran's Blade and a Health Potion. Simple, effective, and provides early lane sustain and damage. * **Mythic Item:** **Gorenor's Impetus** is often the go-to. The omnivamp and the active ability provide massive burst damage and sustain, perfect for carrying. Other options like **Stridebreaker** (for mobility) or **Divine Sunderer** (against tanky comps) can work situationally, but Gorenor's Impetus usually offers the most consistent hard carry potential. * **Core Build:** 1. **Gorenor's Impetus:** Your Mythic. 2. **Plated Steelcaps / Mercury's Treads:** Defensive boots based on the enemy team composition. 3. **Black Cleaver:** Provides AD, Health, Ability Haste, and the crucial Armor Shred, which synergizes incredibly well with Sett’s true damage. 4. **Death's Dance:** Essential for survivability against mixed damage threats. The damage delay and subsequent healing on takedowns are game-changing. * **Situational/Late Game Items:** * **Sterak's Gage:** If you're getting focused hard and need a massive shield. * **Guardian Angel:** For a second chance in crucial teamfights, especially late game. * **Maw of Malmortius:** Against heavy magic damage threats. * **Titanic Hydra:** If you need more AoE damage and health for split-pushing and wave clear.

Early Game Dominance: Setting the Pace

The early game is all about establishing lane control and looking for opportunities to trade aggressively. Sett excels in short, brutal trades thanks to his passive grit generation and his Q's bonus damage on subsequent hits. * **Trading Stance:** Use your passive's grit to absorb damage, then unleash your Q (Punch Through) followed by a W (Facebreaker). The stun from your E (Haymaker) can set up devastating combos. * **Jungle Synergy:** Communicate with your jungler. Sett is a potent gank setup champion with his E, and he can follow up on invades effectively. A successful early gank can snowball your lane hard. * **Objective Control:** Prioritize Rift Herald if you have lane priority. Sett can take it relatively quickly and the herald pressure can open up the map for your carry potential.
Don't be afraid to go for a Level 2 or 3 all-in if the opportunity presents itself. Sett's early damage is surprisingly high, and catching an opponent off guard can lead to a crucial first blood.

Mid-Game Power Spike: The True Carry Phase

This is where your core items start coming online. With Gorenor's Impetus, Black Cleaver, and possibly Death's Dance, Sett becomes a terrifying force. * **Teamfight Engagement:** Look for opportunities to flank or engage when the enemy team is slightly out of position. A well-placed E can stun multiple enemies, setting up a massive W. Remember to charge your W *before* the fight if possible to maximize your grit. * **Split Pushing:** If your team is playing defensively or needs time to scale, Sett can be a potent split-pusher. His dueling power is immense, and he can often take towers faster than most champions. Use Teleport to join your team if a fight breaks out. * **Objective Control:** Secure Dragons and Barons. Sett’s damage output, especially with Conqueror stacked and his W ready, makes him a significant contributor to taking down these major objectives.

Late Game: Closing Out the Victory

In the late game, Sett's role as a hard carry becomes even more pronounced. You're likely the primary damage threat or the main engage. * **Target Selection:** In teamfights, identify the biggest threats on the enemy team (carries, high-damage mages) and look to isolate them with your E or dive them with your ultimate if it resets your E. * **Wave Management:** Continue to pressure side lanes if appropriate. A fed Sett can often 1v2 or even 1v3 if played correctly, drawing immense pressure away from his team. * **Baron/Elder Dragon:** These are critical. As a primary damage dealer, your contribution is vital. Ensure you have your key cooldowns ready and position yourself to maximize damage and survivability.

Matchup-Specific Tips & Tricks

* **Against Poke/Ranged:** Focus on farm and look for opportunities when they misposition or use key abilities. Build sustain early (Dorans, potentially Second Wind). * **Against Bruisers/Tanks:** This is where Sett truly shines. Abuse your trading stance. Black Cleaver becomes even more important. Try to bait out their key cooldowns before committing your all-in. * **Gank Avoidance:** Be aware of the enemy jungler. If you're pushed up, ward effectively. Sett’s E can sometimes be used defensively to catch an incoming ganker.

Advanced Techniques: Glitches & Skips? (Maybe Not, But Still!)

While Sett isn't known for game-breaking glitches or skips in the traditional speedrunning sense, mastering his animation cancels and optimal ability sequencing is crucial. For instance, cancelling the backswing of your Q with a W or E can gain you precious milliseconds and maximize damage output. Practicing these micro-interactions in the Practice Tool is key to shaving off time in a true speedrun scenario or simply dominating in ranked play. The true "glitch" is how much damage this adjusted Sett can output! This is the kind of core gameplay we love to explore on #gaming and #speedrun.

Frequently Asked Questions

Q1: What is the best build for Sett to hard carry?

A1: The core build typically involves Gorenor's Impetus, Plated Steelcaps/Mercury's Treads, Black Cleaver, and Death's Dance for a strong mix of damage and survivability.

Q2: Is Sett still good in the current League of Legends meta?

A2: Yes, recent adjustments have made him exceptionally strong, particularly for players who can master his aggressive trading patterns and teamfight presence, allowing for OP hard carry gameplay.

Q3: What runes are best for an aggressive Sett playstyle?

A3: Conqueror, Triumph, Legend: Alacrity, and Last Stand are standard. For secondary, picking Sudden Impact and Relentless Hunter from Domination can boost aggressive plays.

Q4: How do I maximize Sett's W (Facebreaker) damage?

A4: Charge your W by taking damage *before* you use it. The more grit you accumulate (represented by the Grit bar below your health), the more true damage your W will deal. Combining it with E for a stun guarantees hits.

Conclusion: Unleash the Beast!

Sett, in his current adjusted state, is an absolute monster capable of carrying any game. By understanding his core strengths, optimizing your rune and item builds, and mastering his aggressive laning and teamfight presence, you can transform yourself into an OP force on the Rift. This isn't just about playing a champion; it's about executing a winning strategy, one perfectly timed ability rotation at a time. So, go forth, practice these strats, and start hard carrying your games. Don't forget to check out our other guides on #worldrecord attempts and #speedrun strategies. Let us know in the comments below how your Sett games are going! Join our Discord to share your best plays and discuss the latest meta shifts.