Final Doom: TNT Evilution Ultra-Violence Speedrun Shattered in 34:36

Hey fellow gamers and speedrunning enthusiasts! If you're anything like me, you live for that adrenaline rush of shaving seconds off your personal best, especially in a classic like Final Doom: TNT Evilution. This absolute gem of a first-person shooter, dropping back in '96, still holds a special place in our hearts and on our hard drives. Speedrunning isn't just about finishing a game; it's an art form, a test of precision, and a deep dive into a game's mechanics. Today, we're dissecting an incredible feat: a sub-35-minute Ultra-Violence run of TNT Evilution, clocking in at a mind-blowing 34 minutes and 36 seconds. Stick around as we break down the strategies, the mindsets, and what it takes to achieve such a monumental run, and more importantly, how you can improve your own times.

Understanding the Final Doom: TNT Evilution - Ultra-Violence Speedrun

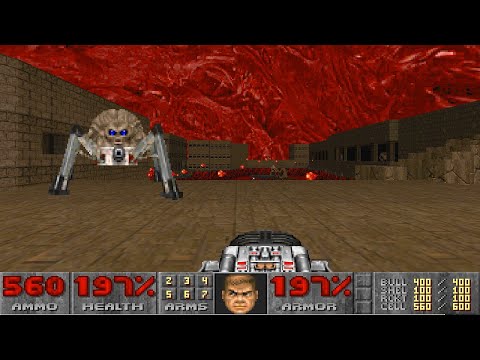
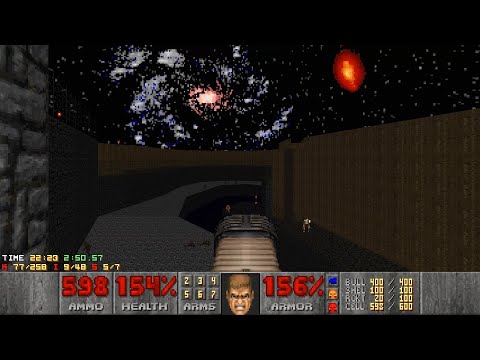
Achieving a 34:36 run on Ultra-Violence difficulty in TNT Evilution is nothing short of legendary. This isn't just about blasting through enemies; it's a meticulously planned assault on all 32 levels, demanding peak performance and flawless execution. The Ultra-Violence setting means enemies hit harder and are more numerous, turning every encounter into a potential run-ender. To shave precious seconds, runners rely on an arsenal of advanced techniques.

The core of any great speedrun lies in efficiency. For this particular run, it means:

  • Aggressively exploiting glitches and discovering hidden shortcuts that bypass entire sections of maps.
  • Mastering rapid weapon switching to maximize damage output and minimize downtime.
  • Developing a deep understanding of each level's geometry and enemy placement to create the most optimal route.

It's a high-stakes dance with the game's engine, pushing its limits to achieve the impossible. This level of mastery is what the speedrun community thrives on.

Mastering Movement: The Foundation of Speed

If you're looking to shave time off your own TNT Evilution runs, the absolute first thing you need to master is the game's movement. Forget just running forward; we're talking about advanced maneuvers that feel almost like a dance.

Key movement techniques to nail include:

  • Strafing: Moving sideways while facing forward is crucial for dodging projectiles and maintaining momentum.
  • Circle Strafing: A more advanced form of strafing, essential for crowd control and keeping enemies in your line of sight while evading.
  • Jump Boosting: While not as pronounced as in some other games, understanding how jumping interacts with speed and certain geometry can sometimes provide small, but vital, advantages.

In my experience, spending hours just practicing movement in empty maps made a world of difference. You need to feel the game's physics in your bones. Smooth, fast movement is the bedrock upon which all other speedrun strategies are built.

Route Planning and Level Knowledge

Simply knowing the controls isn't enough. A successful speedrun hinges on meticulous planning. This means:

  • Memorizing Every Level Layout: You need to know the shortest path from point A to point B without hesitation.
  • Optimizing Enemy Engagement: Sometimes, it's faster to run past enemies than to fight them. Other times, you need to take out specific threats to clear a path or grab a crucial item.
  • Item and Power-up Placement: Knowing where health, armor, ammo, and keycards are located allows for efficient collection without deviation.

The 34:36 run likely involved a route that skipped optional areas, killed only essential enemies, and utilized precise movement to navigate the maps as quickly as possible. Each second saved in one area compounds over the 32 levels.

The Art of Glitches and Exploits

Speedrunning, at its core, is about playing the game *as intended*, but also about discovering and exploiting unintended behaviors. In Final Doom: TNT Evilution, like many id Tech engine games, there are opportunities for clever players to bend the rules.

"Exploiting glitches isn't about cheating; it's about understanding the game's engine so intimately that you can make it do things the developers never imagined."

These might include:

  • Noclipping/Out-of-Bounds: Finding ways to pass through walls or get outside the intended playable area to skip large sections.
  • Bunny Hopping Variations: Maximizing speed through precise timing of jumps and movement.
  • Enemy Manipulation: Tricking enemies into specific behaviors or positions to dispatch them quickly or avoid them entirely.

Mastering these requires patience and a willingness to experiment. Many world record runs rely on one or two key exploits that can save significant time.

Optimizing Weapon Swapping

In the fast-paced chaos of TNT Evilution, the difference between a good run and a great run can be as simple as how quickly you switch weapons. Here’s why it’s critical:

  • Chainsaw vs. Shotgun vs. Chaingun: Knowing which weapon is best for close-range, medium-range, and crowd control is vital. Rapidly switching between them ensures you always have the optimal tool for the job.
  • Rocket Launcher and Plasma Rifle: These heavy hitters are essential for larger enemies and groups, but their slower projectile speed means you need to anticipate their use.
  • Quick Weapon Changes: Advanced players can often chain weapon swaps with movement and firing to maximize DPS and minimize the time spent in less effective weapons.

The 34:36 run undoubtedly showcases incredibly fluid weapon switching, seamlessly transitioning between weapons to obliterate threats with maximum efficiency.

Practice, Practice, Practice!

There's no magic bullet here. Achieving a record-breaking speedrun like this takes thousands of hours of dedicated practice. It involves:

  • Segmented Practice: Breaking the game down into individual levels or sections and perfecting each one before attempting a full run.
  • VOD Review: Watching successful runs (like the one we're discussing!) and your own attempts to identify mistakes and areas for improvement.
  • Staying Updated: The speedrun community is constantly evolving. New strats, glitches, and optimizations are discovered regularly. Keeping up with these developments is key.

The dedication shown by runners to achieve times like 34:36 is truly inspiring and a testament to the enduring appeal of gaming and the competitive spirit of the community.

Frequently Asked Questions

Q1: What is the Ultra-Violence difficulty in Final Doom: TNT Evilution?

Ultra-Violence is the second-highest difficulty level in Final Doom: TNT Evilution. It significantly increases enemy count, aggression, and damage dealt, making it a substantial challenge for players.

Q2: How long is a typical full run of Final Doom: TNT Evilution on Ultra-Violence?

A casual playthrough might take several hours. However, for a speedrun aiming for optimization, times can range from under an hour to the record-breaking 34:36 we're discussing, depending on the category (e.g., any%, glitchless, etc.).

Q3: Are there any major skips or glitches commonly used in TNT Evilution speedruns?

Yes, like many classic FPS games, TNT Evilution has numerous potential skips and glitches. These can range from out-of-bounds exploits to sequence breaks that allow players to bypass entire sections of levels. The specific glitches used can vary depending on the current discovered strats.

Q4: What kind of practice is most effective for improving my TNT Evilution speedrun times?

Practicing individual levels or segments is highly recommended. Focus on mastering movement mechanics, learning optimal enemy engagement, and executing known skips consistently. Watching top runners and analyzing their techniques is also invaluable.

Q5: Where can I find more information or community discussions about Final Doom speedruns?

Websites like Speedrun.com are the central hubs for leaderboards, resources, and forums dedicated to speedrunning specific games, including Final Doom: TNT Evilution. Joining related Discord communities is also a great way to connect with other runners.

Final Doom: TNT Evilution remains a timeless classic, and the dedication poured into its speedrun community is a testament to its lasting legacy. The 34:36 Ultra-Violence run is a masterclass in precision, game knowledge, and sheer willpower. By focusing on mastering movement, planning your routes, understanding the game's mechanics, and yes, practicing relentlessly, you too can climb the leaderboards and achieve your own personal bests.

Here at GamingSpeedrun.com, we're all about pushing the limits and celebrating these incredible achievements. If you're looking to elevate your own gaming setup to match your speedrunning ambitions, check out our curated selection of gaming accessories. Every purchase helps us continue bringing you the deepest dives into the world of speedrunning. What are your personal bests for TNT Evilution? Share your favorite strats or any tips you have in the comments below! Let's keep the conversation going and support each other in our quest for speed!

Final Doom: Plutonia Experiment Nightmare! Speedrun Shatters Records in 34:28

Hey there, fellow Doom enthusiasts and speedrun fanatics! You've landed on GamingSpeedrun.com because you're hungry for that adrenaline rush, that perfect sequence of pixel-perfect movements and strategic monster management that defines the ultimate speedrun. Today, we're diving deep into the fiery depths of Final Doom: The Plutonia Experiment, specifically a jaw-dropping Nightmare! category run by the legendary Zero-Master that clocked in at an unbelievable 34 minutes and 28 seconds. Forget your casual playthroughs; this is high-octane gaming at its absolute finest.

Introduction: The Plutonia Nightmare Unveiled

When you think of speedrunning some of the hardest Doom WADs out there, Final Doom: The Plutonia Experiment on Nightmare! difficulty is often mentioned in hushed, fearful tones. It's a brutal test of skill, patience, and pure gaming grit. So, when Zero-Master dropped a new World Record (WR) of 34:28, it sent ripples through the community. This wasn't just a minor improvement; it was a massive leap forward, proving that even the most daunting challenges can be overcome with dedication and a mastery of the game's mechanics. This run is a masterclass in Doom speedrunning, showcasing incredible route optimization and flawless execution.

Run Details: The Anatomy of a Record

Let's break down the core stats of this incredible feat. This run was published on October 29, 2020, pushing the boundaries of what was thought possible for this notoriously difficult WAD.

  • Runner: Zero-Master
  • Date: 2020-10-29
  • IWAD: Plutonia.wad
  • Category: NM-Speed (Nightmare! Speedrun)
  • Map Progression: D2All (Maps 1-30)
  • Source Port: Crispy Doom v5.9.2
  • Total Time: 34:28

The improvement over the previous record, held by S6kana, was a staggering 3 minutes and 32 seconds. Considering the razor-thin margins in most speedruns, this is monumental. Even more impressively, it was nearly 10 minutes faster than Zero-Master's own previous best run. This speaks volumes about the dedication to route refinement and skill development.

Map-by-Map Breakdown: Strategies and Close Calls

What makes this run so fascinating are the specific strategies employed on each map and the moments where disaster could have struck. Zero-Master provides some insightful commentary on the challenges and triumphs within each level.

Map 01: A Welcoming Warm-up?

The opening map often sets the tone. For Plutonia, even Map 01 can be tricky on Nightmare!. Zero-Master notes a smart strat from S6kana: instead of dealing with a single Mancubus head-on, using the chaingun to "painstate" the second one significantly eases the start. This allows for a quicker exit and conserves precious health and ammo.

Map 04: Navigating the Cacodemon's Lair

Map 04 presents a unique challenge. Zero-Master explains a crucial maneuver: moving backward off the starting platform to avoid agitating a Cacodemon that's positioned in an acid pit. This Cacodemon needs to be dealt with if it teleports out, so avoiding unnecessary engagement here is key. Precision is paramount to hitting the switch without being caught off guard by stray fire.

Map 07: The Arachnotron Enigma

Some levels, like Map 07, offer less defined strats due to enemy unpredictability. Zero-Master admits to not having a solid plan for the Arachnotrons after crossing a gap, highlighting the inherent risk and reliance on adaptation in speedrunning.

Map 10: Arming Up for Survival

Map 10 is particularly dangerous because the armor acquired here is vital for Map 12. The strategy involves clearing out some Chaingunners and executing a quick linedef skip on the Revenant closet. The tension is palpable as the runner hopes to avoid Cacodemon fire while securing essential gear.

The need for that armor in Map 10 makes it a high-stakes gamble. One bad hit and the entire run could be compromised before you even reach the next critical stage.

Map 16: A Near-Disastrous Start

The start of Map 16 was, by Zero-Master's own admission, "a real mess." Uncertainty about the number and position of Shotgunners led to a near-fatal encounter when going for a linedef skip. Surviving that initial onslaught was a testament to quick reflexes and a bit of luck.

Map 18: Calculated Risks and Hitscanner Havoc

Map 18 offered a suboptimal start, with Zero-Master preferring to get a Shotgunner to teleport in first for potential infighting with an Imp. The close call came from an Imp while trying to dodge hitscanner fire. Failing to secure the MegaSphere here would have been fatal. The exit Arch-Vile jump, however, proved relatively straightforward.

Map 20: Baron of Hell's Unfortunate Positioning

In Map 20, the second Baron of Hell's movement out of a corridor took an agonizingly long time. Coupled with their unfavorable positioning, Zero-Master had to rely on sheer health reserves to survive. This map exemplifies how enemy AI and placement can drastically impact a run.

Map 22: The Linedef Skip and Spectre Scares

A different setup for the linedef skip on the red key trap, believed to be by JCD, made things a bit easier. However, the yellow key section poses a significant threat. Getting blocked by Spectres on the lowering bridge is a potential disaster, likely leading to a run-ending death.

Map 23: Navigating the 50/50 and BFG Drops

Map 23 has historically been a struggle, often described as a "50/50" level. Recent routing changes, possibly by S6kana, have significantly improved the approach. Starting by grabbing the blue key first (thanks to health from Map 22) is a major advantage. Dropping onto the platform near the yellow key switch with the BFG and executing a glide after clearing monsters near the red key gap are now key strategies for conserving health.

The routing improvements on Map 23 are a perfect example of how the speedrunning community constantly innovates, turning nightmare maps into manageable challenges through clever optimization and shared knowledge.

Map 24: The Arch-Vile Jump Gambit

Map 24 is relatively simple if the Arch-Vile jump is executed correctly. The main risk? Expecting the Arch-Vile to hit you, only for it to be killed by something else, causing the jump to fail. An alternative involves activating the bridge, but this allows the Arch-Vile to advance, potentially causing problems later.

Map 25: Megasphere Mania

Despite heavy initial damage, the plan for Map 25 was always clear: grab the MegaSphere and clear the room swiftly. The rocket jump required is considered easy, making this a relatively smooth segment if executed correctly.

Map 26: Pain Elemental Peril

Zero-Master expresses surprise at nearly dying to Pain Elementals on Map 26, despite having sufficient health. This serves as a stark reminder that even with a health advantage, the sheer number and threat of enemies on Nightmare! difficulty can be overwhelming.

It's moments like these on Map 26 that truly highlight the pressure of a speedrun. Even with a comfortable health buffer, the relentless assault can create unexpected peril.

Map 30: The Cyberdemon Showdown

The final map, Map 30, often involves strategies to weaken the Cyberdemon before engaging it directly. The idea is to prevent it from having a window to respawn after being damaged from below. This final encounter demands precision and a deep understanding of enemy behavior.

The Legacy of the Run and Future Potential

Zero-Master's run is more than just a time on a screen; it's a testament to the enduring appeal of Doom and the incredible dedication of its speedrunning community. The fact that this run was achieved with Crispy Doom, a modern-source port, shows how far gaming technology and technique have evolved.

When asked about how low the time could go, Zero-Master admits, "No idea." This leaves the door wide open for future attempts and innovations. Could we see this time drop even further? With the Plutonia WAD's notorious difficulty, any further improvement will require near-perfect execution and potentially groundbreaking new strategies. It's exciting to think about what the future holds for this classic map set.

For those interested in cooperative runs, Zero-Master mentions that JCD and S6kana might attempt a co-op playthrough on Nightmare!. You can find their previous Nightmare! record and UV co-op record on S6kana's YouTube channel.

The pursuit of perfection in speedrunning never truly ends. Each record broken simply sets a new benchmark, inspiring the next generation of players to push the limits.

Frequently Asked Questions

Q1: What makes The Plutonia Experiment so difficult on Nightmare! difficulty?
A1: Nightmare! difficulty significantly increases enemy damage, speed, and aggression, while also restricting saves. Plutonia itself features extremely challenging map design, traps, and enemy placements, making it one of the hardest official Doom WADs.

Q2: What is a "linedef skip" in Doom speedrunning?
A2: A linedef skip is a glitch or exploit where a player manipulates game physics or triggers to bypass a section of a map by passing through a specific trigger line (linedef) that wasn't intended to be crossed in that manner.

Q3: Why is the armor in Map 10 so important?
A3: The armor acquired in Map 10 is crucial for surviving the increased damage output from enemies in subsequent maps, particularly Map 12, which is known for its intense combat scenarios. Having that extra protection is vital for maintaining run viability.

Q4: Can this run be replicated on other source ports?
A4: While the core strategies are transferable, specific glitches and exploits like linedef skips can sometimes behave differently or be impossible in different source ports due to variations in engine emulation. Crispy Doom is known for its compatibility and faithfulness to original Doom behavior.

This incredible speedrun by Zero-Master is a milestone for Final Doom: The Plutonia Experiment. It showcases the pinnacle of skill, dedication, and strategic thinking in the gaming world. We encourage you to watch the run, study the strats, and maybe even try to beat your own personal bests! What are your thoughts on this record-breaking run? Did any specific map strategy surprise you? Let us know in the comments below or join the discussion on our GamingSpeedrun Discord server!

``` ```json { "@context": "https://schema.org", "@type": "FAQPage", "mainEntity": [ { "@type": "Question", "name": "What makes The Plutonia Experiment so difficult on Nightmare! difficulty?", "acceptedAnswer": { "@type": "Answer", "text": "Nightmare! difficulty significantly increases enemy damage, speed, and aggression, while also restricting saves. Plutonia itself features extremely challenging map design, traps, and enemy placements, making it one of the hardest official Doom WADs." } }, { "@type": "Question", "name": "What is a \"linedef skip\" in Doom speedrunning?", "acceptedAnswer": { "@type": "Answer", "text": "A linedef skip is a glitch or exploit where a player manipulates game physics or triggers to bypass a section of a map by passing through a specific trigger line (linedef) that wasn't intended to be crossed in that manner." } }, { "@type": "Question", "name": "Why is the armor in Map 10 so important?", "acceptedAnswer": { "@type": "Answer", "text": "The armor acquired in Map 10 is crucial for surviving the increased damage output from enemies in subsequent maps, particularly Map 12, which is known for its intense combat scenarios. Having that extra protection is vital for maintaining run viability." } }, { "@type": "Question", "name": "Can this run be replicated on other source ports?", "acceptedAnswer": { "@type": "Answer", "text": "While the core strategies are transferable, specific glitches and exploits like linedef skips can sometimes behave differently or be impossible in different source ports due to variations in engine emulation. Crispy Doom is known for its compatibility and faithfulness to original Doom behavior." } } ] }