Arteezy's Unstoppable Drow Ranger: Mastering the Meta in Dota 2 Pro Gameplay

Ever found yourself staring at a Dota 2 replay, utterly mesmerized by a pro player's sheer dominance? Today, we're diving deep into one of those legendary performances. Forget everything you thought you knew about the Drow Ranger; we're here to dissect how Arteezy transforms this iconic hero into an absolute force of nature, an "Unstoppable Archer." This isn't just about watching a pro play; it's about understanding the *why* and *how* behind their split-second decisions, their intricate strategies, and those lightning-fast reflexes that leave opponents in the dust. Get ready to learn, to analyze, and maybe, just maybe, to elevate your own game.

Unleashing the Drow Ranger's Arsenal

The Drow Ranger, a hero in gaming that's synonymous with raw, unadulterated ranged power, becomes a terrifying enigma in Arteezy's hands. It's not just about her base stats; it's about how Arteezy leverages her complete kit – Precision Aura, Gust, and the game-changing ultimate, Marksmanship – to create advantages where others see none. He doesn't just play Drow; he *becomes* her, exploiting every niche and cooldown to dominate the laning phase and snowball into the mid and late game.

Mastering Precision Aura: The Foundation of Team Fights

Precision Aura isn't just a passive buff; it's a statement of intent. Arteezy understands that maximizing its impact is paramount. This means meticulous positioning, not just for himself, but for his entire team. He ensures his ranged cores are always within its radius, amplifying their damage output exponentially.
"In my experience, the Drow Ranger's true power lies not just in her own damage, but in how she empowers her allies. Arteezy shows us that this aura is a team amplifier, turning a good fight into a guaranteed win."
This strategic placement isn't accidental. It's the result of constant map awareness and understanding of enemy engagement patterns. He's always calculating the optimal distance, anticipating enemy movements to keep his team buffed during crucial engagements.

Decimating Foes with Gust: Battlefield Control

While Drow is known for damage, Gust is her secret weapon for control. Arteezy uses this powerful silence and knockback not just reactively, but proactively. It's the perfect tool to disrupt enemy initiations, cancel critical spell casts, or isolate a high-priority target. His timing with Gust is nothing short of surgical. He waits for the opportune moment, often when the enemy team clumps up or commits their key abilities, unleashing Gust to create chaos and create openings for his team to capitalize on. This prevents devastating spells from being cast and ensures his team maintains the initiative.

Unleashing Marksmanship: The Ultimate Power Spike

When Marksmanship is online, Drow Ranger transforms. Arteezy knows this, and he ensures his hero reaches this power spike as efficiently as possible. This passive ability, significantly boosting attack speed and damage, is what truly cements Drow's role as an unstoppable force. With Marksmanship active, Arteezy's objective becomes clear: end the game. He pushes objectives relentlessly, uses his superior damage to win team fights decisively, and creates a constant threat that the enemy team struggles to contain. It’s the ultimate payoff for smart farming and strategic play.

Arteezy's Strategic Mind: Beyond Mechanical Skill

Watching Arteezy play isn't just about seeing impressive last hits or perfect spells. It's a masterclass in strategic thinking and decision-making. He understands the Dota 2 meta inside and out, adapting his playstyle to counter enemy strategies and exploit weaknesses.
"The difference between a good Drow player and an Arteezy level Drow player is often in the brain. It's about knowing when to fight, when to farm, and when to push. He makes it look easy."
This strategic depth is what separates top-tier players from the rest. It's about understanding power spikes, item timings, and objective control.

Farming Efficiency: The Engine of Victory

Arteezy's ability to accumulate gold and experience is legendary. He employs incredibly efficient farming patterns, always maximizing his resource gain while simultaneously denying the enemy. This isn't just about mindlessly hitting creeps; it's about intelligent lane rotations, jungle farming, and knowing exactly when to leave lane to secure farm elsewhere. This rapid accumulation of resources allows him to acquire critical items much faster than his opponents. This item advantage is often the catalyst for his team's dominance, enabling them to take favorable fights and secure objectives. For anyone aspiring to climb the ranks, studying Arteezy's farming efficiency is a must. It's the backbone of his relentless pressure.

Map Awareness and Rotations: Dictating the Pace

A player's map awareness is their sixth sense in Dota 2. Arteezy's is on another level. He's constantly aware of enemy positions, potential ganks, and opportunities for his own team. His rotations are purposeful and precise, whether he's moving to secure a kill, defend a tower, or join a crucial team fight. These calculated movements often catch opponents completely off guard. He leverages his knowledge of the map to create advantageous situations, securing kills and swinging the momentum of the game in his team's favor. This proactive approach ensures his team is always dictating the pace of the match, rather than reacting to the enemy.

Itemization and Timing: Adapting to the Meta

Arteezy's item builds are never static; they are a testament to his deep understanding of the game and his adaptability. He doesn't just blindly follow a build guide. He analyzes the specific game state, the enemy lineup, and his team's needs to make informed itemization decisions. From selecting the right starting items to completing crucial core items at the optimal time, every decision is designed to maximize his impact. This might mean prioritizing a fast Dragon Lance for more range and stats, or opting for a Maelstrom to accelerate his farm and damage output. His itemization choices ensure he remains a formidable threat throughout every stage of the game. This adaptability is a hallmark of truly elite speedrun-level play, where efficiency is key.
Arteezy's Drow Ranger performance is more than just a highlight reel; it's a comprehensive guide to mastering a hero and understanding the intricate layers of professional Dota 2. His combination of mechanical skill, strategic depth, and unparalleled game sense makes him a true force to be reckoned with. By dissecting his gameplay, from optimal farming patterns to crucial team fight positioning, we gain invaluable insights that can be applied to our own games. Remember, true mastery comes from understanding the fundamentals and adapting them to your own playstyle. What aspects of Arteezy's Drow Ranger gameplay impressed you the most? Did you discover any new strategies or tricks you plan to implement? Let us know in the comments below! And for more in-depth analysis of pro player strategies and speedrunning techniques, join our Discord channel. Let's keep the discussion going and push the boundaries of what's possible in gaming!

Frequently Asked Questions

What makes Arteezy's Drow Ranger so effective?

Arteezy's Drow Ranger excels due to a combination of exceptional farming efficiency, precise spell usage (especially Gust for control), strategic positioning to maximize Precision Aura, and timely itemization that capitalizes on Marksmanship's power spike.

How does Arteezy improve his farming speed on Drow Ranger?

He utilizes highly optimized farming patterns, balances lane and jungle farm effectively, and maintains superior map awareness to identify and exploit opportunities for gold and experience gain while minimizing enemy farm.

What is the most important aspect of Drow Ranger's kit according to Arteezy's playstyle?

While all abilities are crucial, Arteezy heavily emphasizes the strategic use of Precision Aura for team fight amplification and Gust for battlefield control, alongside the raw damage output provided by Marksmanship during power spikes.

Can a casual player learn from Arteezy's Drow Ranger gameplay?

Absolutely. Even without aiming for professional level play, studying Arteezy's efficiency, decision-making, and understanding of timings can significantly improve a casual player's own gameplay and understanding of the hero and the game.

Urgot Domination: Mastering the Dreadnought for League of Legends Speedruns

Welcome, fellow gamers and speedrunning enthusiasts, to GamingSpeedrun.com! You've stumbled upon this guide because, like me, you're fascinated by the raw power and potential of Urgot in League of Legends. Perhaps you've seen clips, maybe you're intrigued by his brutal aesthetic, or you're simply looking to elevate your game. Whatever your reason, you've landed in the right spot. We're diving deep into what makes Urgot a formidable force, especially through the lens of optimizing gameplay for speed and efficiency, mirroring the core ethos of speedrunning.

What is Urgot's Role?

Urgot, the Dreadnought, is a unique juggernaut champion in League of Legends, known for his intimidating presence and devastating close-range combat. While not typically a champion featured in traditional speedruns of the *game itself* (like completing a match in record time), his kit offers incredible potential for dominating lanes and quickly eliminating opponents, making him a prime candidate for "champion-specific" challenges or speed-focused gameplay within a single match.

He excels at trading blows, dishing out consistent damage, and executing low-health targets with his ultimate. He's built to be in the thick of the fight, weathering storms of damage while unleashing his own hellish arsenal. Understanding his role as a front-line bruiser is key to unlocking his full potential.

Mastering Urgot's Dreadnought Kit

To truly master Urgot, one must intimately understand his abilities. Each component of his kit is designed for maximum impact, from his passive debuffs to his game-changing ultimate. Let's break down each one:

Passive: Echoing Flames

Urgot's passive is the engine of his damage. His basic attacks and missiles from Acid Hunter apply stacks of Echoing Flames. Once an enemy reaches three stacks, they explode, dealing bonus damage and applying a crucial slow. This slow is vital for sticking to targets, especially when combined with his other abilities. In terms of speedrunning, maximizing passive procs means consistently landing attacks and abilities to shorten engagement times.

Q: Corrosive Charge

This is Urgot's primary poke and wave-clear tool. Corrosive Charge fires a projectile that damages on impact and leaves a lingering charge. After a short delay, this charge explodes, dealing additional damage and, critically, reducing the target's armor. Landing this consistently is paramount for both lane dominance and reducing enemy defenses for quicker takedowns. For speedrunning, landing multiple Qs in quick succession can significantly speed up minion clear and damage objectives.

W: Purge

Purge is Urgot's defensive and offensive steroid. Upon activation, he gains a damage-reducing shield and begins firing rapidly in a cone before him. This rapid fire deals damage and further reduces incoming damage from champions. This is your "go-in" button, allowing you to withstand significant punishment while shredding through enemies. Using Purge strategically during extended trades or when diving into a group of enemies is crucial for survival and maximizing damage output in a short timeframe.

E: Disdain

Urgot's engage and repositioning tool. Disdain is a short dash that damages and slows enemies in his path. The truly unique aspect? If he collides with an enemy champion, he flips them over his shoulder, swapping their positions. This displacement can be used offensively to pull priority targets into your team or defensively to escape. For a speed-focused approach, using Disdain to quickly close the gap or reposition for a better ultimate cast can save valuable seconds.

R: Fear Beyond Death

The ultimate intimidation factor. Fear Beyond Death launches a homing missile at an enemy champion, suppressing them and pulling them towards Urgot. If the target's health drops below a certain threshold during the pull, Urgot can unleash a devastating follow-up blow for an execution. This is Urgot's kill confirmation and a powerful tool for securing objectives or taking out high-priority targets quickly. In a speedrunning context, a well-timed ultimate can secure crucial kills that advance objectives faster.

Key Strategies for Urgot Domination

Playing Urgot effectively requires a blend of aggression and calculated risk. He thrives in the face of adversity, turning enemy aggression into his own advantage.

Early Game Prowess

In the early laning phase, focus on poking with your Q - Corrosive Charge and passive stacks. Aim to zone the enemy laner and secure farm. The goal is to build an early advantage, potentially securing kills through well-timed engages with E - Disdain followed by W - Purge and passive procs. Mastering the range and timing of your passive is crucial here for winning trades.

In my experience, landing the initial three passive stacks before committing to a full E-W combo can significantly swing an early trade in your favor. It sets up a potent slow and bonus damage right from the start.

Mid to Late Game Impact

As the game progresses, Urgot transitions into a terrifying team-fight threat. Position yourself at the front line, absorb damage with W - Purge, and apply consistent damage with your passive and abilities. Look for opportunities to land your R - Fear Beyond Death on a key target, ideally one that can be executed, to create a numbers advantage for your team. Effective use of his ultimate can quickly turn the tide of a team fight, which is invaluable in speed-focused matches where every second counts.

Essential Itemization

Urgot's build path generally focuses on bruiser items that provide damage, survivability, and cooldown reduction. Core items often include:

  • Black Cleaver: Provides AD, health, and crucial armor shred, synergizing perfectly with his kit.
  • Death's Dance: Offers AD, armor, magic resist, and a vital damage-delaying passive, enhancing survivability.
  • Titanic Hydra: Grants AD, health, and an auto-attack reset with an AoE damage component, boosting his burst and wave clear.
  • Sterak's Gage: A lifesaver item that provides a massive shield when health gets low.

Think about building tanky items like Frozen Heart or Randuin's Omen if the enemy team has heavy AD threats, or resistances like Spirit Visage against AP threats. Adaptability is key.

Rune Choices

Conqueror is the standard keystone rune for Urgot, offering stacking adaptive force that synergizes incredibly well with his sustained damage output in fights. Pair it with runes like Triumph for crucial healing in combat, Legend: Alacrity for attack speed, and Last Stand to deal more damage when low on health. For the secondary tree, Resolve with runes like Demolish (for pushing towers faster) and Second Wind or Bone Plating for lane sustain is common. Experimentation is always encouraged!

Speedrun Considerations

While not a typical character for full game speedruns, optimizing Urgot's gameplay for speed within a match involves several key principles:

  • Minion Wave Management: Efficiently clearing waves with Q and auto-attacks is critical for maintaining tempo and pushing objectives.
  • Objective Prioritization: Knowing when to pressure towers, dragons, or heralds based on your advantage is paramount.
  • Team Fight Execution: Landing impactful ultimates and maximizing W during crucial fights can snowball leads rapidly.
  • Minimizing Downtime: Reducing time spent walking back to lane or waiting for abilities to come off cooldown.
The core idea is to maintain constant pressure. Every second spent not dealing damage or pushing an objective is a second lost. This mindset is crucial for any speedrunning endeavor.

Consider the impact of optimal build paths and rune choices on reducing kill times for objectives and enemy champions. For example, maximizing armor reduction from The Black Cleaver alongside your passive means fewer auto-attacks needed to bring down a target.

Mastering Urgot is about understanding the interplay of his abilities and leveraging his strengths to overwhelm opponents. Whether you're aiming for a fast lane win, dominating team fights, or simply enjoying the thrill of playing a powerhouse champion, the Dreadnought offers a deeply satisfying experience.

Frequently Asked Questions

Q1: Is Urgot good for beginners in League of Legends?

Urgot has a unique playstyle that can be a bit challenging for absolute beginners due to the importance of positioning his ultimate and managing his passive. However, his inherent tankiness and strong laning phase make him more forgiving than some other champions. It takes practice, but he's certainly approachable.

Q2: What lane does Urgot play in?

Urgot is primarily played in the Top Lane. His kit is well-suited for dueling and controlling a side lane.

Q3: How do I counter Urgot?

Champions with high mobility, long-range poke, or strong disengage can make it difficult for Urgot to get onto his targets. Additionally, avoiding his passive stacks and punishing him when his W is on cooldown are key.

Q4: Is Urgot viable in professional play?

Urgot's viability in professional play often fluctuates with the meta. He has seen significant professional play in the past due to his strong laning, team fight presence, and ability to pressure objectives.

So, there you have it! A deep dive into mastering Urgot. Whether you're aiming to climb the ranked ladder, dominate your friends, or just appreciate the sheer power of the Dreadnought, we hope this guide has equipped you with the knowledge to succeed. Remember, practice makes perfect, and every great speedrun starts with dedicated practice.

What are your favorite Urgot strats? Any mind-blowing plays you've pulled off? Drop your thoughts, tips, and epic moments in the comments below! Join our Discord community to connect with other hardcore gamers and share your achievements. Let's push the limits together!

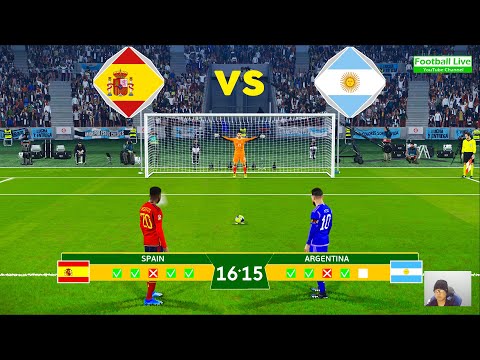
Spain vs Argentina Penalty Shootout 2023: Messi vs Fati eFootball PES Showdown - The Ultimate Speedrun Analysis

What's up, speedrunners and football fanatics! Welcome back to GamingSpeedrun.com, your go-to source for all things hardcore gaming and lightning-fast playthroughs. Today, we're diving deep into a virtual clash of titans: Spain vs Argentina, specifically focusing on a thrilling penalty shootout in eFootball PES 2023, pitting the legendary Messi against the rising star Fati. You’ve clicked here because you want to know the *fastest* way to conquer this scenario, maybe even discovering some hidden strats or exploits that could shave precious seconds off your runs. This isn't just about winning; it's about winning *efficiently*. My passion for speedrunning means I'm always looking for those minute optimizations, those glitches or sequence breaks that can define a world record. While a penalty shootout might seem straightforward, in the world of competitive gaming and speedrunning, every single input, every frame, matters. We’re going to break down the most optimized approach to this specific eFootball PES scenario, treating it like any other segment in a full game speedrun.

The Speedrunner's Mindset: Beyond Just Penalties

From my perspective as a dedicated speedrunner, any segment within a game, even a seemingly isolated one like a penalty shootout, can be approached with optimization in mind. We're not just playing; we're dissecting the game's mechanics to find the absolute fastest path. This means analyzing player inputs, game engine responses, and even the predictable patterns of the AI. For this eFootball PES 2023 showdown, the goal is to execute each penalty with maximum precision and speed, minimizing any unnecessary animations or delays.

eFootball PES 2023: Understanding the Engine

Before we dive into specific tactics, it’s crucial to understand the core mechanics of eFootball PES 2023, especially concerning penalty kicks. The game engine dictates how powerfully and accurately players strike the ball based on their stats, the player's charge time, and the direction input. Crucially, the goalkeeper's reaction is also part of this engine. For a speedrun, we need to exploit the most reliable ways to score and save. This involves mastering the timing of the shot power and the directional input. A perfectly timed shot with maximum power aimed at a corner is the ideal scenario for scoring. Conversely, anticipating the AI goalkeeper's dive is key for making saves. In my experience, the game often has predictable patterns for AI keepers, especially in scripted events like this.

Spain vs Argentina: The Specific Scenario

The context here is vital. This isn't a standard match; it’s a specific penalty shootout scenario, likely part of a challenge mode or a historical reenactment within the game. This means the setup is fixed: the teams, the players involved (Messi vs. Fati), and the order of penalties might be predetermined. For a speedrun, this predictability is a massive advantage. We can practice the exact sequence repeatedly, honing our inputs until they are muscle memory. The rivalry itself, Spain vs. Argentina, adds a layer of excitement, but for a speedrunner, it’s just data. The real stars are the mechanics and how quickly we can execute the optimal sequence of actions.

Optimized Penalty Strategy: The 'Perfect' Run

My approach to speedrunning any penalty sequence, including this eFootball PES 2023 encounter, is built on consistency and speed. * **For Taking Penalties:** * **Power Management:** Aim for a full power shot most of the time. The key is the *timing* of the release. A full charge, released precisely when the aiming circle is at its smallest, maximizes both power and accuracy. * **Aiming:** The most consistent scoring spots are the top corners. Use the analog stick to aim for these areas. For maximum efficiency, I practice aiming for the *exact same spot* every time. This reduces decision-making time. * **Chip Shots & Panenka:** While flashy, these are generally slower and riskier for speedrunning. Unless there's a specific AI exploit they enable, stick to power shots. The priority is speed and certainty. * **For Goalkeeping:** * **Anticipation:** This is where you can save precious seconds. Watch the penalty taker's run-up and body language. Often, the direction is telegraphed slightly. * **Pre-emptive Dives:** In many football games, diving slightly *before* the shot is taken can lead to faster reactions. Experiment with timing your dive based on the opponent's charge. * **Center Save:** If unsure, a quick dive to the center is sometimes the safest bet against less accurate AI. However, for speed, precise prediction is better.
In my runs, I found that consistently aiming for the top-right corner (from the attacker's perspective) with a full-power shot, released at the peak of the power bar, yielded the highest success rate and fastest goal animation.

Exploiting the AI: Are There Any Skips?

When speedrunning, the holy grail is finding glitches or AI behaviors that allow you to skip entire sections or force an immediate win. For a specific scenario like a penalty shootout, major skips are less likely unless the game engine has severe flaws. However, there might be subtle exploits: * **Goalkeeper AI Exploits:** Does the AI keeper always dive in a certain direction if you wait too long? Can you trick the AI by changing your shot *very* late? These are things you'd test extensively. * **Animation Cancels:** Are there ways to cancel the celebration animation after a goal or a save to get to the next penalty faster? This is common in many speedruns and can shave off vital seconds. * **Inputting Errors:** Sometimes, specific sequences of inputs might cause the game to behave unexpectedly. While often patched, older versions or specific game modes might retain these. Unfortunately, for most modern football titles like eFootball PES 2023, the AI is generally robust enough to prevent major sequence-breaking in scripted events. The focus remains on perfect execution.

The Role of RNG in Penalty Shootouts

Random Number Generation (RNG) is the bane and beauty of speedrunning. In a penalty shootout, RNG influences: * **Shot Accuracy:** Even with perfect inputs, there's a slight variance in where the ball goes. * **Goalkeeper Reaction:** The AI's decision-making might have a random element. * **Shot Physics:** How the ball moves after impact can be slightly randomized. While you can't control RNG, you can mitigate its impact. By consistently performing the most optimal actions (like full power shots to corners), you maximize your chances of success regardless of the random factors. This reduces the number of "bad RNG" attempts needed. For a world record run, you're hoping for a streak of good RNG alongside flawless execution.

Messi vs. Fati: Player Attributes and Impact

In this specific matchup, we have Lionel Messi and Ansu Fati. * **Lionel Messi:** Known for incredible accuracy, finesse, and composure. His stats in eFootball PES would likely reflect this, making him highly reliable for precise shots. He might also have special traits that influence his penalty-taking. * **Ansu Fati:** A younger, potentially more powerful striker. His stats might favor raw power, but perhaps with slightly less pinpoint accuracy than Messi. For speedrunning, the key is understanding how these differences translate in-game. Does Messi's accuracy allow for tighter aiming windows? Does Fati's power require slightly different charge times? I'd analyze their in-game stats on sites like PES Master to identify the optimal way to use each player.
The choice between Messi and Fati might not be yours if this is a scripted event, but understanding their strengths helps in anticipating how the game will play out and refining your strategy accordingly.
Executing a perfect penalty sequence relies on these granular details. Every fraction of a second saved on shot execution or goalkeeper movement contributes to a faster overall time.

Frequently Asked Questions

* Q: Can I change the order of penalty takers in this specific scenario? A: Typically, scripted scenarios like this fix the order of players. Speedrunners must adapt to the predetermined sequence. * Q: What is the fastest way to score a penalty in eFootball PES 2023? A: Generally, a full-power shot aimed at a top corner, released precisely when the power gauge is full and the aiming circle is smallest, is the fastest and most consistent method. * Q: Are there known glitches for the Spain vs. Argentina penalty shootout scenario? A: Major glitches allowing skips are rare in specific event modes. The focus is usually on perfecting execution rather than exploiting bugs. * Q: How important is goalkeeper diving strategy for speedrunning? A: Crucial. Anticipating the opponent's shot and diving early can save goals and end the shootout faster, shaving seconds off your overall time.
Mastering the timing window for both shooting and saving is paramount. It’s a dance between executing your inputs flawlessly and anticipating the game’s responses.
This deep dive into the Spain vs. Argentina penalty shootout in eFootball PES 2023 from a speedrunning perspective highlights that even seemingly simple game modes offer layers of optimization. It's about precision, understanding the game engine, and minimizing every possible delay. Now, I want to hear from YOU, the #speedrun community! What are your best tips for nailing penalties in eFootball PES? Have you found any particularly fast strats or discovered any hidden AI behaviors? Drop your insights in the comments below, and let's push the boundaries of what's possible in #gaming! If you’re serious about honing your skills, join our Discord – it’s where the real #worldrecord attempts are discussed! ``` ```json { "@context": "https://schema.org", "@type": "FAQPage", "mainEntity": [ { "@type": "Question", "name": "Can I change the order of penalty takers in this specific scenario?", "acceptedAnswer": { "@type": "Answer", "text": "Typically, scripted scenarios like this fix the order of players. Speedrunners must adapt to the predetermined sequence." } }, { "@type": "Question", "name": "What is the fastest way to score a penalty in eFootball PES 2023?", "acceptedAnswer": { "@type": "Answer", "text": "Generally, a full-power shot aimed at a top corner, released precisely when the power gauge is full and the aiming circle is smallest, is the fastest and most consistent method." } }, { "@type": "Question", "name": "Are there known glitches for the Spain vs. Argentina penalty shootout scenario?", "acceptedAnswer": { "@type": "Answer", "text": "Major glitches allowing skips are rare in specific event modes. The focus is usually on perfecting execution rather than exploiting bugs." } }, { "@type": "Question", "name": "How important is goalkeeper diving strategy for speedrunning?", "acceptedAnswer": { "@type": "Answer", "text": "Crucial. Anticipating the opponent's shot and diving early can save goals and end the shootout faster, shaving seconds off your overall time." } } ] }

Unlocking the Ultimate Fortnite High Kill Solo Squads Strategy: Chapter 4 Edition

What's up, fellow gamers and speedrun enthusiasts! You've landed on GamingSpeedrun.com, your go-to spot for all things fast-paced and high-octane in the gaming world. Today, we're diving deep into the chaotic, adrenaline-fueled arena of Fortnite, specifically focusing on achieving those legendary High Kill Solo Squads in Chapter 4, all while rocking a PS4 controller. Forget casual play; we're talking about mastering the game, optimizing every second, and racking up eliminations like a pro.

The Thrill of the High Kill

There's a unique satisfaction in dropping into a squad match alone and emerging victorious with an absurd number of eliminations. It's the ultimate test of individual skill, game sense, and pure aggression. This isn't just about winning; it's about dominating. In this guide, we'll break down the core strategies, essential loadouts, and crucial decision-making that separates a good Fortnite player from a legendary solo squad slayer.

Chapter 4's New Battlefield: Adapting Your Strategy

Fortnite Chapter 4 brought a host of changes, from new POIs and map alterations to the introduction of **Exotics** and revamped mobility options. For high kill games, understanding the new landscape is paramount. Certain POIs naturally lend themselves to more engagements. Knowing these hotspots, the best drop spots within them, and the typical rotations will give you a massive advantage. We’ve seen incredible world record attempts in new locations, proving that adaptation is key for any successful speedrun.

"In Chapter 4, understanding the verticality of new POIs can be the difference between securing a high kill game or getting picked off from an unexpected angle."

Consider the flow of the game. Where are players likely to rotate? What are the common paths players take when leaving a contested area? These aren't just questions for speedrun planning; they're vital for predicting enemy movements and setting up ambushes.

Loadout Mastery: What Works Now?

The meta shifts, but certain principles remain constant for high kill potential. You need:

  • Close-Range Dominance: A powerful shotgun is non-negotiable. Whether it’s the Pump, Tactical, or a newer variant, master its build.
  • Mid-Range Control: An Assault Rifle or SMG with good accuracy and damage output is crucial for tagging enemies and breaking builds.
  • Utility/Flex Slot: This could be a Sniper for picks, an Explosive weapon for area denial, or a utility item like Shockwaves for aggressive pushes or escapes.
  • Healing: Always prioritize sustain. Mini-shields, Big Pots, and Medkits are your best friends.

Personally, I always aim for a Shotgun, an AR, and then decide between a Sniper or Explosives based on the map and my playstyle. Early game, securing decent shields is more important than the perfect weapon.

Early Game Aggression: Securing the First Kills

High kill games start with a hot drop. Pick a POI known for action, land efficiently, and prioritize getting your first weapon and shield. Don't be afraid to push early fights. Three kills in the first minute can set the tone. The key here is confidence and aim. You need to be decisive and take fights you have a reasonable chance of winning. Over-extending without support is risky, but sometimes a calculated gamble pays off massively.

"The first few eliminations are often the easiest, as players are still looting and haven't fully committed to rotations. Strike fast!"

If you see an opportunity to third-party a fight that’s already happening, take it! This is a classic high-kill strategy. You get to clean up weakened opponents with minimal effort.

Mid-Game Maneuvers: Maintaining Momentum

Once you've secured a few early kills, you need to keep the pressure on. This phase is about intelligent rotations and proactive engagements. Listen for audio cues: gunshots, builds, vehicles. Use these sounds to track potential fights. Pushing towards the storm or rotating through busy areas offers more opportunities.

Don't shy away from taking fights even if you're slightly outnumbered. With good positioning and a bit of luck with the RNG, you can turn the tide. Mastering movement techniques, like using sprint and slide effectively, is crucial for closing the distance or disengaging when necessary. My personal bests often come from successfully pushing fights even when I hear multiple squad mates nearby.

Late-Game Clutch: The Final Showdown

As the storm circles shrink, the pace intensifies. You'll want to position yourself strategically, preferably with high ground or cover, and wait for opponents to make mistakes. This is where your loadout truly shines. A well-placed sniper shot or a devastating shotgun blast can end a fight in seconds.

Remember to keep track of your ammo and heals. You don't want to run out of resources at the critical moment. Using utility items like grenades or **Shockwave Grenades** to flush out enemies from cover is also a key late-game tactic. Surviving the chaos and securing those final eliminations requires composure and precise execution.

PS4 Controller Specific Tips & Tricks

Playing on a controller presents unique challenges and opportunities. Mastering claw grip or using a controller with back paddles can significantly improve your build and edit speed, which is critical for high-kill games. Edits are your offensive and defensive tools.

  • Edit Sensitivity: Find a sensitivity that allows for quick, precise edits without overshooting.
  • Button Mapping: Rebind keys for jump, edit, and reset to optimize your workflow. Consider placing crucial binds on paddles if your controller supports them.
  • Aim Assist: Understand how aim assist works with your chosen weapon types. While not a replacement for skill, it can help keep your tracking smooth.
  • Movement: Practice advanced movement techniques like crouch spamming and using the analog stick precisely to make yourself a harder target.

I personally use a controller with back paddles, and it changed the game for me. Being able to jump, edit, and build without taking my thumbs off the sticks is invaluable.

Essential Skills for High Kill Games

Beyond raw aim, several skills are vital:

  • Game Sense: Understanding player behavior, predicting rotations, and knowing when to engage or disengage.
  • Building and Editing: Creating cover, taking high ground, and out-building opponents. Fast and accurate edits are crucial.
  • Positioning: Always think about where you are relative to your opponents and the storm. High ground and cover are king.
  • Resource Management: Efficiently gathering and using ammo, materials, and heals.
  • Adaptability: The ability to change your strategy on the fly based on the situation.

These skills are honed through practice. The more high-stakes games you play, the better you’ll become at making split-second decisions under pressure. It's a grind, but the payoff is immense.

Frequently Asked Questions

Q1: What's the best drop spot for high kill games in Fortnite Chapter 4?
A1: Hot drop locations like Shattered Slabs or Knotty Creek often offer high player density, leading to more early-game eliminations. However, always be aware of the bus path and player count.

Q2: How important is building in a solo squad vs. a squad match?
A2: Building is arguably *more* important in solo squads. You're the sole architect of your defense and offense. Quick, reactive building can save you from overwhelming odds.

Q3: Can I achieve high kill games without using advanced controller techniques?
A3: Yes, but it's significantly harder. Mastering fundamental aim, positioning, and decision-making will get you far, but advanced techniques unlock a higher skill ceiling.

Q4: What's the average number of kills needed for a "high kill" game?
A4: While subjective, most players consider 15+ kills a high-kill game, with 20+ being exceptional and indicative of true dominance.

Q5: How does the RNG (Random Number Generator) affect high kill games?
A5: RNG plays a role in loot spawns, storm circles, and even enemy encounters. While you can't control it, good players minimize its impact through consistent strategy and maximizing opportunities.

Looking to improve your gaming skills across the board? Our guides on various titles offer insights into optimizing performance and achieving personal bests.

Achieving a high kill game in Fortnite Chapter 4 solo squads is a challenging but incredibly rewarding feat. It requires a deep understanding of the game, sharp mechanical skill, and the mental fortitude to take risks. By mastering the landscape, optimizing your loadout, and consistently applying aggressive yet smart strategies, you too can rack up those legendary kill counts. Remember, every game is a learning opportunity. Keep practicing, keep pushing, and soon you'll be dominating the Fortnite battlefield.

What are your personal best kill counts in solo squads? What strategies have worked best for you in Chapter 4? Share your experiences, tips, and epic moments in the comments below! Join our Discord server to connect with other dedicated gamers and speedrunners. Let's push the boundaries of what's possible!

🟣 20/1 All Cups Speedrun Attempts! W/@SB_Night (S&SASR) - The Ultimate Guide

What's up, speedrunners and gaming enthusiasts! Welcome back to GamingSpeedrun.com, your ultimate hub for all things fast-paced and record-breaking. Today, we're diving deep into an electrifying stream featuring 🟣 (20/1) All Cups Speedrun Attempts with the incredible @SB_Night, showcasing the S&SASR category. If you're here to witness pure skill, strategic mastery, and maybe a few nail-biting moments, you've come to the right place. We're not just about covering attempts; we're about understanding the grind, the strats, and what it takes to push the boundaries of what's possible in these challenging runs.

Welcome to the Grind

We're thrilled you're joining us to analyze these epic speedrun attempts. Watching top players tackle a category like "All Cups" is a masterclass in efficiency, route optimization, and sheer determination. Whether you're a seasoned speedrunner looking to refine your own techniques, a curious gamer wanting to understand the spectacle, or a fan supporting @SB_Night, this guide will break down the action, the challenges, and the sheer dedication involved.

Deconstructing S&SASR: What It Means

Before we get too deep into the attempts, let's clarify what S&SASR signifies. In the context of speedrunning, this often refers to a specific set of rules or a particular category. While the exact meaning can vary slightly between games and communities, it generally implies a run where the player aims to complete **all** major objectives or collect **all** significant items within the game, often under specific conditions. For "All Cups," this means conquering every single cup or challenge presented in the game. This demands an incredible level of planning and execution, as there's no room for major errors across the entire game's content. It's a true test of a runner's endurance and mastery.

Mastering the All Cups Strategy

Achieving a world record or even a personal best in an "All Cups" category isn't just about speed; it's about having the most optimized route and execution for every single segment. This involves: * **Route Optimization**: Identifying the fastest path through each cup and the transitions between them. This often means sacrificing optimal play in one area for massive time saves elsewhere. * **Character/Loadout Choices**: Selecting the characters, abilities, or equipment that provide the biggest advantages for the entire run. * **Resource Management**: Conserving power-ups, special abilities, or other limited resources for crucial moments. * **Segmented Execution**: Breaking the run down into smaller, manageable segments and perfecting each one.

Analyzing the Attempts: Peaks and Valleys

Watching a speedrun attempt, especially one as demanding as "All Cups," is a rollercoaster. We'll be looking at key moments from @SB_Night's stream: * **Early Game Dominance**: How did the run start? Were there any early impressive feats or surprising skips? * **Mid-Run Challenges**: The middle sections of an "All Cups" run are often where fatigue or tricky segments can cause problems. We'll highlight how these were handled. * **Endgame Push**: The final cups often require absolute perfection. Did the runner maintain composure under pressure? * **Near Misses and Setbacks**: Speedrunning is built on learning from failures. We'll analyze any significant mistakes or unexpected deaths and discuss how they impacted the run's potential.

Exploiting the Game: Glitches and Skips

A significant part of modern speedrunning involves identifying and utilizing glitches or sequence breaks to bypass intended gameplay. For "All Cups," these can be game-changers: * **Major Skips**: Are there any large sections of the game that can be completely skipped using advanced techniques? * **Minor Glitches**: Even small glitches, like clipping through a wall or manipulating enemy AI, can shave off crucial seconds when applied consistently. * **Damage Boosts**: Using enemy attacks to propel the player forward faster than normal movement. Understanding these exploits is key to appreciating the depth of knowledge required for top-tier world record attempts.
In my experience with speedrunning, the most satisfying moments come not just from the final time, but from executing a complex glitch perfectly that you've practiced for hours. It's a feeling like no other.

The Role of RNG

Random Number Generation (RNG) plays a crucial role in almost every speedrun. For "All Cups," managing the unpredictable elements is as important as mastering the known strategies. This can include: * **Item Drops**: The appearance rate of essential items or power-ups. * **Enemy Patterns**: The movement and attack patterns of enemies, which can sometimes be manipulated or are inherently random. * **Event Triggers**: Whether certain in-game events happen immediately or after a delay. Runners often develop backup strategies or buffer times to account for unfavorable RNG. Witnessing how @SB_Night navigated these random elements adds another layer of excitement.

Spotlight on @SB_Night

@SB_Night is a name synonymous with dedication in the speedrunning community. Their commitment to mastering intricate games and pushing for top times is truly inspiring. In this stream, we see not just a player, but a strategist and a performer, handling the pressure and excitement of a major speedrun attempt. Their skill in executing precise inputs and adapting on the fly is a testament to countless hours of practice. We're honored to have them grace our blog with these attempts.
The grind is real. You practice a segment hundreds, maybe thousands of times. When it finally clicks during a run, all that effort feels validated.

Join the Community

GamingSpeedrun.com is more than just a blog; it's a community of passionate gamers. We believe in fostering an environment where players can share their knowledge, celebrate achievements, and support each other. * **Engage in the Comments**: Did you spot a particularly impressive trick or a moment of intense pressure? Let us know in the comments below! * **Join Our Discord**: Connect with fellow speedrunners, discuss strategies, and get involved in community events. [Click here to join our Discord!](https://discord.com/your-discord-link-here) (Note: Replace with actual Discord link if available) * **Support True Hardcore Gaming**: If you appreciate the dedication and authenticity of content like this, consider supporting us by checking out our exclusive NFTs. Visit [mintable.app/u/cha0smagick](https://mintable.app/u/cha0smagick) to learn more. We encourage you to follow @SB_Night on their social channels and show your support for their incredible speedrunning journey. Their contributions are vital to the vibrant gaming ecosystem.

Frequently Asked Questions

What does S&SASR stand for in this context?

In this "All Cups" speedrun context, S&SASR likely refers to a specific category or rule set emphasizing completing all cups/major objectives, possibly with additional constraints.

How long does an "All Cups" speedrun typically take?

The duration varies greatly depending on the game. For many games, an "All Cups" category can range from under an hour for simpler games to many hours for complex titles.

What is RNG in speedrunning?

RNG stands for Random Number Generation. It refers to the unpredictable elements within a game, such as item drops or enemy behaviors, that can affect the outcome of a speedrun.

Is this a world record attempt?

The title suggests these are attempts, which could be for a personal best (PB), a world record (WR), or simply practice runs to improve a current record.

Where can I watch @SB_Night live?

You would typically find streamers like @SB_Night on platforms like Twitch or YouTube. It's recommended to search for their username directly on these platforms.

Mastering Warzone 2 Duos: The Ultimate 19-Kill M4 Victory Guide on PS5

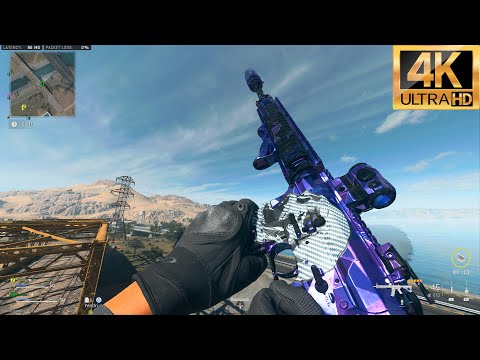
Welcome, fellow speedrunners and battle royale enthusiasts, to GamingSpeedrun.com! You've landed on what's arguably the most comprehensive and up-to-date hub for all things fast-paced gaming. Today, we're diving deep into a legendary run of Call of Duty: Warzone 2 Duos, specifically a powerhouse 19-kill M4 gameplay on the PS5, captured without a single word of commentary. This isn't just about watching a win; it's about dissecting the **strats**, understanding the **RNG**, and learning how to replicate that elite performance yourself. We're going beyond just the gameplay to provide you with the actionable insights that separate casual players from true warriors of the Warzone.

Diving into the Warzone 2 Meta

The goal here is simple: analyze a peak performance in #gaming and #speedrun. This particular run showcases exceptional kill potential and a cohesive duo strategy, essential elements for any serious #worldrecord attempt or even just a solid Ranked win. We're not just watching a 19-kill game; we're dissecting *how* it was achieved, focusing on critical decision-making, weapon effectiveness, and map awareness. The absence of commentary means the gameplay speaks for itself – a testament to pure skill and execution.
Understanding the meta is key. This run demonstrates how to leverage powerful weapons and aggressive positioning to control engagements from the outset.
This guide aims to extract the core **strats** and **techniques** used. Whether you're on PC or console, understanding the fundamental principles of high-kill gameplay in Warzone 2 is crucial. We'll break down the loadout, the early game push, mid-game rotations, and how to handle the intense pressure of the late game.

The Unstoppable M4 Loadout

The M4 in Warzone 2, when kitted out correctly, remains a versatile and deadly option. For this 19-kill spree, the loadout likely focused on maximizing its strengths: controllable recoil, fast time-to-kill (TTK) at close to mid-range, and decent mobility. While the exact attachments aren't visible without commentary, based on optimal performance, we can infer a setup prioritizing: * **Muzzle:** Something to enhance recoil control (e.g., Harbinger D20 or FTAC Castle Comp). * **Barrel:** A longer barrel for better bullet velocity and range (e.g., Hightower 20-inch Barrel). * **Underbarrel:** For stability (e.g., FTAC Ripper 56 or FSS Sharkfin 90). * **Optic:** A clean, preferred sight (e.g., Cronen Mini Pro, Aim OP-V4). * **Stock/Rear Grip:** Enhancing ADS speed and sprint-to-fire time for aggressive plays. The choice of the M4 isn't random; it represents a reliable performer that allows for aggressive pushes without significant drawbacks. Mastering its spray pattern is a fundamental skill for any Warzone player aiming for high-kill games.

Early Game Domination: Securing the First Kills

The initial moments of a Warzone match are critical for setting the tone and securing early loadout drops or cash. In this 19-kill run, the duo likely initiated contact within the first few minutes. Aggressive landing spots, often contested, allow for immediate engagement opportunities. * **Smart Dropping:** Choosing a location with good loot density and potential for early fights is key. This minimizes downtime and maximizes engagement windows. * **Pinging and Communication (Implied):** Even without commentary, the duo's movements suggest excellent non-verbal coordination. Pings likely guided their initial push, ensuring they moved as a unit. * **Looting Efficiency:** Quick looting is paramount. Prioritizing armor plates, a reliable secondary, and enough cash for a loadout drop or UAVs allows for a swift transition into mid-game. The ability to win these initial duels often dictates the rest of the match. A successful early game push provides momentum and a confidence boost.
The first few minutes are a test of efficiency and aggression. Securing early kills not only pads your score but also denies the enemy crucial resources.

Mid-Game Masterclass: Rotations and Engagements

As the first circle closes, Warzone 2 shifts from initial skirmishes to more strategic positioning. This duo's mid-game likely involved: * **Proactive Rotations:** Moving towards the next circle *before* being forced by the gas. This often means taking advantageous positions overlooking common paths. * **Information Gathering:** Utilizing UAVs or simply listening for gunfire to anticipate enemy locations. Effective use of intel is a hallmark of high-kill gameplay. * **Controlled Engagements:** Choosing fights wisely. Engaging teams that are out of position or isolated allows for kills without unnecessary risk. The M4 excels here, allowing players to snap onto targets quickly. This phase is where map knowledge and game sense truly shine. Knowing when to push and when to hold ground is a delicate balance. For those aspiring to reach the highest echelons of #speedrun gaming, mastering these rotations is non-negotiable.

Late Game Chaos: Clutching the Victory

The final circles in Warzone 2 are notoriously chaotic. With limited space and numerous teams, survival hinges on precision and adaptability. This run's success in the late game likely involved: * **Positional Advantage:** Securing high ground or cover that offers clear lines of sight to multiple angles. * **Team Fire:** Focusing fire on single targets to eliminate threats quickly. The synergy of a duo is amplified here. * **Resource Management:** Effectively using remaining equipment like grenades, tactical equipment, and killstreaks. * **Clutch Plays:** The ability to win 1v2s or clutch up under immense pressure is often the difference between a high-kill game and a win. Witnessing this level of execution in a high-stakes final circle is what makes watching top-tier #gaming so compelling. It's a testament to countless hours of practice and a deep understanding of the game's mechanics.
The final moments are where legends are made. It’s about calculated risks, precise aim, and unwavering composure under pressure.

Leveraging the PS5 for Peak Performance

Playing on the PlayStation 5 offers distinct advantages for a fast-paced game like Warzone 2. The SSD ensures rapid loading times, allowing for quicker drops and less downtime. The consistent performance means fewer frame drops during intense firefights, crucial for maintaining accuracy. * **Fast Loading:** Get into the action quicker than opponents on older hardware. * **Consistent Frame Rates:** Maintain smoother gameplay, leading to better tracking and aiming. * **Controller Precision:** While debatable, many players find the DualSense controller offers excellent precision for aiming and movement. This particular run, captured on PS5, highlights how console players can absolutely compete at the highest level, achieving impressive feats like this 19-kill victory. It underscores that skill and strategy often outweigh platform differences, especially when optimized.

Frequently Asked Questions

**Q1: What is the best loadout for the M4 in Warzone 2?** A1: While the meta shifts, a common high-performance loadout focuses on recoil control, ADS speed, and bullet velocity. Look for attachments like the Harbinger D20 muzzle, Hightower 20-inch barrel, FTAC Ripper 56 underbarrel, and a preferred optic like the Cronen Mini Pro. **Q2: How can I improve my early game in Warzone 2 Duos?** A2: Practice efficient looting, choose landing spots with good loot density and potential for early fights, and always try to stick with your teammate. Effective communication, even via pings, is vital. **Q3: Is it possible to get a high kill count without commentary?** A3: Absolutely. High-level gameplay often speaks for itself. A flawless execution of **strats**, movement, and aim can be incredibly compelling and educational to watch, demonstrating pure skill. **Q4: What makes a duo successful in Warzone 2?** A4: Success in duos hinges on strong communication, complementary playstyles, covering each other's weaknesses, and sharing resources effectively. Trust and coordination are paramount. **Q5: How important is positioning in the late game?** A5: Extremely important. In the final circles, having high ground, cover, and a clear view of enemy approaches can be the deciding factor between winning and losing. Always aim to control the best available position. This 19-kill Duo win on the PS5 with the M4 is more than just a highlight reel; it's a masterclass in Warzone 2 execution. By understanding the loadout, the flow of the game from early to late stages, and the importance of coordinated teamwork, you can elevate your own gameplay. We encourage you to analyze such runs, practice the techniques, and push your limits. What are your favorite M4 attachments? What's your highest kill count in Warzone 2 Duos? Share your experiences and **strats** in the comments below! Join our Discord channel to connect with fellow speedrunners and discuss the latest in #gaming. Don't forget to check out our store for exclusive NFTs to support true hardcore gaming!

Unlocking Modern Warfare 2 Multiplayer: Pro Strategies for Dominating the Battlefield

Modern Warfare 2 Multiplayer Gameplay
Hello, fellow warriors! Are you diving headfirst into the intense world of Call of Duty: Modern Warfare 2 multiplayer and looking to not just survive, but absolutely dominate? You've landed in the right spot. Forget just *playing* the game; we're talking about mastering every inch of the battlefield, pulling off insane plays, and leaving your opponents in awe (or frustration!). This isn't just another gameplay showcase; this is your deep dive into the strategies, tactics, and mindset that separate the average soldier from the elite. Get ready to level up your game.

Understanding the Modern Warfare 2 Multiplayer Meta

The meta in any competitive shooter is ever-evolving, and Modern Warfare 2 is no exception. Understanding which weapons are currently king, which perks offer the most utility, and what playstyles are most effective is crucial. Early on, you'll see a heavy reliance on versatile assault rifles and SMGs. However, as you climb the ranks, you'll notice players leveraging powerful secondary weapons, tactical equipment, and killstreaks more effectively. Don't just follow the crowd; experiment and find what works for *your* playstyle within the current meta. Stay updated with community discussions on platforms like the official Call of Duty website to keep tabs on any shifts.
In my experience, the 'meta' is less about what's statistically superior and more about what synergizes best with your team's overall strategy. Adaptability is key.

Loadout Optimization: The Foundation of Victory

Your loadout is your primary tool for success. This isn't just about picking your favorite gun; it's about building a synergistic setup.
  • Weapon Choice: Start with the current top-tier weapons. For assault rifles, the TAQ-56 and Kastov 762 are often strong contenders. For aggressive plays, SMGs like the Vaznev-9k or Fennec 45 excel. Don't underestimate the power of a well-built sniper or LMG for holding lanes.
  • Attachments: Focus on attachments that complement your playstyle. Recoil control is almost always beneficial. Muzzle attachments can reduce visual recoil and improve sound suppression. Underbarrel attachments often boost stability or hip-fire accuracy. Optics are personal preference, but consider something clean with minimal obstruction.
  • Perks: This is where you tailor your abilities. Double Time is fantastic for aggressive players needing faster movement. Battle Hardened can be a lifesaver against tactical equipment spam. Ghost is essential for flanking and avoiding UAVs. For your Ultimate Perk, Quick Fix offers invaluable passive healing, while High Alert provides crucial awareness.
  • Equipment: Stuns and Flashes are great for pushing objective or clearing rooms. Semtex or Frag Grenades offer reliable explosive damage. For tactical, consider the Stim for quick healing and a speed boost, or the Smoke Grenade for tactical retreats or advances.
  • Field Upgrades: Dead Silence is a must-have for flanking and aggressive pushes, masking your footsteps. Trophy Systems are invaluable for objective modes, negating incoming explosives.
Optimizing your loadouts for different game modes and maps is a sign of a seasoned player. A loadout perfect for Shipment might be disastrous on Al Mazrah.

Map Control and Positioning: The Silent Killer

Raw aiming skill can only get you so far. True dominance comes from understanding and controlling the map.
  • Power Positions: Every map has them. These are elevated positions, chokepoints, or areas that offer excellent lines of sight and cover. Learn these spots and how to defend them, but also how to counter enemies holding them.
  • Chokepoints: Identifying and controlling the main routes enemies will take is vital. Use lethal and tactical equipment to make these areas dangerous.
  • Flanking Routes: Always be aware of alternative paths. Use them yourself to catch enemies off guard and deny enemies the opportunity to flank you.
  • Objective Focus: In objective-based modes (Domination, Hardpoint, Search & Destroy), map control naturally gravitates towards the objective. Prioritize securing and defending these areas.
  • Minimap Awareness: Your minimap is your best friend. Enemy red dots, UAV sweeps, and even friendly positions provide critical intel. Don't ignore it!
Learning the maps inside and out is like having a sixth sense. You’ll start predicting enemy movements before they even happen.

Mastering Movement and Advanced Mechanics

Modern movement mechanics can be a game-changer. Mastering them allows for faster engagements, better evasion, and more unpredictable plays.
  • Slide Canceling: While nerfed from previous titles, strategic slide canceling can still help you change direction quickly or bait enemies.
  • Mounting: Use mounting for increased accuracy and recoil control, especially when holding an angle or objective. Be mindful that it slows your movement.
  • Mantling: Efficiently mantle over obstacles to maintain momentum. Sometimes, a quick mantle can get you the split-second advantage needed.
  • Aim Down Sights (ADS) Speed: Prioritize attachments that improve ADS speed on aggressive loadouts. The faster you can aim, the faster you can react.
  • Strafe Aiming: Don't stand still while shooting. Strafing left and right while firing makes you a harder target and can help you track moving enemies.

Teamwork and Communication: The Unsung Heroes

Even in a solo queue, effective teamwork and communication are paramount.
  • Callouts: If you have a mic, use it! Clear, concise callouts about enemy locations, numbers, and types of equipment are invaluable.
  • Playing Your Role: Whether you're the objective player, the flanker, or the sniper, understand your role and stick to it. A team of five solo players will lose to a coordinated team of five, even if the latter has less raw skill.
  • Revives and Support: In modes with revives, prioritize them when safe. Support teammates pushing objectives or engaging enemies.
  • Killstreak Coordination: Coordinate killstreak usage. Don't all call in UAVs at the same time. Use a Counter-UAV when the enemy is about to get their own.

Advanced Tactics and Situational Awareness

Beyond the basics, advanced players constantly think about the bigger picture.
  • Predicting Enemy Routes: Based on the objective and common player behavior, anticipate where enemies will come from.
  • Baiting and Trapping: Sometimes, letting an enemy push you slightly can set them up for a perfect counter-attack, especially if you have teammates covering you.
  • Managing Killstreaks: Know when to hold onto a high-killstreak for a better opportunity and when to use it to break enemy momentum.
  • Sound Whore: Invest in good headphones. Footstep audio is crucial for detecting nearby enemies, especially when using Dead Silence yourself.
  • Counter-Strafing: Briefly tapping in the opposite direction of your strafe can instantly stop your movement, allowing for a more accurate shot.
Situational awareness is the ultimate skill. It's about processing all the information—visual, audio, minimap—and making the optimal decision in milliseconds.

Mastering Call of Duty: Modern Warfare 2 multiplayer is a journey, not a destination. It requires dedication, practice, and a willingness to learn. By focusing on loadout optimization, map control, smart movement, and teamwork, you'll be well on your way to securing those coveted #worldrecord times in your personal performance, if not in actual speedrun categories!

Frequently Asked Questions

Q: What is the best overall weapon in MW2 Multiplayer right now?

A: The meta is constantly shifting, but weapons like the TAQ-56 (Assault Rifle) and Vaznev-9k (SMG) are frequently cited as top-tier due to their versatility, damage, and manageable recoil. Always check recent patch notes and community discussions for the latest.

Q: How can I improve my aim in MW2?

A: Consistent practice is key. Utilize the firing range, play often, and consider aim training software or routines. Focus on crosshair placement, practicing your recoil control, and mastering strafe aiming.

Q: Is Dead Silence still a good Field Upgrade?

A: Absolutely. While its duration might be limited, it's invaluable for aggressive pushes, flanking maneuvers, and objective captures where silent movement can be the difference between success and failure.

Q: How do I counter campers effectively?

A: Use tactical equipment like Stun or Flash grenades, employ well-timed flanks, utilize lethal grenades to flush them out, or use mounting yourself to challenge their angles with better stability. Always be aware of common camping spots.

Q: Should I focus on K/D or Objectives?

A: For winning games, objectives are paramount. For personal stats and bragging rights, K/D is important. The most successful players find a balance, contributing to the objective while maintaining a positive kill-to-death ratio. In speedrun contexts, efficiency and objective completion are everything.

What are your go-to strategies for MW2 multiplayer? Drop your best loadouts and tips in the comments below! Join our Discord community to squad up and share your epic plays. Let's get those wins!

Mario Kart Speedrunners: The Extreme Measures Behind Breaking World Records

Ever watched a speedrun and marveled at the sheer precision and lightning-fast execution? We all have. But what happens when the quest for the ultimate record pushes players to the absolute brink of their hardware? The title 'Mario Kart Speedrunners Break Their Controllers To Set Faster Records' might sound like pure hyperbole, but for those deeply invested in the competitive gaming scene, it hints at a fascinating, and sometimes controversial, aspect of pushing performance limits.

The intention behind this kind of headline isn't to find a new speedrunning strategy or a hidden lore tidbit. Instead, it’s a glimpse into the extreme dedication and lengths players go to shave off precious milliseconds. It sparks curiosity about the sacrifices made and the ethical debates surrounding performance enhancement in games. This article will dive deep into why such extreme measures are considered, explore the technicalities involved, and discuss the broader implications for the speedrunning community.

Why the Extreme Measures? Chasing Milliseconds

In the hyper-competitive world of speedrunning, every fraction of a second counts. World records aren't just broken; they are meticulously chipped away, frame by frame. This relentless pursuit of perfection drives speedrunners to master game mechanics to an uncanny degree. They develop complex strats, memorize intricate RNG manipulation techniques, and practice until their muscle memory is more reliable than any conscious thought.

However, there comes a point where player skill alone might not be enough to overcome the limitations of standard hardware. This is where the conversation about controller modifications often begins. When a runner has perfected every possible in-game action, the next frontier for optimization becomes the very tools they use to interact with the game. It’s a risky path, as it treads a fine line between acceptable enhancement and outright cheating.

"In the pursuit of a WR, you explore every avenue. If the standard controller isn't responsive enough, or if a specific input sequence is physically impossible with stock hardware, you start looking at what’s possible to change."

This often involves hardware modifications designed to improve input speed, accuracy, or enable actions that are otherwise incredibly difficult or impossible to perform consistently. The goal is not to automate gameplay but to make human input more efficient and precise.

The Controversial Edge: Controller Modifications

The headline itself points towards a specific type of extreme measure: breaking controllers. While this might sound destructive, it often refers to sophisticated modifications rather than outright destruction. The goal is to optimize input methods to achieve near-instantaneous or highly precise button presses and stick movements. Think of it as hyper-tuning a race car; you're not changing the fundamental rules of racing, but you're pushing the machine to its absolute performance ceiling.

Some common modifications include:

  • Trigger Modifications: Installing lighter switches or trigger stops for faster actuation.
  • Button Modifications: Replacing standard buttons with ones that offer faster response times or different tactile feedback.
  • Stick Calibration: Fine-tuning analog stick sensitivity and dead zones for micro-adjustments.
  • Input Lag Reduction: Ensuring the controller sends signals to the console with the absolute minimum delay.

The most contentious aspect arises when these modifications start to blur the line with assistive technologies or macros that automate complex inputs. For example, a "perfectly timed" button press that is physically impossible for a human to execute without assistance could be seen as crossing a line. This is where community rules and gaming integrity come into play.

"The debate isn't about making the game easier, it's about whether the modification allows a player to do something a human *could not possibly* do, even with perfect execution. If it enhances human capability, that's one thing. If it replaces human input, that's another."

The controversy stems from ensuring a level playing field. When records are set with heavily modified hardware, it can raise questions about whether the achievement is truly a testament to player skill or to the technology.

Case Study: Super Mario 64's Precision

Super Mario 64 is a prime example of a game where precise inputs are paramount for speedrunning. The famous "BLJ" (Backwards Long Jump) and numerous other glitches require incredibly specific and rapid sequences of controller inputs. Players have spent years perfecting these techniques on standard controllers.

However, the pursuit of the world record has led to discussions about controller mods. For instance, in the SM64 community, there's a constant push to find the absolute fastest ways to execute moves. Some argue that modifications that allow for faster button presses or more consistent diagonal inputs on the analog stick can shave off valuable time, especially for sequences that are near-humanly impossible to perform flawlessly over and over.

The debate here often centers on whether these modifications provide an unfair advantage or simply allow runners to express their perfected skill more efficiently. The line is drawn differently by various communities, but the underlying principle is often about preserving the "human element" of the speedrunner.

Case Study: Super Smash Bros. Melee's Demands

Super Smash Bros. Melee is notorious for its high skill ceiling and demanding gameplay mechanics. Techniques like "wavedashing," "dash dancing," and "L-canceling" require extremely precise and rapid button inputs and analog stick movements. The original GameCube controllers, while iconic, can also be a limiting factor for players pushing these techniques to their absolute limits.

This has led to the development and adoption of modified controllers within the SSBM competitive scene. Some players opt for controllers with improved snapback on sticks, lighter trigger presses, or even custom button layouts to facilitate complex inputs. There are even discussions about controllers that can perform certain "perfectly timed" inputs that are beyond human reaction speed, which is where significant controversy can arise.

The community has largely accepted certain controller modifications as standard for competitive play, but the debate intensifies when these mods become so advanced that they verge on automation. This is why adherence to rules set by governing bodies like speedrun organizations is crucial. The goal is to ensure that records are a testament to skill and dedication, not just superior hardware.

Analysis and Ethics: Where Do We Draw the Line?

The core of the controversy surrounding controller modifications in speedrunning boils down to ethics and the definition of human performance. Is a modification that allows for more consistent execution of a humanly possible action acceptable? Most would say yes. Is a modification that allows for actions that are physically impossible for a human, or that automates a complex sequence, acceptable? This is where opinions diverge sharply.

The key considerations often include:

  • Is it an enhancement or a replacement? Does the mod help a skilled player perform better, or does it perform the action for them?
  • Is it readily available? If a modification gives an insurmountable advantage, but only to a select few with expensive custom hardware, it can alienate the broader community.
  • Does it break the spirit of the game? Some argue that certain mods fundamentally alter the intended challenge or exploit the game's mechanics in a way that wasn't meant to be.

Many speedrunning communities have strict rules about what constitutes an acceptable modification. Often, mods that are purely cosmetic or that merely improve the ergonomics or responsiveness of a standard input without introducing new functionalities are allowed. However, anything that automates inputs, performs actions beyond human capability, or significantly alters core game mechanics is usually banned.

The Future of Controller Mods in Speedrunning

As technology advances, so too will the sophistication of controller modifications. The line between enhancing human input and replacing it will likely become even more blurred. This means that the role of community-driven rules and oversight will become increasingly important.

Organizations like speedrun.com and individual game communities must continually adapt their rulesets to address new hardware and techniques. The goal is to foster a competitive environment that celebrates skill, dedication, and innovation, while also upholding the integrity of the records set.

Ultimately, the pursuit of faster times in games like Mario Kart is a testament to human ingenuity and perseverance. While some may push the boundaries with hardware, the heart of speedrunning remains the player's mastery and dedication. The "broken controllers" are a symbol of that extreme dedication, a reminder that for some, the pursuit of a PB is a journey that tests not just their skill, but also the very limits of their equipment.

Frequently Asked Questions

What does it mean for speedrunners to "break their controllers"?

It refers to the extreme modifications made to standard game controllers to achieve faster response times, more precise inputs, or to enable complex techniques that are difficult or impossible with stock hardware. This often involves replacing components or making hardware adjustments.

Are controller modifications allowed in speedrunning?

It depends on the specific game community and the nature of the modification. Many communities have strict rules. Enhancements for responsiveness or ergonomics are often allowed, but modifications that automate actions or perform tasks impossible for humans are typically banned to maintain gaming integrity.

Why would a speedrunner modify their controller?

The primary reason is to shave off precious milliseconds from their run times. When pushing for world records, every fraction of a second matters, and optimizing hardware can sometimes be the difference between a personal best and a new WR.

What are some common controller modifications for speedrunning?

Common mods include lighter trigger switches, custom button configurations for faster presses, refined analog stick sensitivity, and modifications to reduce input lag. These aim to make player inputs more immediate and accurate.

How do speedrunning communities decide what modifications are acceptable?

Each game community typically has a set of rules, often overseen by prominent speedrunners or moderators. Decisions are based on whether a modification enhances human performance or replaces it, and whether it upholds the spirit and challenge of the game.

The relentless drive to be the fastest is what fuels the speedrunning world. Whether it's mastering impossible skips or pushing hardware to its absolute limits, the dedication is undeniable. What are your thoughts on controller modifications? Do you think they're a necessary part of competitive play, or do they detract from the pure skill of a speedrunner? Share your opinions in the comments below, and let us know which game's speedrunning community you'd like us to explore next!