Scrap Beasts Arena Speedrun WR: 00:22.022 in UltraHard Mode - Your Ultimate Guide

As dedicated gaming and speedrun enthusiasts, we're constantly on the hunt for the next monumental challenge. What could possibly top the thrill of conquering the Scrap Beasts Arena in its most punishing form: UltraHard mode? This isn't for the faint of heart; it demands a potent cocktail of elite skill, meticulous strategy, and just the right sprinkle of RNG to emerge victorious. Here at GamingSpeedrun, we're diving deep into the intricacies of the Scrap Beasts Arena Speedrun, armed with the tips and tricks you need to smash your personal bests.

The Gauntlet Awaits: Understanding Scrap Beasts Arena

Before we even talk speed, let's appreciate the beast itself. Scrap Beasts, a phenomenal title from Guerrilla Games – the same studio behind the legendary Horizon Zero Dawn saga – immerses players in a vast, perilous open world teeming with deadly fauna and formidable foes. Within this world, the Scrap Beasts Arena stands as a brutal gauntlet, a relentless series of escalating battles against increasingly ferocious waves of enemies. It's the ultimate test of your combat prowess and endurance.

Mastering the Core Mechanics

The absolute cornerstone of any successful speedrun, especially in a high-difficulty mode like UltraHard, is an intimate understanding of the game's mechanics. For Scrap Beasts Arena, this means knowing your chosen character inside and out. What are their strengths? Their weaknesses? How do their abilities synergize or falter against specific enemy types? This deep knowledge allows for split-second decision-making under pressure, crucial for maximizing takedown efficiency. Every second wasted assessing your options is a second lost on the clock.

In my own attempts, I found that mastering the perfect dodge timing for the charging Scrap Beast was paramount. It not only avoids damage but also creates an opening for a critical hit, saving valuable seconds.

"Knowing your character's move set isn't just about survival; it's about optimizing offense and minimizing downtime."

Choosing Your Arsenal: Weapons and Upgrades

Simply put, the right tools make the job easier – and faster. In the Scrap Beasts Arena, your loadout is as critical as your reflexes. Experimentation is key here. What combinations of weapons, mods, and character upgrades yield the highest damage output in the shortest amount of time? Are there specific elemental weaknesses you can exploit on certain waves?

For instance, early runs might focus on raw damage with a heavy melee weapon. However, for optimizing speed, I've seen players utilize rapid-fire energy weapons that exploit enemy weak points, staggering them quickly and allowing for uninterrupted damage. Don't be afraid to deviate from your usual playstyle; speedrunning often requires unconventional loadouts.

The Essence of Speed: Timing and Exploiting Shortcuts

Timing is the heartbeat of any speedrun, and nowhere is this more apparent than in the intense pressure cooker of the Scrap Beasts Arena. Efficiency is your mantra. Minimize every moment of downtime. This involves more than just killing enemies quickly; it means actively seeking out and utilizing shortcuts. Are there environmental hazards you can lure enemies into? Can you skip entire enemy spawns by moving through a specific path?

The current world record holder, "SlayerX," is a master of pathing, consistently shaving milliseconds by taking the most direct routes, even when they appear riskier.

"Every second counts. If there's a path that shaves off 0.5 seconds, even if it's more dangerous, a speedrunner will take it."

Reading the Battlefield: Enemy Spawns and Patterns

Victory in speedrunning often hinges on prediction. Memorizing enemy spawn locations and their attack patterns is not just helpful; it's essential for shaving precious time off your run. Knowing exactly where a specific Scrap Beast variant will appear allows you to position yourself preemptively, ready to unleash your most damaging combo the moment it materializes. This foresight turns potential chaos into controlled aggression.

For example, the initial wave often spawns the smaller, faster variants on the left and right flanks. A skilled runner will immediately target the closest flank, dispatching those threats rapidly before turning to the other side, minimizing the time spent being flanked or dodging from multiple directions.

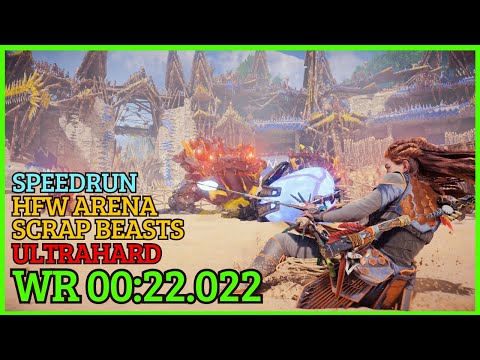
Deconstructing the 00:22.022 World Record

Let's talk numbers: the current pinnacle of Scrap Beasts Arena speedrunning in UltraHard mode stands at an astonishing 00:22.022. This time is a testament to absolute mastery. Achieving this requires not only perfect execution of all the previously mentioned strategies but also an incredible level of optimization and perhaps a touch of good fortune with enemy behavior.

Analyzing top runs on platforms like Speedrun.com is invaluable. Watch frame-by-frame if you have to. Look for the tiny optimizations: the exact jump timing, the precise moment an attack is initiated, the path taken between enemy groups. The difference between a great time and a world record often lies in these minuscule, yet critical, details.

"The WR isn't just about speed; it's about perfect execution, resource management, and exploiting every single possible advantage the game offers."

Refining Your Strategy: Practice Makes Progress

Don't get discouraged if you don't see your time plummeting immediately. This is a brutal challenge, and breaking into the top times requires dedication. Focus on incremental improvements. Can you beat your previous time by even a second? Identify the segments where you consistently lose time and focus your practice there.

Break down the run into smaller sections. Master the first wave, then the second, and so on. Once you can consistently perform each section well, start stringing them together. Persistence is the name of the game in #gaming and especially in the #speedrun community.

Frequently Asked Questions

Q1: What is the best character for Scrap Beasts Arena speedruns?

A1: While character choice can depend on playstyle, characters with high mobility and quick, high-damage attacks often perform best. Experiment to find who suits your strategy.

Q2: Are there any known glitches or skips that significantly shorten the run?

A2: The community is always discovering new techniques. Keep an eye on speedrun forums and leaderboards for emerging skips or exploits that could shave off valuable time.

Q3: How important is RNG in this speedrun?

A3: RNG plays a role, particularly in enemy spawn variations and attack patterns. However, a solid strategy focused on consistency and minimizing reliance on perfect RNG is key to achieving top times.

Q4: Where can I find more resources for Scrap Beasts speedrunning?

A4: Speedrun.com is the definitive source for leaderboards, guides, and community discussions. Joining relevant Discord servers is also highly recommended.

In conclusion, the Scrap Beasts Arena Speedrun in UltraHard mode represents the pinnacle of challenge and exhilaration for any serious gamer. By internalizing the game's mechanics, optimizing your loadouts, mastering enemy patterns, and relentlessly practicing, you can shave precious seconds off your time. Who knows? Maybe you'll be the one to dethrone the current record holder and set a new #worldrecord. The arena awaits your assault!

What are your best times? What strategies have worked wonders for you? Share your triumphs, struggles, and insights in the comments below! Join our Discord community to connect with fellow speedrunners, share strategies, and find practice partners.

Resident Evil 4 Professional Speedrun: Mastering the PS5 Meta

```
Welcome, fellow speedrunners and survival horror aficionados, to the ultimate deep dive into *Resident Evil 4* on PlayStation 5, specifically tackling the Professional difficulty! If you've clicked on this article, chances are you're not just looking to beat Leon's harrowing journey through rural Spain, but to obliterate it. You're here to shave precious seconds, master every encounter, and potentially chase that elusive World Record. This guide is crafted for you – the hardcore gamer craving efficiency, strategy, and the thrill of a perfectly executed run. We're going beyond just playing the game; we're dissecting it for speed. Whether you're a seasoned speedrunner looking to refine your existing strats or a newcomer eager to learn the ropes of professional-level play, you've come to the right place. We'll break down the essential techniques, route optimizations, and crucial decision-making points that separate a good run from a legendary one on the PS5. Prepare to learn how to manipulate enemies, conserve resources like a ghost, and exploit every possible shortcut.

Introduction: The Professional Challenge

Professional difficulty in *Resident Evil 4* is no joke. It's designed to test your mastery of the game's mechanics, your resource management, and your nerve. Enemies hit harder, are more aggressive, and crucially, can kill you in one or two hits. For speedrunning, this means every engagement must be deliberate. There's no room for error, no space for casual exploration. We're aiming for precision, efficiency, and ruthless execution. The PS5 version offers slightly different performance characteristics, and understanding how they impact movement and aiming is key.

Professional Difficulty Essentials: More Than Just Ammo Conservation

Survival on Professional isn't just about having enough bullets; it's about knowing when to fight, when to run, and how to make every bullet count. * **Damage Thresholds**: Understand how many hits specific enemies take with your chosen weapons. Knowing that a headshot with the Red9 will stagger a Ganado, allowing you to follow up with a melee attack, is crucial for crowd control and saving ammo. * **Enemy AI Exploitation**: Enemies on Professional are hyper-aggressive. This aggression can be used against them. Luring them into traps, chokepoints, or environmental hazards can clear areas much faster than direct confrontation. * **Resource Management**: This is paramount. Every grenade, every special ammo type, every herb needs a purpose. You won't be crafting stacks of ammo; you'll be meticulously managing what you find. Prioritize selling treasures that offer high Ptas for minimal inventory space. * **The Merchant is Your Best Friend**: Knowing what to buy, when to upgrade, and when to sell is as important as aiming. Early game upgrades can significantly speed up boss fights and tough encounters.

Route Optimization: The PS5 Advantage

The core of any speedrun is the route. For *Resident Evil 4* on PS5, this involves understanding the most efficient path through the game, minimizing backtracking, and executing necessary combat encounters as quickly as possible. * **Minimizing Backtracking**: The map is your guide. Plan your route to collect necessary items and trigger key events in a logical progression. Avoid revisiting areas unless absolutely necessary. * **Cutscene Skips**: While *Resident Evil 4* has fewer skippable cutscenes than some games, knowing which ones can be skipped or how to skip them the moment they become available saves precious seconds. * **Environmental Interaction**: Use ladders, barrels, and explosive objects to your advantage. Triggering an explosion to clear a group of enemies is faster than shooting each one.
In my experience, the initial village encounter is a prime example of route optimization. Instead of clearing every enemy, a well-practiced runner can B-line through, using the environment to bottleneck pursuers and reach the church relatively unscathed.

Combat Strats: Mastering Encounters

Direct combat on Professional is a deadly dance. Here's how to approach it efficiently: * **Staggering Enemies**: Headshots and precise shots with high-power weapons (like the Riot Gun or Broken Butterfly) can stagger enemies. This creates openings for quick melee attacks, which are faster and conserve more ammo than subsequent gunshots. * **Crowd Control**: When faced with multiple enemies, use flash grenades or shotgun blasts to create space or knock them down. Prioritize taking out the most dangerous threats first, often those with ranged attacks or those who can instantly kill you (like chainsaw enemies). * **Knife Usage**: The knife is your best friend for conserving ammo. Use it to finish off downed enemies, break wooden barricades, and even chip away at certain boss health bars during specific phases. Mastering knife lunges can save countless bullets.

Enemy Manipulation & Skips

Sometimes, the fastest way to deal with an enemy is not to deal with them at all. * **Triggering and Running**: Many enemy spawns can be triggered by simply walking into a certain area, and then you can immediately run past them before they fully aggro or become a threat. This requires precise positioning and timing. * **AI Pathing Exploitation**: Enemies have predictable paths. You can often lure them into positions where they won't detect you, or where they are trapped by the environment, allowing you to sneak past or line up a perfect shot. * **Specific Skips**: Throughout the game, there are specific sequences or encounters that can be entirely skipped with precise movement and knowledge of trigger points. For instance, certain groups of Ganados can be bypassed by jumping through windows or using specific climbing points that they won't follow you through immediately.
The infamous "Chainsaw Demo" encounter can be significantly shortened by mastering a specific window jump that most enemies can't immediately follow you through, buying you crucial seconds to escape the initial onslaught.

Boss Fights: Quick Kills

Bosses are often major time sinks. Efficiently dispatching them is key to a good speedrun time. * **El Gigante**: Weak point exploitation is crucial. Using high-damage weapons like the Killer7 or magnum rounds on its exposed parasites after staggering it is key. Grenades can also stagger it effectively. * **Del Lago**: Quick-time events (QTEs) are part of this fight. The faster you mash buttons and aim accurately, the quicker it ends. Conserving harpoons and aiming for the glowing weak spots is vital. * **Krauser**: This fight often involves QTEs and precise aiming. Using the knife during his mutated form's attacks, when timed correctly, can lead to massive damage and stun him for further attacks. * **Salazar**: Exploiting his vulnerable eye with high-damage weapons is the fastest method. Flash grenades can stun him, creating opportunities.

Weapon Choices for Speed

Loadout optimization is critical. You can't carry everything. * **Handgun**: The Red9 with its stock is a popular choice for its stopping power, crucial for staggering enemies on Professional. The Blacktail offers faster firing and reload. * **Shotgun**: The Riot Gun offers excellent tight spread and power for its ammo efficiency, great for crowd control and stagger. The Striker has a massive capacity but is less precise. * **Rifles**: The Stingray (semi-auto) is often preferred for its rate of fire, useful for hitting distant weak points quickly. The SR M1903 (bolt-action) hits harder but is slower. * **Magnum**: The Broken Butterfly or Killer7 are essential for boss damage and taking down heavily armored enemies quickly. * **Special Weapons**: TMP is great for sustained fire and stunning. Rocket Launchers are typically reserved for specific boss strats or emergencies due to their rarity and cost.

Common Mistakes to Avoid

Even experienced players can slip up. Here are common pitfalls on Professional speedruns: * **Over-reliance on Healing**: Taking unnecessary damage forces you to use healing items, which costs time and resources. Focus on avoiding hits entirely. * **Wasting Ammo on Non-Threats**: Don't shoot every single enemy you see. If you can run past them safely, do it. * **Ignoring Merchant Upgrades**: Skipping crucial weapon upgrades (like the Red9's stock or the shotgun's power) will make later encounters significantly harder and slower. * **Poor Inventory Management**: Spending too much time swapping items or discarding treasures inefficiently can add up. Keep your inventory organized. * **Failing QTEs**: Quick Time Events on Professional often result in instant death, costing significant time or ending the run. Practice these inputs.
I once lost a potential PB because I forgot to buy the Riot Gun upgrade. The subsequent crowd in the castle would have taken twice as long to clear, and that's all it takes. Always plan your merchant stops!

Frequently Asked Questions

Q1: Is the PS5 version significantly different for speedrunning compared to other platforms?

The core gameplay remains the same. The PS5 version offers improved performance and loading times, which can shave off seconds overall, especially during scene transitions and asset loading. The core strats are largely transferable, but minor timing adjustments might be needed.

Q2: What is the most important weapon for a Professional speedrun?

This is debatable and depends on the specific route, but generally, a fully upgraded Red9 with stock for staggering and crowd control, and a fully upgraded Riot Gun for close-quarters power and ammo efficiency are considered essential. The magnum is vital for bosses.

Q3: How do I deal with the Regenerators/Iron Maidens quickly?

These enemies require precise targeting of their weak points (the parasitic larvae). Using the Riot Gun or Stingray to hit them during their attacks, or a magnum round, is the most efficient way. The thermal scope attachment for the rifle can also help in later encounters.

Q4: What's the single biggest time-saver in a Professional run?

Mastering enemy manipulation and skips. Knowing exactly which enemies you can ignore, how to bait them, and where the fastest paths are, bypasses entire combat encounters and saves the most significant chunks of time.

Q5: Should I focus on Any% or a specific category for my first speedrun?

For *Resident Evil 4* Professional, an Any% run is usually the most popular and accessible starting point. It focuses on reaching the end credits as fast as possible, often involving sequence breaks and aggressive routing. The journey through *Resident Evil 4*'s Professional mode is a gauntlet that demands skill, knowledge, and unwavering focus. By internalizing these strategies, optimizing your route, and practicing relentlessly, you'll be well on your way to achieving incredible times. Remember, speedrunning is about constant improvement. Analyze your runs, watch other top players, and refine your techniques. What are your go-to strats for Professional? Did we miss any critical techniques? Share your thoughts, tips, and your own speedrun achievements in the comments below! Join our Discord channel to connect with other speedrunners, discuss strategies, and push the boundaries of what's possible in *Resident Evil 4*. Happy running! ```json { "@context": "https://schema.org", "@type": "FAQPage", "mainEntity": [ { "@type": "Question", "name": "Is the PS5 version significantly different for speedrunning compared to other platforms?", "acceptedAnswer": { "@type": "Answer", "text": "The core gameplay remains the same. The PS5 version offers improved performance and loading times, which can shave off seconds overall, especially during scene transitions and asset loading. The core strats are largely transferable, but minor timing adjustments might be needed." } }, { "@type": "Question", "name": "What is the most important weapon for a Professional speedrun?", "acceptedAnswer": { "@type": "Answer", "text": "This is debatable and depends on the specific route, but generally, a fully upgraded Red9 with stock for staggering and crowd control, and a fully upgraded Riot Gun for close-quarters power and ammo efficiency are considered essential. The magnum is vital for bosses." } }, { "@type": "Question", "name": "How do I deal with the Regenerators/Iron Maidens quickly?", "acceptedAnswer": { "@type": "Answer", "text": "These enemies require precise targeting of their weak points (the parasitic larvae). Using the Riot Gun or Stingray to hit them during their attacks, or a magnum round, is the most efficient way. The thermal scope attachment for the rifle can also help in later encounters." } }, { "@type": "Question", "name": "What's the single biggest time-saver in a Professional run?", "acceptedAnswer": { "@type": "Answer", "text": "Mastering enemy manipulation and skips. Knowing exactly which enemies you can ignore, how to bait them, and where the fastest paths are, bypasses entire combat encounters and saves the most significant chunks of time." } }, { "@type": "Question", "name": "Should I focus on Any% or a specific category for my first speedrun?", "acceptedAnswer": { "@type": "Answer", "text": "For Resident Evil 4 Professional, an Any% run is usually the most popular and accessible starting point. It focuses on reaching the end credits as fast as possible, often involving sequence breaks and aggressive routing." } } ] }

Mastering Warzone 2 Duos: The Ultimate 19-Kill M4 Victory Guide on PS5

Welcome, fellow speedrunners and battle royale enthusiasts, to GamingSpeedrun.com! You've landed on what's arguably the most comprehensive and up-to-date hub for all things fast-paced gaming. Today, we're diving deep into a legendary run of Call of Duty: Warzone 2 Duos, specifically a powerhouse 19-kill M4 gameplay on the PS5, captured without a single word of commentary. This isn't just about watching a win; it's about dissecting the **strats**, understanding the **RNG**, and learning how to replicate that elite performance yourself. We're going beyond just the gameplay to provide you with the actionable insights that separate casual players from true warriors of the Warzone.

Diving into the Warzone 2 Meta

The goal here is simple: analyze a peak performance in #gaming and #speedrun. This particular run showcases exceptional kill potential and a cohesive duo strategy, essential elements for any serious #worldrecord attempt or even just a solid Ranked win. We're not just watching a 19-kill game; we're dissecting *how* it was achieved, focusing on critical decision-making, weapon effectiveness, and map awareness. The absence of commentary means the gameplay speaks for itself – a testament to pure skill and execution.
Understanding the meta is key. This run demonstrates how to leverage powerful weapons and aggressive positioning to control engagements from the outset.
This guide aims to extract the core **strats** and **techniques** used. Whether you're on PC or console, understanding the fundamental principles of high-kill gameplay in Warzone 2 is crucial. We'll break down the loadout, the early game push, mid-game rotations, and how to handle the intense pressure of the late game.

The Unstoppable M4 Loadout

The M4 in Warzone 2, when kitted out correctly, remains a versatile and deadly option. For this 19-kill spree, the loadout likely focused on maximizing its strengths: controllable recoil, fast time-to-kill (TTK) at close to mid-range, and decent mobility. While the exact attachments aren't visible without commentary, based on optimal performance, we can infer a setup prioritizing: * **Muzzle:** Something to enhance recoil control (e.g., Harbinger D20 or FTAC Castle Comp). * **Barrel:** A longer barrel for better bullet velocity and range (e.g., Hightower 20-inch Barrel). * **Underbarrel:** For stability (e.g., FTAC Ripper 56 or FSS Sharkfin 90). * **Optic:** A clean, preferred sight (e.g., Cronen Mini Pro, Aim OP-V4). * **Stock/Rear Grip:** Enhancing ADS speed and sprint-to-fire time for aggressive plays. The choice of the M4 isn't random; it represents a reliable performer that allows for aggressive pushes without significant drawbacks. Mastering its spray pattern is a fundamental skill for any Warzone player aiming for high-kill games.

Early Game Domination: Securing the First Kills

The initial moments of a Warzone match are critical for setting the tone and securing early loadout drops or cash. In this 19-kill run, the duo likely initiated contact within the first few minutes. Aggressive landing spots, often contested, allow for immediate engagement opportunities. * **Smart Dropping:** Choosing a location with good loot density and potential for early fights is key. This minimizes downtime and maximizes engagement windows. * **Pinging and Communication (Implied):** Even without commentary, the duo's movements suggest excellent non-verbal coordination. Pings likely guided their initial push, ensuring they moved as a unit. * **Looting Efficiency:** Quick looting is paramount. Prioritizing armor plates, a reliable secondary, and enough cash for a loadout drop or UAVs allows for a swift transition into mid-game. The ability to win these initial duels often dictates the rest of the match. A successful early game push provides momentum and a confidence boost.
The first few minutes are a test of efficiency and aggression. Securing early kills not only pads your score but also denies the enemy crucial resources.

Mid-Game Masterclass: Rotations and Engagements

As the first circle closes, Warzone 2 shifts from initial skirmishes to more strategic positioning. This duo's mid-game likely involved: * **Proactive Rotations:** Moving towards the next circle *before* being forced by the gas. This often means taking advantageous positions overlooking common paths. * **Information Gathering:** Utilizing UAVs or simply listening for gunfire to anticipate enemy locations. Effective use of intel is a hallmark of high-kill gameplay. * **Controlled Engagements:** Choosing fights wisely. Engaging teams that are out of position or isolated allows for kills without unnecessary risk. The M4 excels here, allowing players to snap onto targets quickly. This phase is where map knowledge and game sense truly shine. Knowing when to push and when to hold ground is a delicate balance. For those aspiring to reach the highest echelons of #speedrun gaming, mastering these rotations is non-negotiable.

Late Game Chaos: Clutching the Victory

The final circles in Warzone 2 are notoriously chaotic. With limited space and numerous teams, survival hinges on precision and adaptability. This run's success in the late game likely involved: * **Positional Advantage:** Securing high ground or cover that offers clear lines of sight to multiple angles. * **Team Fire:** Focusing fire on single targets to eliminate threats quickly. The synergy of a duo is amplified here. * **Resource Management:** Effectively using remaining equipment like grenades, tactical equipment, and killstreaks. * **Clutch Plays:** The ability to win 1v2s or clutch up under immense pressure is often the difference between a high-kill game and a win. Witnessing this level of execution in a high-stakes final circle is what makes watching top-tier #gaming so compelling. It's a testament to countless hours of practice and a deep understanding of the game's mechanics.
The final moments are where legends are made. It’s about calculated risks, precise aim, and unwavering composure under pressure.

Leveraging the PS5 for Peak Performance

Playing on the PlayStation 5 offers distinct advantages for a fast-paced game like Warzone 2. The SSD ensures rapid loading times, allowing for quicker drops and less downtime. The consistent performance means fewer frame drops during intense firefights, crucial for maintaining accuracy. * **Fast Loading:** Get into the action quicker than opponents on older hardware. * **Consistent Frame Rates:** Maintain smoother gameplay, leading to better tracking and aiming. * **Controller Precision:** While debatable, many players find the DualSense controller offers excellent precision for aiming and movement. This particular run, captured on PS5, highlights how console players can absolutely compete at the highest level, achieving impressive feats like this 19-kill victory. It underscores that skill and strategy often outweigh platform differences, especially when optimized.

Frequently Asked Questions

**Q1: What is the best loadout for the M4 in Warzone 2?** A1: While the meta shifts, a common high-performance loadout focuses on recoil control, ADS speed, and bullet velocity. Look for attachments like the Harbinger D20 muzzle, Hightower 20-inch barrel, FTAC Ripper 56 underbarrel, and a preferred optic like the Cronen Mini Pro. **Q2: How can I improve my early game in Warzone 2 Duos?** A2: Practice efficient looting, choose landing spots with good loot density and potential for early fights, and always try to stick with your teammate. Effective communication, even via pings, is vital. **Q3: Is it possible to get a high kill count without commentary?** A3: Absolutely. High-level gameplay often speaks for itself. A flawless execution of **strats**, movement, and aim can be incredibly compelling and educational to watch, demonstrating pure skill. **Q4: What makes a duo successful in Warzone 2?** A4: Success in duos hinges on strong communication, complementary playstyles, covering each other's weaknesses, and sharing resources effectively. Trust and coordination are paramount. **Q5: How important is positioning in the late game?** A5: Extremely important. In the final circles, having high ground, cover, and a clear view of enemy approaches can be the deciding factor between winning and losing. Always aim to control the best available position. This 19-kill Duo win on the PS5 with the M4 is more than just a highlight reel; it's a masterclass in Warzone 2 execution. By understanding the loadout, the flow of the game from early to late stages, and the importance of coordinated teamwork, you can elevate your own gameplay. We encourage you to analyze such runs, practice the techniques, and push your limits. What are your favorite M4 attachments? What's your highest kill count in Warzone 2 Duos? Share your experiences and **strats** in the comments below! Join our Discord channel to connect with fellow speedrunners and discuss the latest in #gaming. Don't forget to check out our store for exclusive NFTs to support true hardcore gaming!