Hey there, fellow loopers and speed demons! Welcome back to GamingSpeedrun, your ultimate hub for all things fast-paced and high-octane in the gaming world. Today, we're diving deep into the chaos of Fortnite Chapter 4, specifically tackling the ultimate challenge: dominating **High-Kill Solo Squads** on a PS4 controller. Forget just surviving; we're here to rack up insane kill counts and push the boundaries of what's possible when you're the lone wolf against entire squads. This isn't just gameplay; it's a masterclass in aggressive strategy and lightning-fast execution.
Fortnite's Chapter 4 introduced a dynamic landscape with new mechanics and weapon balancing that heavily favors aggressive playstyles. Understanding this meta is crucial if you're aiming for high-kill games, especially when going solo against squads. The pace is faster, rotations can be more exposed, and the available mobility items often encourage direct confrontation rather than passive play. For a solo player, this means you need to be hyper-aware of your surroundings, pick your fights strategically, and always have an escape or an aggressive follow-up plan.
The key here is **tempo**. You want to dictate the pace of engagements. Don't let teams set up on you. Push them, overwhelm them, and use the environment to your advantage. Think about how new POIs offer verticality and cover, and how you can exploit these for flanking maneuvers. My experience in speedrun attempts has taught me that efficiency is paramount. Every second spent hesitating is a second lost, and in Fortnite, that can mean the difference between a 20-bomb and a quick exit.
Loadout is King: Your Weapon Breakdown
Your loadout is your lifeline in a solo-vs-squad scenario. Forget versatility; we're talking about raw power and synergy.
* **Primary Engagement Weapon**: This needs to be something with high burst damage or rapid fire. The Kinetic Blade, if available, is a game-changer for aggressive pushes and close-quarters combat. Otherwise, an SMG like the Combat SMG or an Assault Rifle with a good fire rate is essential. You need to be able to melt opponents quickly.
* **Close-Quarters Dominance**: A Shotgun is non-negotiable. Whether it's the Pump Shotgun for precision or the Tactical Shotgun for spamming, you need something to finish off enemies you've chipped away at or to win those brutal close-range build fights.
* **Utility/Mobility**: This is where things get interesting. Mobility items like Shockwave Grenades or the ODM Gear are invaluable for aggressive repositioning, escaping bad situations, or initiating fights. If you can't get mobility, carrying extra utility like Clingers or Stink Bombs can help flush out entrenched opponents.
* **Healing**: Always prioritize shield regeneration. Chug Splashes and Med Kits are great, but mini-shields and Big Pots are your bread and butter for quick, on-the-fly healing during intense firefights.
In my runs, I've found that carrying a balanced loadout focusing on close-to-mid range is key. Trying to engage at long range solo against a coordinated squad is often a recipe for disaster. Stick to what you can control: getting up close and personal.
Hot Dropping and Early Game Strats
If your goal is high kills, you can't afford to play passively. Hot dropping is almost mandatory. Pick a POI known for decent loot density and a lot of player traffic. The key is to land *slightly* away from the main cluster of players to secure your initial weapon, then immediately engage the nearest opponent.
* **Prioritize Loot Speed**: Land on your weapon. Don't waste time searching chests if there's an enemy right next to you. A grey pistol kill is better than no kill.
* **Isolate Fights**: Your goal is to take 1v1s as much as possible, even if you're outnumbered. Try to break line of sight between you and other enemies while you focus down one player. Use natural cover and buildings to your advantage.
* **Don't Be Afraid to Disengage (Temporarily)**: If you get into a fight and realize you're outmatched or outnumbered *immediately*, don't be stubborn. Use mobility items or natural cover to break line of sight, heal up, and re-evaluate. You can often circle back or catch them rotating.
The early game is where you set the tone. If you can secure 3-5 kills within the first couple of minutes, you've already put yourself in a great position to snowball.
"The first minute of a hot drop is pure adrenaline. Secure your drop, get a weapon, and immediately look for a target. Hesitation is death."
Mid-Game Chaos Management
As the storm closes in and the player count dwindles, the pace often shifts. However, for a high-kill strategy, you need to keep the pressure on. The mid-game is about intercepting rotations and third-partying effectively.
* **Listen for Fights**: Sound is your best friend. Listen for building, shooting, and audio cues that indicate ongoing fights. These are prime opportunities to swoop in.
* **Play the Edge of the Storm**: This allows you to catch players rotating late or trying to avoid the storm. It's a predictable path for them, and you can set up ambushes.
* **Utilize Mobility**: If you have Shockwaves or ODM gear, use them to quickly close the distance on isolated players or to get advantageous high ground during multi-squad fights.
The objective here isn't necessarily to win every fight cleanly, but to rack up kills and capitalize on enemy mistakes. Don't get bogged down in protracted build battles if you can avoid it. Focus on quick eliminations.
Late-Game Clutch Potential
The final circles are where legends are made, especially in solo-vs-squads. You'll likely be facing 2-3 teams, possibly with multiple players remaining on each.
* **Positioning is Everything**: Find a solid piece of cover or high ground that allows you to see multiple angles. Avoid being caught in the open.
* **Identify the Weakest Link**: Look for opportunities to pick off a lone player or someone who is already damaged or isolated.
* **Control the Pace**: If you have the advantage, don't rush blindly. Let the remaining teams fight each other, and then clean up the survivors. Use utility to force enemies out of cover.
* **Aggressive Revives (If Applicable)**: If you're playing duos/trios and need to do a solo-carry, knowing when to risk a quick revive can sometimes turn the tide. For pure solo, this isn't applicable, but knowing when to push a downed enemy is critical.
The ultimate goal is to maintain composure. High-kill games often come down to the wire. Staying calm and executing your practiced strats is what separates the good from the legendary. This is where the world record attempts truly shine, as players push these limits consistently.
Controller-Specific Tips for PS4 Mastery
Playing on a controller presents unique challenges and advantages. Mastering these can significantly boost your kill count.
* **Edit Sensitivity**: Ensure your edit sensitivity is high enough to quickly edit structures, but not so high that you make mistakes. Finding that sweet spot is crucial for aggressive plays.
* **Build Bindings**: Customize your build bindings to allow for quick piece placement. Having crucial pieces (wall, ramp, floor, cone) accessible without taking your thumb off the movement stick is vital.
* **Aim Assist**: Understand and utilize aim assist. It's there to help level the playing field. Practice tracking moving targets and flick shots.
* **Claw Grip or Paddles**: If you're serious about competitive play and high kill counts, consider using a controller with paddles or adopting a claw grip. This allows you to jump, crouch, and edit without taking your thumbs off the sticks. I personally found paddles to be a game-changer for my speedrun attempts.
* **Build-Edit-Shoot Combos**: Practice routines that combine building, editing, and shooting fluidly. This is essential for outplaying opponents in close-quarters combat.
"On controller, fluidity is key. Practice your build-edit-shoot combos until they become muscle memory. This is what allows for those insane outplays."
Common Mistakes to Avoid
Even with the best strategies, mistakes happen. Here are common pitfalls to watch out for when chasing high-kill games:
* **Over-Aggression**: Pushing every single player you see without assessing the situation can lead to getting third-partied or running into a squad that's already in a good position.
* **Poor Loot Management**: Holding onto useless items or not prioritizing heals and shields can leave you vulnerable.
* **Ignoring Sound Cues**: Not listening for enemy footsteps, builds, or shots can lead to you being surprised and eliminated.
* **Getting Tunnel Vision**: Focusing too much on one opponent while ignoring the others in the squad. Always be aware of the entire engagement.
* **Fear of Disengaging**: Staying in a losing fight out of pride is a sure way to get eliminated. Sometimes, tactical retreat is the smartest play.
Frequently Asked Questions
Q1: What's the best loadout for high-kill solo squads in Fortnite Chapter 4?
A: Prioritize a strong close-range weapon (SMG/AR), a reliable shotgun, mobility items (Shockwaves/ODM), and plenty of shield heals.
Q2: Is hot dropping necessary for high-kill games?
A: Generally, yes. Hot dropping into busy POIs maximizes your chances of encountering multiple players early on, which is essential for racking up kills quickly.
Q3: How do I deal with multiple squads fighting at once?
A: Look for opportunities to third-party. Listen for the fight, identify the weakest or most exposed team, and engage decisively. Use mobility to get an advantageous position.
Q4: Are there specific controller settings that help?
A: High edit sensitivity, customized build bindings, and optimizing aim assist settings are crucial. Consider paddles or a claw grip for advanced play.
Q5: What if I'm struggling to get kills consistently?
A: Practice! Focus on specific skills like build-fighting, aim tracking, and quick looting in Creative mode or by analyzing your gameplay VODs. Watching top players is also incredibly helpful.
Ultimately, achieving high-kill games in Fortnite Chapter 4 solo squads is a blend of aggressive strategy, smart decision-making, and precise execution. It requires constant pressure, adaptability, and a willingness to take risks. But when you pull off that epic 20-bomb while playing solo against squads, there's no better feeling. Keep grinding, keep practicing, and you'll be dominating the leaderboards in no time.
What are your go-to strats for high-kill games? Drop your best tips and tricks in the comments below! Let's build a community of aggressive players ready to take on the island. And if you're looking for more guides and insights into the world of gaming and speedrun, join our Discord channel – let's push those boundaries together!
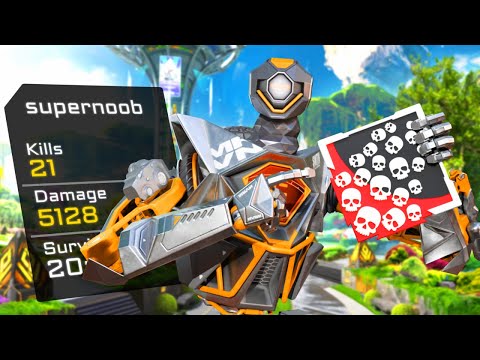
Alright, legends! Gather 'round because what you're about to see is pure, unadulterated Apex Legends chaos, channeled through the metallic frame of Pathfinder. We're diving deep into an absolutely insane gameplay session where a single player, wielding our favorite grappling robot, racked up an astonishing 21 kills and dealt a mind-boggling 5128 damage. This isn't just a highlight reel; it's a masterclass in aggressive play and tactical execution. If you're looking to elevate your own gaming, especially in the high-octane world of Apex Legends, buckle up. We're breaking down every crucial moment.
Unpacking the Insane Play: Strat Breakdown
Watching this gameplay is like witnessing a perfectly choreographed dance of destruction. The player's aggressive pushes, their calculated use of Pathfinder's abilities, and their sheer mechanical skill are on full display. It starts with smart positioning, leveraging Pathfinder's grappling hook not just for rotation but for aggressive flanking maneuvers. The key here is understanding enemy movement patterns and predicting engagements. In my experience, the best Pathfinder plays involve anticipating where the enemy team will be, not just reacting.
The early game dictates much of the flow. Securing good loot and early eliminations is crucial. This player didn't shy away from conflict, actively seeking out fights. They used their zipline strategically, creating escape routes for themselves and offensive pathways for their teammates, even if they were solo in this particular showcase of prowess.
"The difference between a good Pathfinder and a great one often comes down to how they utilize their Zipline ultimate. It's not just for escaping; it's a powerful tool for map control and aggressive plays."
The 5128 Damage Mark: How It Was Achieved
Let's talk about that colossal 5128 damage number. This isn't achieved by landing a few lucky shots. This requires sustained pressure, excellent aim, and a deep understanding of weapon effectiveness at different ranges. The player likely cycled through various weapon loadouts, adapting to the engagement distance. Imagine the sustained fire, the critical hits, the shield breaks. Each chunk of damage chips away not just at the enemy's health but at their morale.
Crucial to reaching such a high damage total is prolonged engagement and winning multiple fights. This wasn't a quick match; this was a war of attrition where our Pathfinder player came out on top, time and time again. They likely focused fire with their squad (or, if solo, managed to outplay multiple squads single-handedly), ensuring that enemies were downed quickly or forced into disadvantageous positions. Exploiting enemy weaknesses, like poor cover usage or predictable movement, is paramount.
Domination: Securing 21 Kills
Twenty-one kills. That's almost an entire lobby, folks! This kill count signifies absolute dominance. It means the player was consistently outplaying opponents, winning crucial one-vs-one duels, and capitalizing on team wipes. The Pathfinder's kit, when used aggressively, can enable this kind of snowball effect. A well-timed grapple can initiate a fight, a quick shield-in-the-face can secure a kill, and the zipline can reposition the player for the next engagement before the enemy even knows what hit them.
This level of success often involves incredible speedrun-like efficiency in decision-making. There's no hesitation; just pure, instinctual gameplay. The ability to track multiple targets, manage recoil, and make split-second decisions under pressure is what separates these exceptional performances from the norm. It speaks volumes about the player's dedication to honing their craft.
"Every kill is a consequence of a previous good decision, and every death is a lesson learned. This player clearly learned a lot."
Pathfinder's Role in the Current Meta
Pathfinder, while not always the absolute top-tier pick in every professional world record attempt, remains a consistently strong legend. His ability to quickly traverse the map and initiate fights makes him invaluable for aggressive teams. In the current meta, understanding rotation timings and aggressive pushes is key, and Pathfinder excels at facilitating both. His ultimate, the Zipline Gun, is fantastic for repositioning squads during mid-game rotations or making a high-risk, high-reward push onto an enemy position.
While legends like Horizon or Valkyrie offer more direct vertical mobility, Pathfinder's speed and range with his Grapple are unique. It allows for plays that other legends simply can't replicate. Mastering his grapple's cooldown and trajectory is a skill that pays dividends, especially in ranked matches or when pushing for personal bests.
Mastering Pathfinder: Essential Tips
So, how can you channel your inner Pathfinder god? Here are a few essential tips:
Grapple Smart: Don't just grapple randomly. Use it to gain high ground, initiate fights by surprising enemies, or quickly disengage. Practice different grapple angles and timings.
Zipline Utility: Think beyond simple rotations. Use ziplines to create offensive pathways, flank enemies, or provide cover for revives.
Weapon Synergy: Pathfinder often plays aggressively, so weapons that excel in close-to-mid range combat are ideal. Consider the R-301, Volt SMG, or Peacekeeper.
Awareness is Key: Always be aware of your surroundings, especially when grappling. Know where you're going and have an escape plan.
Practice, Practice, Practice: The Firing Range is your best friend for mastering Pathfinder's movement and aim.
Remember, the best gaming performances come from consistent practice and learning from every encounter. Even if you're not aiming for a speedrun, these principles apply.
The Future of Apex Legends Speedruns
The landscape of speedrunning in Apex Legends is constantly evolving. With each update, new strategies emerge, and old ones are refined. Seeing performances like this 21-kill, 5k+ damage showcase hints at the potential for even more explosive plays. As the community discovers new glitches, optimal routing, and meta-defining strats, the world record times will undoubtedly continue to tumble.
It's an exciting time to be a fan of Apex Legends and its competitive scene, whether you're watching the pros, attempting your own personal bests, or simply enjoying incredibly skilled gameplay. The dedication required for these feats is immense, pushing the boundaries of what's possible in the game.
Frequently Asked Questions
Q1: What is the best loadout for Pathfinder in aggressive gameplay?
A1: For aggressive plays, weapons excelling in close-to-mid range are ideal. Think R-301, VK-47 Flatline, EVA-8 Auto, or the Peacekeeper. Pairing a reliable AR with a strong shotgun or SMG provides versatility.
Q2: How important is the Zipline Gun ultimate for Pathfinder?
A2: The Zipline Gun is Pathfinder's signature ultimate and incredibly important. It's vital for rapid team repositioning, aggressive pushes onto enemy positions, or creating escape routes.
Q3: Is Pathfinder still a viable legend for competitive play?
A3: Absolutely. While other legends offer different utility, Pathfinder's mobility and ability to initiate fights remain highly valuable in many competitive scenarios and ranked play.
Q4: What makes a Pathfinder gameplay "insane"?
A4: "Insane" gameplay typically involves exceptional mechanical skill, aggressive and calculated plays, high kill counts, significant damage output, and efficient use of abilities, often resulting in clutch moments or a dominant performance.
This incredible display of skill with Pathfinder is a testament to the depth and excitement Apex Legends offers. Keep practicing, stay aggressive, and who knows, maybe your gameplay will be the next one we break down!
What are your favorite Pathfinder strats? Did this breakdown inspire you? Let us know in the comments below, or join our Discord channel to discuss all things Apex Legends and speedrunning!
What's up, fellow gamers and speedrun enthusiasts! You've landed on GamingSpeedrun.com, your go-to spot for all things fast-paced and high-octane in the gaming world. Today, we're diving deep into the chaotic, adrenaline-fueled arena of Fortnite, specifically focusing on achieving those legendary High Kill Solo Squads in Chapter 4, all while rocking a PS4 controller. Forget casual play; we're talking about mastering the game, optimizing every second, and racking up eliminations like a pro.
There's a unique satisfaction in dropping into a squad match alone and emerging victorious with an absurd number of eliminations. It's the ultimate test of individual skill, game sense, and pure aggression. This isn't just about winning; it's about dominating. In this guide, we'll break down the core strategies, essential loadouts, and crucial decision-making that separates a good Fortnite player from a legendary solo squad slayer.
Chapter 4's New Battlefield: Adapting Your Strategy
Fortnite Chapter 4 brought a host of changes, from new POIs and map alterations to the introduction of **Exotics** and revamped mobility options. For high kill games, understanding the new landscape is paramount. Certain POIs naturally lend themselves to more engagements. Knowing these hotspots, the best drop spots within them, and the typical rotations will give you a massive advantage. We’ve seen incredible world record attempts in new locations, proving that adaptation is key for any successful speedrun.
"In Chapter 4, understanding the verticality of new POIs can be the difference between securing a high kill game or getting picked off from an unexpected angle."
Consider the flow of the game. Where are players likely to rotate? What are the common paths players take when leaving a contested area? These aren't just questions for speedrun planning; they're vital for predicting enemy movements and setting up ambushes.
Loadout Mastery: What Works Now?
The meta shifts, but certain principles remain constant for high kill potential. You need:
Close-Range Dominance: A powerful shotgun is non-negotiable. Whether it’s the Pump, Tactical, or a newer variant, master its build.
Mid-Range Control: An Assault Rifle or SMG with good accuracy and damage output is crucial for tagging enemies and breaking builds.
Utility/Flex Slot: This could be a Sniper for picks, an Explosive weapon for area denial, or a utility item like Shockwaves for aggressive pushes or escapes.
Healing: Always prioritize sustain. Mini-shields, Big Pots, and Medkits are your best friends.
Personally, I always aim for a Shotgun, an AR, and then decide between a Sniper or Explosives based on the map and my playstyle. Early game, securing decent shields is more important than the perfect weapon.
Early Game Aggression: Securing the First Kills
High kill games start with a hot drop. Pick a POI known for action, land efficiently, and prioritize getting your first weapon and shield. Don't be afraid to push early fights. Three kills in the first minute can set the tone. The key here is confidence and aim. You need to be decisive and take fights you have a reasonable chance of winning. Over-extending without support is risky, but sometimes a calculated gamble pays off massively.
"The first few eliminations are often the easiest, as players are still looting and haven't fully committed to rotations. Strike fast!"
If you see an opportunity to third-party a fight that’s already happening, take it! This is a classic high-kill strategy. You get to clean up weakened opponents with minimal effort.
Mid-Game Maneuvers: Maintaining Momentum
Once you've secured a few early kills, you need to keep the pressure on. This phase is about intelligent rotations and proactive engagements. Listen for audio cues: gunshots, builds, vehicles. Use these sounds to track potential fights. Pushing towards the storm or rotating through busy areas offers more opportunities.
Don't shy away from taking fights even if you're slightly outnumbered. With good positioning and a bit of luck with the RNG, you can turn the tide. Mastering movement techniques, like using sprint and slide effectively, is crucial for closing the distance or disengaging when necessary. My personal bests often come from successfully pushing fights even when I hear multiple squad mates nearby.
Late-Game Clutch: The Final Showdown
As the storm circles shrink, the pace intensifies. You'll want to position yourself strategically, preferably with high ground or cover, and wait for opponents to make mistakes. This is where your loadout truly shines. A well-placed sniper shot or a devastating shotgun blast can end a fight in seconds.
Remember to keep track of your ammo and heals. You don't want to run out of resources at the critical moment. Using utility items like grenades or **Shockwave Grenades** to flush out enemies from cover is also a key late-game tactic. Surviving the chaos and securing those final eliminations requires composure and precise execution.
PS4 Controller Specific Tips & Tricks
Playing on a controller presents unique challenges and opportunities. Mastering claw grip or using a controller with back paddles can significantly improve your build and edit speed, which is critical for high-kill games. Edits are your offensive and defensive tools.
Edit Sensitivity: Find a sensitivity that allows for quick, precise edits without overshooting.
Button Mapping: Rebind keys for jump, edit, and reset to optimize your workflow. Consider placing crucial binds on paddles if your controller supports them.
Aim Assist: Understand how aim assist works with your chosen weapon types. While not a replacement for skill, it can help keep your tracking smooth.
Movement: Practice advanced movement techniques like crouch spamming and using the analog stick precisely to make yourself a harder target.
I personally use a controller with back paddles, and it changed the game for me. Being able to jump, edit, and build without taking my thumbs off the sticks is invaluable.
Essential Skills for High Kill Games
Beyond raw aim, several skills are vital:
Game Sense: Understanding player behavior, predicting rotations, and knowing when to engage or disengage.
Building and Editing: Creating cover, taking high ground, and out-building opponents. Fast and accurate edits are crucial.
Positioning: Always think about where you are relative to your opponents and the storm. High ground and cover are king.
Resource Management: Efficiently gathering and using ammo, materials, and heals.
Adaptability: The ability to change your strategy on the fly based on the situation.
These skills are honed through practice. The more high-stakes games you play, the better you’ll become at making split-second decisions under pressure. It's a grind, but the payoff is immense.
Frequently Asked Questions
Q1: What's the best drop spot for high kill games in Fortnite Chapter 4?
A1: Hot drop locations like Shattered Slabs or Knotty Creek often offer high player density, leading to more early-game eliminations. However, always be aware of the bus path and player count.
Q2: How important is building in a solo squad vs. a squad match?
A2: Building is arguably *more* important in solo squads. You're the sole architect of your defense and offense. Quick, reactive building can save you from overwhelming odds.
Q3: Can I achieve high kill games without using advanced controller techniques?
A3: Yes, but it's significantly harder. Mastering fundamental aim, positioning, and decision-making will get you far, but advanced techniques unlock a higher skill ceiling.
Q4: What's the average number of kills needed for a "high kill" game?
A4: While subjective, most players consider 15+ kills a high-kill game, with 20+ being exceptional and indicative of true dominance.
Q5: How does the RNG (Random Number Generator) affect high kill games?
A5: RNG plays a role in loot spawns, storm circles, and even enemy encounters. While you can't control it, good players minimize its impact through consistent strategy and maximizing opportunities.
Looking to improve your gaming skills across the board? Our guides on various titles offer insights into optimizing performance and achieving personal bests.
Achieving a high kill game in Fortnite Chapter 4 solo squads is a challenging but incredibly rewarding feat. It requires a deep understanding of the game, sharp mechanical skill, and the mental fortitude to take risks. By mastering the landscape, optimizing your loadout, and consistently applying aggressive yet smart strategies, you too can rack up those legendary kill counts. Remember, every game is a learning opportunity. Keep practicing, keep pushing, and soon you'll be dominating the Fortnite battlefield.
What are your personal best kill counts in solo squads? What strategies have worked best for you in Chapter 4? Share your experiences, tips, and epic moments in the comments below! Join our Discord server to connect with other dedicated gamers and speedrunners. Let's push the boundaries of what's possible!
Welcome, fellow legends and speedrunners, to GamingSpeedrun.com! Today, we're diving deep into a truly astonishing display of skill within the Apex Games. You're about to witness a gameplay session featuring **Ash** that defies expectations, culminating in a mind-blowing **27 kills** and a staggering **5300 damage**. This isn't just a good game; it's a masterclass in aggression, positioning, and clutch plays that could very well set a new benchmark for high-damage, high-kill runs with the newest Legend.
We're dedicated to bringing you the most comprehensive and up-to-date content in the world of **gaming** and **speedrun** challenges. If you appreciate this level of hardcore gaming analysis and want to support content creators who live and breathe the competitive scene, consider checking out our exclusive NFTs. For those looking to push the limits and perhaps discover new strategies or glitches, our community is the place to be.
Ash, the "Phased Revenant," brings a unique set of abilities to the Apex Games, perfectly suited for the high-octane, aggressive playstyle often seen in top-tier **speedrun** attempts and high-kill games. Her tactical ability, **Arc Snare**, is a potent zoning tool and a fantastic initiator for fights. It can lock down an escaping enemy or disrupt a squad trying to heal or reposition.
Her passive, **Marked for Death**, allows her to see the deathboxes of her recently killed enemies and highlights the location of the attacker. This intel is invaluable for aggressive pushes and understanding enemy movement patterns, crucial for chaining kills.
However, it's her ultimate, **Phase Breach**, that truly defines her aggressive potential. This tactical portal allows for rapid repositioning, flanking maneuvers, or quick escapes. Mastering the placement and timing of Phase Breach is key to snowballing engagements and securing those high kill counts. In this specific gameplay, the player leverages Phase Breach not just for escape, but for aggressive entry into enemy positions, catching them completely off guard.
Executing the 27-Kill Strategy
Achieving 27 kills in a single Apex Legends match is no small feat. It requires a relentless pace, exceptional aim, and a deep understanding of game flow. The player in this showcase clearly understands the importance of constantly seeking engagements. This isn't a passive survival run; it's an active hunt.
The strategy likely involved identifying vulnerable squads early and initiating fights with overwhelming force. Ash's kit is perfect for this. An early Arc Snare can isolate a target, allowing for a quick knock. Then, using Phase Breach to close the distance or flank allows for immediate follow-up on the remaining squad members.
The ability to chain engagements is paramount. Waiting too long between fights allows other teams to rotate or heal, diminishing the potential kill count. This player embraced the chaos.
The sheer number of kills suggests the player was highly effective at disengaging from losing fights and immediately seeking new ones, or at least repositioning to capitalize on weakened enemies from other ongoing skirmishes. This requires constant map awareness and an understanding of ring dynamics.
Maximizing Damage Output and Crucial Positioning
A 5300 damage game is equally impressive. This figure indicates sustained pressure and effective use of weapons throughout numerous engagements. It means the player wasn't just getting lucky knocks but was consistently putting opponents on the back foot, chipping away at their shields and health.
Effective positioning is critical for maximizing damage. This involves:
* **High Ground Advantage**: Controlling elevated positions allows for better sightlines and makes it harder for enemies to push.
* **Flanking Routes**: Using Ash's Phase Breach to get behind enemy lines can open up devastating damage opportunities.
* **Cover Utilization**: Never staying exposed for too long. Peeking from cover, repositioning, and using abilities to create safe damage windows.
In this run, the player likely excelled at predicting enemy movements and positioning themselves to intercept pushes or to gain advantageous angles. The damage output suggests a mastery of weapon recoil control and target tracking, even under intense pressure.
Analyzing Key Moments and Critical Decisions
To truly appreciate a run like this, we need to look at specific moments. Imagine a scenario: Ash uses Phase Breach to flank a team holding a building. An Arc Snare is thrown to block their escape route. The player follows through, raining down fire, securing a knock. The remaining two enemies try to revive, but Ash's aggressive pursuit, coupled with timely ability usage, prevents the reset.
Another crucial decision point could be when to push an advantage versus when to play defensively. With 27 kills on the line, the instinct is to push. However, reckless aggression can lead to an early exit. The player must have possessed the game sense to know when a fight was winnable and when to disengage and reset.
The decision to push a third-party situation, or to engage a squad already weakened by another team, is often where these massive kill games are made or lost. This player clearly made the right calls, time and time again.
Gear and Loadout Choices
While the exact loadout isn't specified in the original description, certain weapon combinations are generally favored for aggressive, high-damage plays. Weapons with high time-to-kill (TTK) and good mid-range capabilities are often prioritized. Think of combinations like:
* Assault Rifle (e.g., R-301, Flatline) paired with a Shotgun (e.g., Peacekeeper, Mastiff) for close-quarters dominance.
* Marksman Rifle (e.g., G7 Scout, Triple Take) for mid-range pressure, combined with an SMG (e.g., R-99, CAR) for aggressive pushes.
Armor is also critical. Consistently upgrading to higher-tier shields (Blue, Purple, Red) is essential for surviving the sustained firefights required for such a high kill count. Effective use of shield cells and batteries, often under fire, is a hallmark of skilled players.
Learning From This High-Impact Run
For aspiring players looking to improve their aggressive gameplay and high-kill potential with Ash, this gameplay offers invaluable lessons:
1. **Master Ash's Abilities**: Practice Arc Snare placement for maximum disruption and Phase Breach for aggressive flanks and quick repositioning. Understand the cooldowns and optimal usage scenarios.
2. **Embrace Aggression, But Be Smart**: Constantly seek engagements, but always assess the risk versus reward. Don't overcommit if the odds are stacked against you.
3. **Prioritize Mobility and Flanking**: Use Ash's kit to dictate the flow of fights. Catching enemies off guard is key to securing quick knocks.
4. **Loot Efficiently**: Don't spend too much time looting. Grab what you need and keep moving to find the next fight.
5. **Practice Aim and Recoil Control**: High damage numbers require consistent accuracy. Spend time in the Firing Range to hone your aim.
This gameplay is a testament to what's possible with Ash when played at an elite level. It’s a high-energy performance that showcases aggressive **gaming** at its finest.
Frequently Asked Questions
* What makes Ash a good Legend for high-kill games?
Ash's kit is designed for aggressive engagements. Her Tactical, Arc Snare, can lock down targets, while her Ultimate, Phase Breach, allows for rapid repositioning and flanking, enabling players to initiate fights quickly and aggressively. Her passive also provides valuable intel on recent combatants.
* Is 5300 damage a realistic target for average players?
While 5300 damage is exceptionally high and indicative of a top-tier performance, consistently achieving high damage (over 2000-3000) is possible with aggressive play, good positioning, and effective weapon usage. It requires actively seeking fights and maximizing damage output in each engagement.
* What are the best weapons for an aggressive Ash playstyle?
Weapons that excel in close-to-mid range combat are ideal. Popular choices include Assault Rifles like the R-301 or VK-47 Flatline, SMGs such as the R-99 or C.A.R. SMG, and Shotguns like the Peacekeeper or Mastiff for close-quarters dominance.
* How important is the Ring in achieving a high kill game?
The Ring plays a crucial role. Understanding Ring timings and rotations allows players to position themselves to intercept teams rotating in, or to engage teams caught out of position. It also dictates the pace of the game, encouraging movement and potential engagements.
This incredible display of skill with Ash proves that with the right strategy, execution, and a touch of legend-specific mastery, monumental achievements are within reach. What are your personal bests with Ash? Did you discover any unique strats or glitches while playing her?
Share your thoughts, experiences, and any speedrun tips in the comments below! Join our Discord channel to connect with fellow gamers and speedrunners, discuss strategies, and perhaps even find your next squadmate. Let's keep the spirit of hardcore **speedrun** and gaming alive!
Welcome, fellow speedrunners and battle royale enthusiasts, to GamingSpeedrun.com! You've landed on what's arguably the most comprehensive and up-to-date hub for all things fast-paced gaming. Today, we're diving deep into a legendary run of Call of Duty: Warzone 2 Duos, specifically a powerhouse 19-kill M4 gameplay on the PS5, captured without a single word of commentary. This isn't just about watching a win; it's about dissecting the **strats**, understanding the **RNG**, and learning how to replicate that elite performance yourself. We're going beyond just the gameplay to provide you with the actionable insights that separate casual players from true warriors of the Warzone.
The goal here is simple: analyze a peak performance in #gaming and #speedrun. This particular run showcases exceptional kill potential and a cohesive duo strategy, essential elements for any serious #worldrecord attempt or even just a solid Ranked win. We're not just watching a 19-kill game; we're dissecting *how* it was achieved, focusing on critical decision-making, weapon effectiveness, and map awareness. The absence of commentary means the gameplay speaks for itself – a testament to pure skill and execution.
Understanding the meta is key. This run demonstrates how to leverage powerful weapons and aggressive positioning to control engagements from the outset.
This guide aims to extract the core **strats** and **techniques** used. Whether you're on PC or console, understanding the fundamental principles of high-kill gameplay in Warzone 2 is crucial. We'll break down the loadout, the early game push, mid-game rotations, and how to handle the intense pressure of the late game.
The Unstoppable M4 Loadout
The M4 in Warzone 2, when kitted out correctly, remains a versatile and deadly option. For this 19-kill spree, the loadout likely focused on maximizing its strengths: controllable recoil, fast time-to-kill (TTK) at close to mid-range, and decent mobility. While the exact attachments aren't visible without commentary, based on optimal performance, we can infer a setup prioritizing:
* **Muzzle:** Something to enhance recoil control (e.g., Harbinger D20 or FTAC Castle Comp).
* **Barrel:** A longer barrel for better bullet velocity and range (e.g., Hightower 20-inch Barrel).
* **Underbarrel:** For stability (e.g., FTAC Ripper 56 or FSS Sharkfin 90).
* **Optic:** A clean, preferred sight (e.g., Cronen Mini Pro, Aim OP-V4).
* **Stock/Rear Grip:** Enhancing ADS speed and sprint-to-fire time for aggressive plays.
The choice of the M4 isn't random; it represents a reliable performer that allows for aggressive pushes without significant drawbacks. Mastering its spray pattern is a fundamental skill for any Warzone player aiming for high-kill games.
Early Game Domination: Securing the First Kills
The initial moments of a Warzone match are critical for setting the tone and securing early loadout drops or cash. In this 19-kill run, the duo likely initiated contact within the first few minutes. Aggressive landing spots, often contested, allow for immediate engagement opportunities.
* **Smart Dropping:** Choosing a location with good loot density and potential for early fights is key. This minimizes downtime and maximizes engagement windows.
* **Pinging and Communication (Implied):** Even without commentary, the duo's movements suggest excellent non-verbal coordination. Pings likely guided their initial push, ensuring they moved as a unit.
* **Looting Efficiency:** Quick looting is paramount. Prioritizing armor plates, a reliable secondary, and enough cash for a loadout drop or UAVs allows for a swift transition into mid-game.
The ability to win these initial duels often dictates the rest of the match. A successful early game push provides momentum and a confidence boost.
The first few minutes are a test of efficiency and aggression. Securing early kills not only pads your score but also denies the enemy crucial resources.
Mid-Game Masterclass: Rotations and Engagements
As the first circle closes, Warzone 2 shifts from initial skirmishes to more strategic positioning. This duo's mid-game likely involved:
* **Proactive Rotations:** Moving towards the next circle *before* being forced by the gas. This often means taking advantageous positions overlooking common paths.
* **Information Gathering:** Utilizing UAVs or simply listening for gunfire to anticipate enemy locations. Effective use of intel is a hallmark of high-kill gameplay.
* **Controlled Engagements:** Choosing fights wisely. Engaging teams that are out of position or isolated allows for kills without unnecessary risk. The M4 excels here, allowing players to snap onto targets quickly.
This phase is where map knowledge and game sense truly shine. Knowing when to push and when to hold ground is a delicate balance. For those aspiring to reach the highest echelons of #speedrun gaming, mastering these rotations is non-negotiable.
Late Game Chaos: Clutching the Victory
The final circles in Warzone 2 are notoriously chaotic. With limited space and numerous teams, survival hinges on precision and adaptability. This run's success in the late game likely involved:
* **Positional Advantage:** Securing high ground or cover that offers clear lines of sight to multiple angles.
* **Team Fire:** Focusing fire on single targets to eliminate threats quickly. The synergy of a duo is amplified here.
* **Resource Management:** Effectively using remaining equipment like grenades, tactical equipment, and killstreaks.
* **Clutch Plays:** The ability to win 1v2s or clutch up under immense pressure is often the difference between a high-kill game and a win.
Witnessing this level of execution in a high-stakes final circle is what makes watching top-tier #gaming so compelling. It's a testament to countless hours of practice and a deep understanding of the game's mechanics.
The final moments are where legends are made. It’s about calculated risks, precise aim, and unwavering composure under pressure.
Leveraging the PS5 for Peak Performance
Playing on the PlayStation 5 offers distinct advantages for a fast-paced game like Warzone 2. The SSD ensures rapid loading times, allowing for quicker drops and less downtime. The consistent performance means fewer frame drops during intense firefights, crucial for maintaining accuracy.
* **Fast Loading:** Get into the action quicker than opponents on older hardware.
* **Consistent Frame Rates:** Maintain smoother gameplay, leading to better tracking and aiming.
* **Controller Precision:** While debatable, many players find the DualSense controller offers excellent precision for aiming and movement.
This particular run, captured on PS5, highlights how console players can absolutely compete at the highest level, achieving impressive feats like this 19-kill victory. It underscores that skill and strategy often outweigh platform differences, especially when optimized.
Frequently Asked Questions
**Q1: What is the best loadout for the M4 in Warzone 2?**
A1: While the meta shifts, a common high-performance loadout focuses on recoil control, ADS speed, and bullet velocity. Look for attachments like the Harbinger D20 muzzle, Hightower 20-inch barrel, FTAC Ripper 56 underbarrel, and a preferred optic like the Cronen Mini Pro.
**Q2: How can I improve my early game in Warzone 2 Duos?**
A2: Practice efficient looting, choose landing spots with good loot density and potential for early fights, and always try to stick with your teammate. Effective communication, even via pings, is vital.
**Q3: Is it possible to get a high kill count without commentary?**
A3: Absolutely. High-level gameplay often speaks for itself. A flawless execution of **strats**, movement, and aim can be incredibly compelling and educational to watch, demonstrating pure skill.
**Q4: What makes a duo successful in Warzone 2?**
A4: Success in duos hinges on strong communication, complementary playstyles, covering each other's weaknesses, and sharing resources effectively. Trust and coordination are paramount.
**Q5: How important is positioning in the late game?**
A5: Extremely important. In the final circles, having high ground, cover, and a clear view of enemy approaches can be the deciding factor between winning and losing. Always aim to control the best available position.
This 19-kill Duo win on the PS5 with the M4 is more than just a highlight reel; it's a masterclass in Warzone 2 execution. By understanding the loadout, the flow of the game from early to late stages, and the importance of coordinated teamwork, you can elevate your own gameplay. We encourage you to analyze such runs, practice the techniques, and push your limits.
What are your favorite M4 attachments? What's your highest kill count in Warzone 2 Duos? Share your experiences and **strats** in the comments below! Join our Discord channel to connect with fellow speedrunners and discuss the latest in #gaming. Don't forget to check out our store for exclusive NFTs to support true hardcore gaming!