Are you ready to face the ultimate test in Going Balls? The thrill of speedrunning these increasingly challenging levels is unparalleled, and mastering levels 206 through 210 is a significant milestone. This isn't just about completing the game; it's about pushing your limits, refining your techniques, and achieving that perfect, flawless run. In this guide, I'm going to break down the critical strategies and insights I've learned from countless attempts to help you conquer these specific stages and shave precious seconds off your personal best. Forget just playing the game; we're here to *dominate* it.
Stepping into Level 206 feels like entering a meticulously crafted gauntlet. The core challenge here is **precision**. Every nudge, every twitch of the analog stick matters. You're navigating tight corridors with strategically placed hazards that can instantly end a run. My biggest takeaway from grinding this level was the importance of controlled, short movements.
* **Controlled Inputs:** Instead of wild swings, focus on micro-adjustments. Think less "pushing" the ball and more "guiding" it.
* **Anticipate Obstacles:** The traps aren't random. They follow patterns. Learn these patterns to predict when to slow down or make a sudden, sharp turn.
* **Momentum Management:** While precision is key, don't completely kill your momentum. Find the sweet spot between control and speed. A slight drift can sometimes be your friend to slide past a closing gate.
In my runs, I found that pausing for just a fraction of a second before critical turns often saved me more time in the long run than attempting to power through and risk a reset.
This level is a true test of your ability to react instantly. Practicing different inputs and observing the subtle ways the ball responds is crucial.
Level 207: Mastering the Art of Momentum
Level 207 shifts the focus from pure precision to the dynamic physics of **momentum**. You'll encounter a series of ramps, gaps, and bouncing surfaces that require you to build and maintain speed. Understanding how your ball interacts with these elements is paramount. It's a balancing act between gaining enough speed to clear large distances and retaining enough control to land safely.
* **Ramp Mastery:** Learn the optimal speed to hit each ramp. Too slow, and you won't clear the gap. Too fast, and you might overshoot or lose control on landing.
* **Bounce Pad Strategy:** Utilize bounce pads to their full potential. Sometimes a direct hit is best, other times a glancing blow can set you up for a better trajectory. Experimentation is key here.
* **Air Control:** Once in the air, subtle directional inputs can drastically alter your landing. Practice adjusting your trajectory mid-air to stick those tricky landings.
I noticed that the sound cues for hitting ramps or landing often provide valuable feedback. Listening carefully can help you internalize the feel of optimal momentum.
Don't be afraid to use environmental elements to your advantage. Sometimes, letting the level's design carry you forward is the fastest way. If you're struggling with the physics, checking out some Going Balls physics tutorials can provide visual insights.
Level 208: The Gravity-Defying Challenge
Prepare for a mind-bender in Level 208. This stage plays with **gravity**, forcing you to adapt to walls, ceilings, and shifting orientations. It's a test of your spatial awareness and your ability to think on your feet – or, well, on your ball. Adaptability is your greatest weapon here.
* **Surface Transitions:** The key is smooth transitions between surfaces. Don't fight the gravity shift; work with it. Anticipate when the ball will stick or release.
* **Camera Control:** Efficient camera manipulation is vital. You need to see where you're going *and* where you're coming from. Get comfortable quickly switching your viewpoint.
* **Predicting Trajectories:** With altered gravity, trajectories change. Learn how your ball will move when rolling on a wall versus the ceiling. This requires careful observation and practice.
This level really hammered home how important camera control is in a speedrun. Being able to quickly assess the next path while still rolling is a game-changer.
If you find yourself consistently falling, focus on understanding the *feel* of each surface. What feels different when rolling on a wall compared to the floor? This intuitive understanding is what separates good runs from great ones. For more advanced tips on navigation, consider looking into general speedrun camera control tips.
Level 209: The Twisted Obstacle Course
Level 209 throws a complex **obstacle course** at you, packed with twisting paths, rotating elements, and devious traps. This stage demands patience, strategic planning, and unwavering determination. It's less about raw speed and more about calculated execution.
* **Course Memorization:** This is arguably the most crucial aspect of Level 209. You need to know the layout inside and out. Where are the safe zones? When do the traps activate?
* **Timing the Rotations:** Many obstacles will involve timed elements. Learn the rhythm of rotating platforms and moving barriers. Don't just react; predict.
* **Pathfinding:** Sometimes, the shortest path isn't the safest or fastest. Identify the optimal route that balances speed with risk. Look for shortcuts that skilled players utilize.
I spent a lot of time just watching the level's mechanics without moving my ball, just observing the timing of everything. That 'reconnaissance' phase saved me so many frustration resets.
Patience is a virtue in speedrunning, especially here. Rushing will lead to mistakes. Take a deep breath, execute your plan, and celebrate each successfully navigated obstacle. This level is a fantastic showcase of Going Balls level design intricacies.
Level 210: The Ultimate Speedrun Showdown
And then there's Level 210. This is it. The grand finale of this particular sequence. It synthesizes everything you've learned: the precision of Level 206, the momentum management of Level 207, the adaptive physics of Level 208, and the intricate obstacle navigation of Level 209. It’s the ultimate test of your accumulated skills.
* **All-Round Proficiency:** You can't afford to be weak in any one area. This level demands mastery across the board.
* **Endurance and Focus:** Maintaining peak concentration for the entire duration is critical. The slightest lapse can undo minutes of perfect gameplay. Stay calm, even when things get intense.
* **Adapt and Overcome:** Even with memorization, slight variations or unexpected physics can occur. Be ready to adapt your strategy on the fly. Trust your instincts built from previous practice.
The feeling of finally nailing a Level 210 run after hours of practice is indescribable. It's pure adrenaline and satisfaction. Don't give up!
This is where your hard work pays off. Push through, maintain that focus, and aim for that glorious finish line. Achieving a World Record in a game like this is the dream for many, and this level is a significant step towards that Going Balls world record.
Frequently Asked Questions
Q1: What is the best way to practice these levels for speedrunning?
A1: Focus on one level at a time. Master the core mechanics and memorization for each before moving on. Utilize save states or level select features if available, and review your runs to identify specific areas for improvement.
Q2: How do I deal with the RNG (Random Number Generation) in Going Balls?
A2: While some aspects might seem random, many obstacles have underlying patterns or probabilities. Learn to recognize these patterns and adapt. Sometimes, accepting a less-than-ideal scenario and executing the best possible recovery is faster than resetting.
Q3: Are there any specific controller settings or sensitivities that help?
A3: This is highly personal. Experiment with different sensitivity settings to find what allows for both quick movements and precise control. Some players prefer a slightly lower sensitivity for finer adjustments.
Q4: What are some common mistakes beginners make on these levels?
A4: Common mistakes include being too aggressive and losing control, not respecting the timing of obstacles, poor camera management, and not fully memorizing the level layout. Focus on control and observation first.
Reaching Level 210 and beyond in Going Balls is a testament to your dedication as a speedrunner. These levels test every facet of your skill, from precise inputs to strategic thinking and sheer endurance. Keep practicing, keep refining your **strats**, and don't get discouraged by resets. Every failed run is a learning opportunity.
What are your personal best times for these levels? Do you have any unique tricks or **skips** that have helped you shave off crucial seconds? Share your experiences and strategies in the comments below! Let's build the ultimate community knowledge base for conquering Going Balls. Join our Discord to connect with fellow speedrunners and discuss all things gaming!
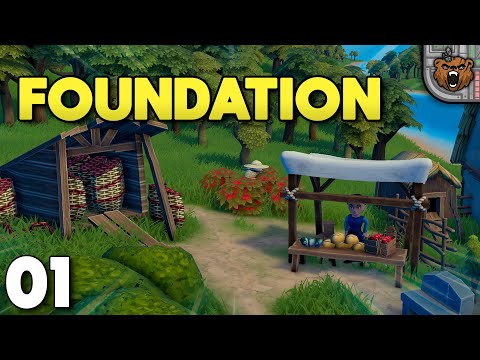
¡Atención, amantes de la estrategia y los speedruns! Si buscas optimizar cada segundo y dominar la construcción de ciudades medievales, prepárate. Hoy nos sumergimos de lleno en la última actualización de Foundation para desentrañar los secretos de la MaraVila. Olvídate de las ciudades desorganizadas; aquí te enseñaremos a crear una metrópoli próspera y estéticamente impecable, digna de un récord mundial.
Antes de colocar el primer adoquín, la clave para una MaraVila exitosa reside en una planificación meticulosa. En mi experiencia, dedicar tiempo a esto evita errores costosos y cuellos de botella más adelante. Piensa en tu ciudad como un organismo vivo, cada parte conectada y funcional.
Zonificación Inteligente: Designa áreas claras para viviendas, comercios, producción (granjas, talleres) y defensa. Esto optimiza el flujo de ciudadanos y recursos.
Red Vial Eficiente: Las carreteras no son solo para el tránsito; son arterias vitales. Planifica una red que minimice distancias y prevenga embotellamientos, crucial para la velocidad en un speedrun. Considera caminos amplios desde el inicio.
Espacio para el Crecimiento: Deja amplios márgenes para la expansión futura. Una ciudad que se siente ahogada limita su potencial y la tuya.
II. El Corazón de tu Imperio: Gestión de Recursos
En Foundation, la gestión de recursos es el pilar del progreso. Una falla aquí puede detener tu avance, y en un speedrun, cada segundo cuenta. El equilibrio es fundamental.
Recursos Clave a Monitorear:
Madera y Piedra: Materiales de construcción primarios. Asegura una cadena de suministro constante.
Alimentos: Esenciales para mantener a tu población feliz y productiva. Diversifica tus fuentes (granjas, pesca, caza).
Agua: Vital para la agricultura y la supervivencia. Ubica pozos o acueductos estratégicamente.
Tejidos y Herramientas: Mejoran la eficiencia de tus trabajadores y desbloquean construcciones avanzadas.
"El error más común es no producir suficientes alimentos básicos al principio. Esto frena todo el desarrollo."
Asegúrate de que tus centros de producción estén cerca de sus fuentes de materia prima y de tus almacenes para minimizar el tiempo de transporte.
III. El Lienzo Perfecto: Eligiendo el Lugar Ideal
La geografía de tu mapa de Foundation es tu lienzo. Elegir la ubicación correcta puede marcar la diferencia entre una partida fluida y una lucha constante.
Proximidad a Recursos Naturales: Bosques densos para madera, canteras ricas en piedra y ríos o lagos para agua y pesca son un gran punto de partida.
Terreno: Busca áreas relativamente planas para facilitar la construcción de edificios y carreteras. Las colinas pueden ser estratégicas para la defensa, pero dificultan la expansión inicial.
Defendibilidad: Si buscas un desafío mayor o planeas defenderte de invasiones, considera ubicaciones con ventajas naturales como cuellos de botella o elevaciones.
Para optimizar un world record, a menudo se busca un balance entre recursos accesibles y un terreno que no entorpezca la construcción rápida.
IV. Manos a la Obra: Edificando la MaraVila
Con la planificación lista y los recursos en camino, es hora de ver cómo tu MaraVila cobra vida. La secuencia de construcción es fundamental para la eficiencia.
Infraestructura Inicial: Comienza con las carreteras principales y los primeros centros de recolección (leñadores, canteros).
Viviendas Básicas: Asegura alojamiento para tus primeros colonos.
Producción de Alimentos: ¡Crucial! Establece granjas, huertos o puestos de pesca lo antes posible.
Comercio y Almacenamiento: Construye mercados y almacenes para gestionar el flujo de bienes.
Edificios Avanzados: Una vez que la base esté sólida, introduce talleres, iglesias y edificios cívicos.
Recuerda que cada edificio tiene un coste de mantenimiento. No construyas en exceso hasta que tus ingresos lo justifiquen. El speedrun exige un crecimiento constante pero controlado.
V. Secretos de Speedrunner: Trucos y Atajos
Para aquellos que buscan pulverizar sus tiempos, hay estrategias específicas que van más allá de la construcción estándar. Estos son los strats que marcan la diferencia:
Priorización de Oficios: Identifica qué oficios son más rentables o necesarios en las primeras etapas. A veces, enfocarse en un par de ellos al principio es más eficiente que distribuirse.
Rutas de Transporte Optimizadas: Observa cómo se mueven tus trabajadores. ¿Hay atajos? ¿Están sus rutas demasiado largas? Reorganiza las carreteras y almacenes para minimizar el tiempo de viaje.
Saltarse Construcciones Innecesarias: En un speedrun, solo construyes lo esencial para alcanzar tu objetivo. Investiga qué edificios puedes omitir sin afectar tu meta.
Uso de Atajos de Mapa (si existen): Algunos mapas de Foundation tienen características geográficas que pueden ser explotadas para acortar distancias o acelerar la recolección.
"El RNG (Random Number Generation) puede jugar un papel, pero una buena estrategia de speedrun minimiza su impacto y maximiza tus posibilidades."
VI. Preguntas Frecuentes (FAQ)
¿Cuál es la mejor forma de gestionar el agua en Foundation?
Para un comienzo rápido, ubica pozos cerca de las zonas de cultivo. Si buscas una solución más escalable y estéticamente agradable para tu MaraVila, considera construir acueductos que conecten fuentes de agua lejanas a tu ciudad.
¿Cómo evito que mi población se queje de la falta de bienes?
Asegúrate de tener suficientes mercados y almacenes bien distribuidos. Produce una variedad de bienes, no solo los básicos. Mejora las casas para aumentar la demanda y la satisfacción.
¿Qué son los "glitches" en Foundation y cómo afectan al speedrun?
Los glitches son errores en el juego que pueden ser explotados para obtener ventajas, como atravesar objetos o duplicar recursos. Los speedrunners a menudo investigan y utilizan glitches conocidos para ahorrar tiempo, aunque esto depende de la categoría de speedrun (glitchless vs. glitched).
¿Es la actualización de la MaraVila significativa para el speedrun?
¡Absolutamente! Las actualizaciones suelen introducir nuevos edificios, mecánicas o balanceos de recursos. Estas modificaciones pueden abrir nuevas strats o hacer que las antiguas sean obsoletas, exigiendo a los speedrunners adaptarse y descubrir las rutas más rápidas.
¿Cuál es el objetivo principal al construir una MaraVila en Foundation?
El objetivo principal es crear una ciudad próspera y funcional que cumpla ciertos hitos de población, economía o desarrollo, dependiendo de los objetivos del mapa o de la categoría de speedrun que estés intentando batir. Una MaraVila bien construida es sinónimo de eficiencia.
Construir la MaraVila perfecta en Foundation es un arte que combina planificación, gestión de recursos y una ejecución impecable. Ya sea que busques un world record o simplemente disfrutar de una experiencia de juego más profunda, aplicar estos principios te llevará al siguiente nivel. ¡Ahora sal y demuestra de qué estás hecho! ¿Tienes tus propios trucos o dudas? ¡Déjalos en los comentarios!
Are you ready to face the hordes and conquer the apocalypse? If you're on the hunt for the absolute best zombie game experience, your search ends with Days Gone. This isn't just another zombie title; it's a masterclass in survival, a thrilling ride that grips you from the first moment and doesn't let go. We're talking jaw-dropping realism, gut-wrenching challenges, and a world that begs to be explored and conquered.
Set in a brutal post-apocalyptic landscape ravaged by a devastating virus, Days Gone thrusts you into the boots of Deacon St. John. He's a former outlaw biker, now a hardened bounty hunter and survivor, navigating a world overrun by the Freakers – humanity's terrifying, mutated descendants. The game's sprawling open world is your playground for survival. Scavenge for precious resources, craft essential gear, and prepare yourself for encounters that will test your every nerve. You'll battle not only the relentless Freakers, each with their own nightmarish abilities and weaknesses, but also desperate human factions clinging to survival.
Hello and welcome, fellow gamers, to GamingSpeedrun! You've stumbled upon what we consider the pinnacle of zombie gaming: Days Gone Gameplay. Prepare for an in-depth look at a title that has captured the hearts of survival enthusiasts and speedrunners alike. This is your ultimate resource for understanding why this game is a must-play, especially if you crave that adrenaline rush of pushing limits and achieving world records.
Deacon's Journey: Gameplay Mechanics
The core gameplay loop in Days Gone is both intense and incredibly rewarding. Deacon isn't just a survivor; he's a force to be reckoned with. You'll have the freedom to meticulously customize your arsenal, from shotguns to sniper rifles, and strategically upgrade Deacon's skills. Want to improve your stealth? Focus on Drifter Skills. Need to dish out more damage? Combat Skills are your go-to. And for traversing the dangerous landscape efficiently, Survival Skills are paramount. This deep customization is key for any successful speedrun, allowing players to tailor Deacon to specific strategies.
Mastering the bike isn't just about transportation; it's a crucial part of your survival and speedrunning strategy. Keeping it fueled and upgraded is non-negotiable.
Your trusty motorcycle, "The Lost Lake," is more than just a vehicle; it's your lifeline. Keeping it fueled, repaired, and upgraded is fundamental. In a speedrun, efficient bike management – knowing fuel routes, repair locations, and optimal upgrade paths – can shave precious seconds, or even minutes, off your total time.
The Horrors of the Freakers
Let's talk about the stars of the show: the Freakers. These aren't your shambling, slow-moving zombies. Days Gone presents a dynamic and terrifying ecosystem. You'll encounter various types:
Swarmer Freakers: The basic, numerous threat. They attack in overwhelming numbers, making horde encounters the game's signature challenge.
Breakers: Hulking monstrosities, incredibly tough and dangerous in close combat.
Reachers: Fast, agile predators that excel at ambushing from a distance.
Newts: Young Freakers found in nests, capable of climbing and attacking from surprising angles.
Understanding their behavior, patrol patterns, and weaknesses is critical not just for survival, but for optimizing movement and avoiding unnecessary combat in a speedrun. Knowing which hordes to avoid and which ones can be manipulated or bypassed is a core speedrunning skill.
Surviving the Open World
The post-apocalyptic Pacific Northwest is a character in itself. Days Gone boasts an incredibly immersive open-world environment. The dynamic day-night cycle isn't just for show; Freaker activity, especially horde behavior, shifts dramatically between day and night. Stealth is often a viable, and sometimes necessary, approach during the darker hours.
The environmental detail, from dynamic weather to realistic lighting, pulls you deep into the world. It’s this immersion that makes every encounter feel significant.
Scavenging for resources – ammo, crafting materials, fuel – is a constant necessity. For speedrunners, efficient route planning for looting is essential. Identifying key resource points and minimizing time spent searching can make a huge difference. The game's attention to detail is staggering, from the way Deacon kicks his bike into gear to the subtle environmental cues that signal danger.
An Engaging Narrative
Beyond the adrenaline-pumping action and survival mechanics, Days Gone weaves a compelling narrative. Deacon's journey is one of loss, loyalty, and resilience. The storyline is filled with unexpected plot twists and genuinely emotional moments that invest you deeply in the fate of Deacon and his allies. While story segments can often be cutscenes that slow down a speedrun, understanding the narrative context helps appreciate the world and Deacon's motivations.
Why Days Gone is a Speedrunner's Dream
So, why is Days Gone such a hot title in the #speedrun community? It boils down to a few key factors:
Massive Scale, Manageable Segments: While the world is vast, key objectives and story beats break the game down into manageable chunks for practice.
Deep Mechanics for Exploitation: The intricate systems – crafting, combat, bike physics, AI behavior – offer numerous opportunities for glitches, skips, and optimized strategies.
Horde Mechanics: Learning to manipulate, outrun, or strategically eliminate Freaker hordes is a unique challenge that defines many speedrun categories.
RNG Factors: While RNG can be frustrating, mastering its impact (like predictable loot spawns or enemy placements) is part of the challenge and skill ceiling.
The constant pursuit of the #worldrecord pushes the boundaries of what's thought possible, with runners discovering new routes and tricks constantly. It's a testament to the game's depth and the dedication of the #speedrunning community.
Essential Speedrunning Strats
Achieving a top-tier run in Days Gone requires meticulous planning and execution. Here are a few common strategies you'll see:
Bike Skips & Jumps: Utilizing the bike's physics to skip large sections of the map or bypass obstacles.
Horde Manipulation: Luring hordes into specific areas, using environmental hazards (like explosive objects), or utilizing stealth to avoid triggering full-on assaults.
Combat Optimization: Efficiently dispatching necessary enemies with minimal ammo and time, often using melee or specific weapon/skill combinations.
Menu/Crafting Exploits: Sometimes, accessing menus or crafting items in specific sequences can save frames or allow for sequence breaks.
Route Planning: The absolute cornerstone. Knowing the fastest path between objectives, factoring in fuel, repairs, and potential threats.
Practice is everything. Mastering the bike controls and knowing exactly when to use a boost or perform a jump is critical for shaving off those vital seconds.
Many runners focus on specific categories, like Any% (finish the game as fast as possible, using any means necessary) or 100% (completing all objectives and collectibles). Each requires a different approach and set of skills.
Frequently Asked Questions
Is Days Gone considered one of the best zombie games?
Absolutely. Its combination of open-world exploration, intense combat against massive hordes, engaging story, and detailed world-building solidifies its place among the top-tier zombie survival games.
What makes Days Gone ideal for speedrunning?
The game's deep mechanics, large open world with exploitable routes, and challenging horde encounters provide ample opportunities for glitches, skips, and optimized strategies that speedrunners love to discover and perfect.
Are there specific glitches or skips that speedrunners commonly use?
Yes, runners often exploit bike physics for massive jumps or sequence breaks, manipulate AI behavior, and utilize menuing tricks to save time during gameplay.
How difficult is it to learn a Days Gone speedrun?
It requires significant dedication. While basic gameplay is accessible, mastering a speedrun involves deep knowledge of game mechanics, precise execution, and extensive practice to optimize routes and strategies.
Can I speedrun Days Gone on any platform?
While speedruns are performed on various platforms, PC often offers the highest potential for optimization due to performance advantages and modding capabilities, though console records are also actively pursued.
Join the Hunt
Days Gone offers an unparalleled zombie survival experience that’s also ripe for competitive #speedrun attempts. Whether you're aiming for a personal best, studying the techniques of world-record holders, or just want to experience the thrill of the apocalypse, this game delivers. Its blend of realism, challenge, and narrative depth makes it a standout title for any gamer.
What are your favorite strategies for surviving the Freaker hordes? Have you attempted a speedrun yourself? Let us know in the comments below! Join our Discord channel to connect with fellow survivors and speedrunners, share your tips, and become part of the vibrant GamingSpeedrun community.
What is the DRG Rich% "Rock" Side Objective Speedrun?
Welcome, fellow dwarves and speedrunning enthusiasts! If you're here, you're likely itching to shave precious seconds off your runs and climb the leaderboards. Today, we're diving deep into a particularly lucrative and challenging category within the gaming speedrun community: the Deep Rock Galactic (DRG) Rich% World Record, specifically focusing on the "Rock" Side Objective. This isn't just about pure speed; it's about efficiency, resource management, and executing flawless strats under pressure.
The core of this category demands players to not only secure the fastest possible completion time but also to meticulously gather a specific amount of Morkite (typically 200 units) and, crucially, maximize gold collection. The twist? All of this must be accomplished while tackling the often-overlooked "Rock" side objective. It’s a true test of a dwarf’s grit and a speedrunner’s dedication.
Deep Rock Galactic: The Perfect Speedrun Canvas
For those new to the mines, Deep Rock Galactic is a cooperative first-person shooter that pits a team of up to four heavily-armed dwarves against hordes of alien bugs on procedurally generated planets. Its blend of intense combat, environmental destruction, and distinct class roles makes it an incredibly engaging experience, and, as we're discovering, a fantastic playground for speedrunning.
The procedurally generated nature of the caves, combined with various mission types and enemy spawns, introduces an element of RNG (Random Number Generation) that speedrunners constantly strategize around. Mastering DRG speedruns means learning to adapt to these variables and exploit every possible advantage. It’s a game where quick thinking and even quicker reflexes are paramount.
Understanding the Rich% Category
In speedrunning, categories define the specific goals a player must achieve to consider a run complete. The "Rich%" category in DRG is all about maximizing your mineral haul, particularly Morkite and Gold, within the shortest possible time. It’s a delicate balancing act: you need to be fast, but you also need to be *efficient* with your resource gathering.
This differs from categories that might focus solely on mission objectives or eliminating enemies. In Rich%, every second spent mining or moving between deposits is scrutinized. A seemingly small detour for a pocket of gold could cost you the world record if not executed perfectly. This requires a deep understanding of map layouts and resource distribution.
The "Rock" Side Objective: A Deeper Dive
The "Rock" Side Objective, often presented as "Mine X amount of Nitra" or "Find a specific rare mineral," can seem secondary. However, in this speedrun category, it's a crucial component. It forces runners to deviate from the most direct path to the main objective, adding a layer of complexity and risk.
Successfully integrating the "Rock" objective requires precise planning. You can't just stumble upon it; you need to know where these objectives typically spawn and how to reach them quickly without sacrificing too much time on your primary goal. Often, the best runs integrate the side objective into the main Morkite collection path, turning a potential time-sink into an efficient part of the overall strategy.
"The 'Rock' objective is where many runs are lost. You either go too far out of your way, or you ignore it and risk a DQ if the category rules are strict on its completion."
Optimal Strats for the Rich% "Rock" Side Objective
Achieving a world record in this category hinges on mastering specific strategies, often referred to as "strats." These are highly optimized sequences of actions designed to minimize time and maximize efficiency.
Pathing: Identifying the most efficient routes through the procedurally generated caves is paramount. This involves predicting potential cave layouts and knowing the fastest ways to traverse them.
Resource Prioritization: Knowing exactly where to mine Morkite and Gold, and how much to gather from each deposit to meet the Rich% quota quickly.
Combat Efficiency: Minimizing time spent fighting enemies. This often involves using AoE (Area of Effect) attacks to clear swarms quickly or employing movement-enhancing tools to bypass threats entirely.
Objective Integration: Seamlessly weaving the "Rock" side objective into the main mission flow. This might involve collecting its resources en route to a Morkite vein or completing it during a strategic pause.
Experienced runners often develop custom builds and loadouts tailored specifically for this category, focusing on speed, traversal, and burst damage rather than sustained combat.
Class Selection: Dwarves for the Win
In DRG, each of the four dwarf classes—Scout, Engineer, Driller, and Gunner—offers unique abilities that can be leveraged for speedrunning. For the Rich% "Rock" objective, the choice of class is critical.
Scout: Excels at rapid traversal with the grappling hook and illuminating large areas. Their ability to reach high-up resources quickly makes them invaluable for certain map seeds.
Engineer: Offers crowd control with turrets and platforms that can create shortcuts or reach difficult areas. Their platforms are particularly useful for rapid vertical movement.
Driller: The king of traversal through terrain. Drillers can create direct paths through rock, bypassing obstacles and saving significant time, especially in dense cave systems.
Gunner: Provides powerful ranged support and mobility options with the zipline gun. While less focused on traversal, their firepower can quickly clear threats.
In my experience, a coordinated team often features a combination of these classes, with the Driller and Scout frequently taking the spotlight for their unparalleled movement capabilities. However, solo attempts might heavily favor the Driller for its terrain manipulation. The specific class choice can also depend on the current meta and any newly discovered glitches or skips.
Team Communication: The Unsung Hero
While solo runs are possible, DRG is fundamentally a cooperative game. For world records, especially in team-based categories like this, communication is non-negotiable. Clear, concise callouts can mean the difference between a successful run and a catastrophic failure.
"Ping everything! Know where the Nitra is, where the Morkite is, where the swarm is coming from. That tiny bit of info can save five seconds, and five seconds is everything in a WR attempt."
Coordinating movement, sharing ammo, and calling out incoming threats ensures the team stays on track. A well-oiled team moves as a single unit, executing strats flawlessly. This level of synergy is built through countless hours of practice together. For those aiming for the top, joining a dedicated DRG speedrunning Discord is highly recommended.
Route Planning: Precision is Key
Given the procedural generation, rigid route planning might seem impossible. However, speedrunners develop sophisticated strategies based on common cave generation patterns and known spawn locations for objectives and resources.
This involves understanding biome-specific layouts, identifying efficient "entry points" into caves that maximize resource density, and knowing when to cut your losses on a bad seed. Advanced runners can often predict the general layout within the first minute of a mission, allowing them to adapt their pre-planned route on the fly.
Equipment Upgrades: Gear Up for Speed
While some speedrun categories restrict upgrades, the Rich% category generally benefits from optimized gear. Investing in upgrades that enhance movement speed, mining speed, and combat efficiency is crucial.
Weapon Mods: Focus on mods that increase damage output for quicker swarm clearing or faster mining speed.
Traversal Tools: Upgrades for the Scout's grappling hook or the Driller's drills can significantly reduce travel time.
Perks: Certain perks, like those that increase movement speed or reduce fall damage, can be game-changers.
Experimenting with different loadouts and understanding how each upgrade synergizes with your chosen class and strategy is a vital part of the preparation.
Practice and Refinement: The Speedrunner's Mantra
There's no substitute for practice. World records are not set by accident. They are the result of thousands of attempts, meticulous analysis of each run, and constant refinement of strats.
This involves:
Repeating specific sections of a mission until they are perfected.
Analyzing video footage of top runs to identify micro-optimizations.
Testing new strats and glitches that might emerge within the community.
Maintaining peak performance through consistent play.
The journey to a world record is often a marathon, not a sprint, requiring patience, dedication, and a relentless drive to improve.
Common Pitfalls to Avoid
Even with the best strategies, mistakes happen. Being aware of common pitfalls can help you avoid them:
Over-mining: Spending too much time on secondary objectives or small gold veins when the primary Morkite goal is close.
Ignoring Threats: Underestimating enemy swarms, which can quickly overwhelm a team focused on speed.
Poor Communication: Lack of clear callouts leading to confusion, wasted movement, or missed opportunities.
Bad RNG: Sometimes, the cave generation is simply unfavorable. Knowing when to reset is a skill in itself.
Execution Errors: Simple mechanical mistakes like missing jumps, fumbling reloads, or activating the wrong tool at the wrong time.
"The biggest enemy isn't the bugs; it's the clock. Every second counts, and every mistake is magnified when you're pushing for a world record."
Frequently Asked Questions
What is the main goal of the DRG Rich% "Rock" Side Objective speedrun?
The primary goal is to complete the mission as quickly as possible while gathering a predetermined amount of Morkite and maximizing gold collection, all while successfully completing the "Rock" side objective.
Which class is best for this speedrun category?
While team composition matters, the Driller and Scout are often favored due to their superior traversal capabilities. However, optimal team strats may vary.
How important is RNG in this speedrun?
RNG plays a significant role due to the procedurally generated caves. Speedrunners develop strategies to adapt to different layouts and resource distributions efficiently.
Can I use any gear upgrades?
Yes, in the Rich% category, utilizing optimized gear upgrades for weapons, traversal tools, and perks is generally allowed and encouraged to achieve the fastest times.
Where can I find the current world record?
The best place to find the current world record and other DRG speedrun leaderboards is on the official Speedrun.com DRG page.
Mastering the DRG Rich% "Rock" Side Objective speedrun is a testament to skill, strategy, and sheer determination. It demands a deep understanding of the game's mechanics, efficient execution of complex strats, and seamless teamwork. By focusing on optimal pathing, intelligent class selection, clear communication, and relentless practice, you too can shave precious seconds off your time and contribute to the ever-evolving world of speedrun records. Remember, every dwarf for himself... but glory is often shared! Rock and Stone!
What are your favorite strats for this category? Have you set any personal bests? Share your thoughts and experiences in the comments below! Join our Discord channel to connect with fellow speedrunners and discuss your latest runs.
Are you tired of those nail-biting FIFA matches slipping through your fingers? Do you dream of not just winning, but absolutely dominating, becoming a true FIFA speedrun master? You've landed in the right spot. Our crew, a mix of seasoned gamers and dedicated speedrun aficionados, has poured all their expertise into crafting the definitive guide to help you clinch victory in every single FIFA match you play. Let's dive in!
Understanding the Core of FIFA Gameplay
Before we even think about shaving seconds off the clock, we need to nail down the fundamentals. The primary objective in FIFA is simple: outscore your opponent before the final whistle blows. A standard match is divided into two 45-minute halves, with potential for extra time and the nerve-wracking penalty shootout if the scores are tied. Mastering the basic controls is non-negotiable. We're talking precise passing, powerful shooting, and impenetrable defending. These are the bedrock upon which all advanced strategies are built.
The Essence of Speedrunning in FIFA
Now, let's talk speedrunning. At its heart, speedrunning is the pure art of conquering a game in the shortest time possible. In FIFA, this translates to completing a match with unparalleled efficiency. This isn't just about scoring quickly; it's about executing every action with intent. You need an intimate knowledge of the game – the best attacking formations, the most effective set-piece routines, and the defensive setups that leave opponents bewildered. It’s about knowing every glitch, every trick, every exploit that can shave precious seconds off your time.
In my experience, understanding the AI's tendencies is as crucial as your own player's skill. Knowing how the opponent will react to certain plays can open up huge opportunities for quick goals.
Achieving a top-tier FIFA speedrun requires more than just raw talent. It demands a deep dive into the game's mechanics and exploiting them to your advantage. This means exploring every possible attacking avenue, from rapid counter-attacks to meticulously planned set-piece plays designed for maximum impact in minimum time.
Elite Strategies for Faster Matches
Want to know how the pros do it? One of the most potent ways to elevate your speedrun game is by dissecting the play of expert FIFA players. Their matches are a masterclass in efficiency. Observing their tactics, their quick decision-making, and their execution of complex skill moves can reveal game-changing strategies. Pay close attention to how they manage possession, how they transition from defense to offense, and the specific player instructions they utilize.
Don't underestimate the power of online communities and forums. Engaging with other players is invaluable. You can share your own discoveries, learn about new gaming exploits, and discuss advanced world record strats. These spaces are goldmines for uncovering hidden efficiencies and understanding the meta.
I once discovered a specific player-switching tactic on a forum that completely changed how I defended, allowing for much faster ball recovery and quicker transitions to attack.
When I first started speedrunning FIFA, I focused too much on individual goals. The real breakthrough came when I started thinking about the entire match flow. Minimizing wasted movement, quick restarts after goals, and even optimizing kick-off plays can drastically cut down your overall time. It's about the entire 90 minutes (or less!) being a perfectly optimized run.
Honing Your Skills: Practice and Community
Speedrunning, above all else, is about relentless practice. You need to dedicate time to sharpening your skills and becoming one with the game's controls. Set aside daily sessions to play matches, experiment with different formations, and refine your set-piece execution. Each match is an opportunity to test and improve your chosen news speedrun strategy.
Consider dedicating specific practice sessions to certain aspects:
Kick-off routines: Practice scoring directly from kick-off or executing quick passing plays to bypass the opponent's initial press.
Defensive stability: Work on quickly regaining possession and preventing the opponent from building momentum.
Attacking efficiency: Focus on taking shots quickly and effectively, minimizing the number of passes needed to create a scoring chance.
Set-piece optimization: Master corner and free-kick strategies that consistently yield goals.
The community aspect is also vital for growth. Platforms like Speedrun.com offer leaderboards, guides, and discussions specific to FIFA speedruns. Watching top runners' videos and analyzing their techniques can provide invaluable insights into optimal routes and glitch utilization.
Staying Ahead: Updates and Adaptability
The world of FIFA is constantly evolving. Staying informed about the latest game updates, patches, and roster changes is crucial. These updates can alter player stats, introduce new mechanics, or even patch out previously exploited glitches. Being adaptable and willing to adjust your strategies based on these changes is what separates the good runners from the truly great ones.
There was a patch in FIFA 22 that nerfed a specific skill move I relied on heavily. I had to spend a week finding a new, equally effective alternative to maintain my times. Adaptability is key.
Keep an eye on official game news and reputable gaming sites for announcements. The faster you can integrate new information into your runs, the greater your advantage will be over competitors who are slower to adapt.
Frequently Asked Questions
What is the fastest way to score in FIFA speedruns?
The fastest way usually involves exploiting kick-off plays, using quick counter-attacks, mastering specific skill moves, and optimizing set-pieces. It varies slightly between FIFA versions.
How important is player control in FIFA speedrunning?
Player control is paramount. Perfecting passing, dribbling, shooting, and defensive timing is essential for executing strategies efficiently and minimizing wasted time.
Can I speedrun any FIFA match, or are there specific modes?
While you can technically speedrun any match, dedicated speedrunning usually focuses on specific modes or scenarios designed for the challenge, often within Kick-Off or specific tournament modes where conditions are consistent.
Where can I find top FIFA speedrunners to learn from?
Websites like Speedrun.com and platforms like Twitch and YouTube are excellent resources for watching live runs and VODs (Videos on Demand) of top players.
Mastering the art of the FIFA speedrun is a journey that demands unwavering dedication, rigorous practice, and an insatiable appetite for learning. By integrating the strategies, insights, and community knowledge shared in this guide, you are well on your way to becoming a formidable force in FIFA. Become the player you aspire to be, and achieve victory in every match.
We hope this guide fuels your passion for games and sharpens your FIFA skills. For even more in-depth guides, cutting-edge speedrun strategies, and the latest news from the gaming world, keep exploring GamingSpeedrun.com. Our team lives and breathes this stuff, and we're committed to bringing you the most comprehensive content out there.
Don't forget to join our community! Share your personal best times, your craziest goals, and your most effective speedrun tactics in the comments below. Let's push the boundaries of what's possible in FIFA together. Happy running!
Hey there, fellow gamers and speedrunning enthusiasts! Ever looked at the vast, blocky world of Minecraft and thought, "How fast can I conquer this?" Or perhaps you've heard the whispers of Herobrine, the enigmatic figure lurking in the game's code, and wondered if you could embody that mystery during a blistering run. Well, you've landed in the right spot. This isn't just another Minecraft article; this is your blueprint for tackling the game with the legendary Herobrine persona, pushing for those insane speedrun times. We're diving deep into strats, glitches, and the sheer dedication required to shave seconds off that clock.
Let's be clear: Herobrine isn't an official Minecraft character. He's a creepypasta legend, a mythical figure born from player experiences and forum theories. But in the speedrunning community, "speedrunning as Herobrine" often refers to using specific seeds or glitches that replicate aspects associated with the Herobrine mythos, or simply adopting a highly aggressive, almost supernatural playstyle that *feels* like playing as him. For this guide, we're focusing on the most popular interpretation: using the "Herobrine" seed to generate unique world features and then executing a highly optimized speedrun strategy. This means leveraging every trick in the book to reach the Ender Dragon as swiftly as possible. It’s about pushing the boundaries of what’s possible in a single seed.
Setting Up Your Herobrine Run: The Seed of Mystery
The first, and arguably most crucial, step to a "Herobrine" speedrun is selecting the right world seed. While Herobrine himself is a myth, certain seeds are rumored to generate worlds that feel more "Herobrine-like" or offer advantageous starting positions for a speedrun. The community often buzzes about seeds that spawn structures or terrain features eerily reminiscent of the Herobrine lore.
For an optimized speedrun, the goal is a seed that provides:
* **Close proximity to essential early-game resources**: Wood, a village for potential iron/food, or even a blacksmith chest with early gear.
* **Favorable spawn location**: Avoiding immediate dangers and allowing for quick traversal.
A popular seed that often gets mentioned in Herobrine-themed discussions is "Herobrine." This seed is known to generate worlds with unique, sometimes unsettling, structures that players associate with the myth. However, for pure speedrunning optimization, community-tested seeds on platforms like speedrun.com are your best bet. These are often vetted for speed advantages, not just thematic Herobrine elements.
Resource Gathering: Speed is Key
Once your world is generated, the clock is ticking. Efficiency in the first few minutes is paramount. Your primary targets are:
* **Wood**: Get enough for a crafting table, wooden pickaxe, and an axe. Punching trees is your initial move.
* **Stone**: Upgrade to a stone pickaxe and axe as soon as possible. Stone tools are significantly faster.
* **Food**: Critically important. Look for passive mobs like pigs, cows, or sheep. A good starting village can also provide bread or crops. Don't waste time chasing phantom food sources.
My personal strategy often involves immediately punching trees to get 3-4 logs, crafting a crafting table, then a wooden pickaxe. From there, I rush to find stone. If a village is nearby, I prioritize hitting its crops or checking chests.
In my experience, the first 5 minutes are the most brutal. Every second spent fumbling for wood or chasing a chicken is a second you can't get back. Plan your immediate actions before you even load the world.
Mastering the Nether Portal Strat
The Nether is your shortcut to the End. Speedrunners consider building a Nether portal as one of the most critical advancements. This typically requires:
* **Obsidian**: You need at least 10 blocks to build a 4x5 portal frame (though you can get away with 10 if you place them strategically).
* **Flint and Steel**: To light the portal. This requires finding iron and flint.
Finding iron can be done by mining or, more efficiently in many seeds, by scavenging chests in villages or shipwrecks. Flint is obtained by mining gravel.
The fastest way to get obsidian is usually by finding a lava pool and using water to turn it into obsidian. You can then mine it with a diamond pickaxe. However, diamond pickaxes are rare early on. Alternatively, speedrunners often employ a "bucket glitch" or find pre-existing obsidian structures. Another highly effective method is "portal trapping," where you lure a Ghast to shoot a fireball at a specific block configuration, creating obsidian. This is an advanced technique that requires precise timing and knowledge of game mechanics.
Combat Essentials for a Fast Run
You'll face plenty of hostile mobs on your way to the End. Efficient combat is crucial to avoid unnecessary damage and time loss.
* **Early Game**: Your initial wooden and stone tools will suffice for basic threats like zombies and skeletons. Prioritize headshots with a bow if possible.
* **Iron Gear**: Once you find iron, aim for at least an iron sword and a bow. Armor is secondary to weapon speed in most runs, but a full set of iron armor can significantly reduce downtime from damage.
* **Advanced Combat**: As you progress, you'll face more dangerous mobs. Understanding mob AI, kiting techniques, and critical hits will save you valuable seconds. Creeper explosions can even be used to your advantage if timed correctly, potentially destroying nearby obstacles or creating paths.
The bow is your best friend for a reason. It lets you deal with threats from a safe distance, preventing you from getting cornered by a horde of zombies or a tricky skeleton archer. Always keep arrows stocked!
Navigating The End and Defeating the Dragon
The End is the final frontier. The objective here is simple: destroy the Ender Crystals and then defeat the Ender Dragon.
* **Ender Crystals**: These are typically located on top of obsidian pillars. You'll need a bow with plenty of arrows to destroy the ones you can't reach. Some crystals are caged, requiring you to pillar up or use precise shots.
* **Dragon Combat**: Once all crystals are destroyed, the dragon will perch on the central portal structure. This is your window to deal damage. Melee attacks are effective, but be wary of its breath attack and charges. Speedrunners often use a combination of beds (which explode powerfully in the End when right-clicked) and bow attacks for maximum damage output.
Mastering the Ender Dragon fight is often the culmination of a speedrun. It requires knowing the dragon's attack patterns and executing a damage-dealing strategy flawlessly. Practice is key here; you don't want to waste minutes on this final encounter.
Tips for Optimizing Your Speedrun
* **Learn the Seed**: Thoroughly explore the "Herobrine" seed (or your chosen speedrun seed) in creative mode first. Know where key resources, structures, and potential pitfalls are.
* **Hotkeys and Inventory Management**: Master using your hotbar and quick crafting. Minimize time spent navigating menus.
* **Glitch Exploitation**: Certain glitches can save immense amounts of time. Research common Minecraft speedrun glitches like tree capes, boat glitches, or specific Nether entry exploits. However, ensure they are allowed in the category you're aiming for on speedrun.com.
* **Practice, Practice, Practice**: Speedrunning is about muscle memory and split-second decisions. Run the game repeatedly, focusing on specific segments until they are perfect.
* **Watch Top Runners**: Analyze runs by top players. See their routes, their techniques, and how they overcome challenges.
Frequently Asked Questions
Q1: Is Herobrine actually in Minecraft?
A1: No, Herobrine is a myth and a popular creepypasta within the Minecraft community. He is not an official character or entity within the game's code.
Q2: What is the best seed for a Herobrine speedrun?
A2: While "Herobrine" is a common seed associated with the myth, the "best" seed for speedrunning depends on the specific version of Minecraft and the category you're attempting. It's recommended to check resources like speedrun.com for community-tested, optimized seeds.
Q3: How long does a typical Minecraft speedrun take?
A3: World record times for Minecraft speedruns (Java Edition, Any% Glitchless) are often under 15 minutes. However, for casual players or those learning, runs can range from 30 minutes to several hours.
Q4: What are the main differences between a normal playthrough and a speedrun?
A4: Speedruns focus on completing the game's objective (defeating the Ender Dragon) as quickly as possible, often employing advanced techniques, glitches, and highly optimized routes. Normal playthroughs prioritize exploration, building, and a more relaxed progression.
In conclusion, embarking on a Minecraft speedrun, especially with the thematic twist of Herobrine, is a thrilling challenge. It demands a deep understanding of the game's mechanics, precise execution, and a relentless drive to shave off every possible second. From meticulously choosing your seed to mastering the lightning-fast Nether portal strategy and outsmarting the Ender Dragon, each step is a test of skill and dedication.
So, gear up, grab your pickaxe, and dive into the blocky abyss. Who knows, with enough practice and the right strats, you might just become the next Minecraft speedrunning legend.
What are your go-to speedrunning strats? Any legendary Herobrine encounters you want to share? Drop your thoughts and tips in the comments below! Join our Discord community to connect with fellow speedrunners and share your progress.
Hey there, fellow Dota 2 fanatics! If you've been keeping up with the meta, you know that patch 7.33 has shaken things up, and Medusa, our Gorgon queen, has emerged as an absolute powerhouse. For those of us who live and breathe speedrunning, mastering a hero's peak potential is key. Today, we're diving deep into a devastating build that leverages the insane synergy between Daedalus and Aghanim's Scepter on Medusa, aiming for those lightning-fast clears and world record times. Forget just winning; we're talking about absolutely dominating the map!
Before we break down the *speedrun strats*, let's quickly recap what makes Medusa tick. She's an agility carry, meaning her damage scales heavily with her Agility stat, translating directly into attack speed and armor. Her kit is all about survivability and area denial:
Split Shot: This is her bread and butter. It allows her basic attacks to split and hit multiple targets. In 7.33, this ability gained a crucial interaction with critical strike chance.
Mystic Snake: A magical nuke that damages enemies and steals mana. The key change here with Aghanim's Scepter is mind-blowing.
Mana Shield: Medusa converts her mana pool into a shield, absorbing incoming damage. This is vital for surviving burst and maintaining farm under pressure.
Stone Gaze: Her ultimate. Enemies looking at her gradually get turned to stone, slowing them and eventually immobilizing them. Essential for control in fights.
The 7.33 Meta Shift: Why Medusa Shines
Patch 7.33 wasn't just a minor tweak; it fundamentally altered how heroes interact with items and abilities. For Medusa, two changes were monumental:
Split Shot Critical Strike Interaction: Previously, Split Shot didn't benefit from critical strikes. Now, it *does*. This opens up a whole new world of damage potential.
Aghanim's Scepter on Mystic Snake: This is where things get truly broken for speedrunning. Mystic Snake can now bounce an *unlimited* number of times between targets. Imagine a single snake clearing waves or hitting an entire enemy team multiple times.
This combination transforms Medusa from a slow-scaling carry into a potential mid-game menace capable of clearing waves and objectives with unprecedented speed. It's a dream come true for any speedrun enthusiast looking for efficient farming and map control.
The Core Strategy: Daedalus & Aghanim's Scepter
The strategy revolves around hitting the "critical mass" point where Medusa's damage output becomes overwhelming. Both Daedalus and Aghanim's Scepter are key:
Daedalus provides the raw critical strike chance and damage multiplier, turning Medusa’s already potent Split Shot into a screen-clearing nightmare. Every few hits, a massive chunk of damage goes out, amplified across multiple targets.
Combine this with Aghanim's Scepter, and your Mystic Snake becomes a multi-target, mana-draining, wave-clearing machine. The snake bounces indefinitely, hitting every enemy hero multiple times in a fight and stealing crucial mana, further weakening your opponents.
Early Game Farming and Itemization
Your early game is all about efficiency. The goal is to get your core items as fast as possible. Start with standard farming items:
Quelling Blade: Essential for last hitting creeps.
Wraith Band / Null Talisman / Bracer: Depending on lane matchup and sustain needs.
Power Treads: Standard agility boots for attack speed and stats.
Focus on farming jungle creeps and lane creeps simultaneously. Use Mystic Snake to secure ranged creeps or harass the enemy offlaner when possible. Your priority after boots is to save for:
Hyperstone: Building towards your damage output.
Ultimate Orb: For stats and eventually part of your Skadi or Butterfly later if needed.
Aghanim's Scepter: This is your first major power spike. The unlimited snake bounces are game-changing for farming speed.
Daedalus: Your second major power spike. Once you have both Aghs and Daedalus, you become a serious threat.
It’s crucial to manage your mana effectively during this phase. Rely on your mana management skills and Mana Shield to survive ganks or tough lane situations.
Mid-Game Dominance: Teamfights and Objectives
Once you have Aghanim's Scepter and are working on Daedalus, you transition into a dominant force. Your farming speed will skyrocket. You can:
Clear creep waves instantly with Mystic Snake.
Take objectives like towers and Roshan much faster.
Participate effectively in skirmishes and teamfights.
In teamfights, position yourself safely behind your frontliners. Use Mystic Snake to hit as many enemies as possible, draining their mana and dealing consistent damage. When Daedalus comes online, your Split Shot attacks will start dealing immense burst damage, amplified by the critical strikes.
Don't be afraid to use Stone Gaze to lock down key targets or escape dangerous situations. The goal is to push your advantage, take map control, and prevent the enemy from scaling back into the game. This is where speedrun map control becomes paramount.
Late-Game Powerhouse: Securing the Win
By the late game, with a fully completed Daedalus and Aghanim's Scepter, Medusa is an unstoppable force. Your damage output is astronomical. Continue farming efficiently and pushing lanes.
Consider adding situational items like:
Eye of Skadi: For added survivability and a slowing effect on your attacks.
Monkey King Bar (MKB): If facing evasion-heavy heroes.
Butterfly: For evasion and more damage.
Black King Bar (BKB): Essential against heavy magical or stun-based lineups.
Remember, even with immense damage, positioning is still key. A dead Medusa deals no damage. Use your range and abilities to control the battlefield and secure the world record pace.
Speedrun Specific Tips & Tricks
To truly optimize for speedrunning this Medusa build:
Abuse Mystic Snake: Practice hitting multiple heroes with Mystic Snake consistently. It's your primary tool for clearing waves and dealing AoE damage quickly.
Aggressive Farming Patterns: Optimize your jungle rotations. Learn the most efficient routes to farm the maximum number of creeps in the shortest time.
Objective Focus: Prioritize taking towers and Roshan. With this Medusa build, you can solo Roshan relatively early with the right items.
HP/Mana Sustain: Carry Tangoes, Salves, and Clarity potions. Efficient sustain means less downtime.
Scouting and Vision: Keep an eye on the minimap. Knowing where the enemy is allows you to farm safely and take objectives without fear of ganks.
The ultimate goal in a speedrun is minimizing time spent not moving towards the objective or gaining an advantage. Every second counts!
Frequently Asked Questions
Q1: When is the best time to buy Daedalus on Medusa in 7.33?
A1: After securing Aghanim's Scepter and potentially another core item like Hyperstone or an Orb. The synergy really kicks in once you have both, but Aghanim's is the priority for wave clear.
Q2: How does the Mystic Snake bounce work with Aghanim's Scepter?
A2: It bounces to any valid target (creeps, heroes, illusions, couriers) an unlimited number of times. It prioritizes targets that haven't been hit by that specific snake bounce yet, making it incredibly effective in large groups.
Q3: Is this build viable outside of speedrunning?
A3: Absolutely! This Medusa build is incredibly strong in standard games as well, offering massive damage and farming potential from the mid-game onwards.
Q4: What are the biggest threats to this Medusa build?
A4: Early game aggression and disables that prevent Medusa from farming or using her abilities effectively. Once she gets rolling, strong burst damage and silence can still be problematic.
Q5: Are there any specific hero counters to watch out for?
A5: Heroes with strong silences (like Death Prophet or Skywrath Mage) or high burst damage that can chew through Mana Shield before you can react can be tough. Also, heroes that can easily close the gap and lock you down.
In conclusion, Medusa in Dota 2 version 7.33, especially with the Daedalus and Aghanim's Scepter build, is a force to be reckoned with. Her ability to melt creep waves and decimate enemy teams with critical Split Shots and bouncing Mystic Snakes makes her a top-tier pick for both standard play and high-octane speedrun attempts. Mastering her itemization and positioning will allow you to dominate the battlefield and smash those personal bests. Keep practicing, keep grinding, and happy speedrunning!
What are your favorite Medusa strategies in 7.33? Did this guide help you shave seconds off your runs? Let us know in the comments below! Join our Discord community to share your tips, find teammates, and discuss all things Dota 2 speedrun!
```
```json
{
"@context": "http://schema.org",
"@type": "FAQPage",
"mainEntity": [
{
"@type": "Question",
"name": "When is the best time to buy Daedalus on Medusa in 7.33?",
"acceptedAnswer": {
"@type": "Answer",
"text": "After securing Aghanim's Scepter and potentially another core item like Hyperstone or an Orb. The synergy really kicks in once you have both, but Aghanim's is the priority for wave clear."
}
},
{
"@type": "Question",
"name": "How does the Mystic Snake bounce work with Aghanim's Scepter?",
"acceptedAnswer": {
"@type": "Answer",
"text": "It bounces to any valid target (creeps, heroes, illusions, couriers) an unlimited number of times. It prioritizes targets that haven't been hit by that specific snake bounce yet, making it incredibly effective in large groups."
}
},
{
"@type": "Question",
"name": "Is this build viable outside of speedrunning?",
"acceptedAnswer": {
"@type": "Answer",
"text": "Absolutely! This Medusa build is incredibly strong in standard games as well, offering massive damage and farming potential from the mid-game onwards."
}
},
{
"@type": "Question",
"name": "What are the biggest threats to this Medusa build?",
"acceptedAnswer": {
"@type": "Answer",
"text": "Early game aggression and disables that prevent Medusa from farming or using her abilities effectively. Once she gets rolling, strong burst damage and silence can still be problematic."
}
},
{
"@type": "Question",
"name": "Are there any specific hero counters to watch out for?",
"acceptedAnswer": {
"@type": "Answer",
"text": "Heroes with strong silences (like Death Prophet or Skywrath Mage) or high burst damage that can chew through Mana Shield before you can react can be tough. Also, heroes that can easily close the gap and lock you down."
}
}
]
}
Yo, fellow gamers and aspiring legends! Ever dropped into a Solo vs Squads match in PUBG Mobile, feeling that adrenaline rush, only to get wiped out by a coordinated team? We've all been there. But what if I told you it's possible to not just survive, but utterly dominate, racking up an insane 50 kills and pushing the boundaries of what's possible? This isn't just about surviving anymore; it's about claiming victory with sheer skill and strategy. In this deep dive, we're not just covering the basics – we're dissecting the absolute cutting edge of PUBG Mobile's latest update, revealing new features and sharing the secrets behind legendary gameplay.
Unveiling the Latest Update: What's New in PUBG Mobile?
The battlegrounds are constantly evolving, and PUBG Mobile's latest update is a testament to that. Developers have been hard at work, not just squashing bugs but introducing game-changing features. The primary focus? Enhancing player experience and adding new layers of strategy.
One of the most significant additions is the new map, Livik. This isn't your sprawling Erangel; Livik is designed for rapid-fire engagements. Its smaller size means the action heats up much quicker, demanding faster decision-making and a more aggressive playstyle. You won't have time to slowly creep across the map here – it’s a relentless fight from the get-go.
Complementing the new terrain is the introduction of the P90. This submachine gun is a beast in close-quarters combat, boasting a hefty 50-round magazine capacity. Imagine clearing out an entire squad with a single mag if you position yourself right. This weapon alone can shift the meta for aggressive players.
Beyond these headline features, the update also includes crucial performance enhancements and bug fixes. Smooth gameplay is paramount for any serious competitor, and these backend improvements ensure a more fluid and responsive experience, reducing those frustrating lag spikes or graphical glitches that can cost you a match.
Mastering Solo vs Squads: The Ultimate Strategy
Solo vs Squads (SVS) is arguably the most challenging and rewarding mode in PUBG Mobile. You're up against teams of four, meaning you're always outnumbered. Success hinges on a potent blend of patience, calculated aggression, and sheer mechanical skill. It's a high-stakes game of chess, but with bullets.
My personal experience in SVS has taught me that panic is your worst enemy. Staying calm under pressure is key. You need to think two steps ahead, anticipating enemy movements and positioning yourself to maximize your advantages, however small they might be.
"In Solo vs Squads, you are the lone wolf against a pack. Every decision, every shot, must be deliberate. Hesitation means defeat."
This mode is a true test of a player's ability to adapt and overcome. It pushes you to improve your aim, your game sense, and your decision-making under extreme pressure. The satisfaction of clutching a win against all odds is unparalleled.
Choosing Your Landing Spot: The First Crucial Step
The plane's trajectory is your first strategic decision. Where you land dictates your early game, your loot potential, and your initial encounters. For SVS, blindly dropping into the most crowded areas is usually a recipe for disaster. You want a spot that offers a balance.
Ideally, pick a location that’s slightly off the beaten path but still has access to decent loot spawns. This allows you to gear up without immediately engaging in a firefight. Think smaller towns or compound clusters that are close enough to the action to rotate in when necessary, but far enough to avoid the initial chaos.
I often look for areas where I can secure a vehicle quickly. Mobility is king in SVS, allowing you to reposition, escape unfavorable situations, or flank unsuspecting squads. A good landing spot gets you geared up and mobile, setting you up for the mid-game.
Looting Like a Pro: Gear Up for Domination
Once you've landed, your primary objective is to acquire the best possible gear. This means prioritizing weapons, armor, healing items, and ammunition. Don't get bogged down looting every single building if it means wasting precious time. Focus on efficiency.
Prioritize finding a reliable primary weapon and a secondary option. Body armor (Level 2 or 3 if possible) and a helmet are non-negotiable. Stock up on bandages, first aid kits, and energy drinks. Running out of healing in a crucial moment is a common mistake that can be easily avoided with proper looting.
My personal rule is to always grab a scope if I find one, even if my current weapon isn't ideal for it. You can always swap attachments later. Good loot isn't just about having the best guns; it's about being prepared for any engagement range and having the resources to sustain yourself through multiple fights.
Tactical Engagement: When and How to Fight
This is where SVS separates the contenders from the champions. You are at a fundamental disadvantage. Engaging a full squad head-on without any leverage is usually a losing proposition. Stealth, positioning, and surprise are your greatest allies.
Always try to engage when you have the element of surprise. Flank the enemy, attack from an unexpected angle, or wait until they are distracted by another engagement. Use the environment to your advantage – buildings, terrain, and cover are crucial.
If you manage to pick off one or two members of a squad, don't immediately push aggressively unless you're certain you can finish them. They might be revived, or the remaining members might be waiting in ambush. Sometimes, repositioning after a successful pick is the smarter play.
"Patience is a virtue in PUBG Mobile's Solo vs Squads. Wait for the opportune moment, strike decisively, and vanish like a ghost."
Understanding sound cues is also vital. Listen for footsteps, vehicle engines, and gunfire to pinpoint enemy locations. This intel can give you the edge needed to set up an ambush or avoid a dangerous confrontation.
Your Perfect Loadout: Weapons for Every Scenario
A versatile loadout is essential for tackling the diverse combat situations in PUBG Mobile. You need weapons capable of handling both close-quarters chaos and mid-to-long range duels.
The newly added P90 is a game-changer for close-range combat. Its high rate of fire and large magazine capacity make it devastating inside buildings or during intense close-quarters battles. Think of it as your panic button – spray and pray with deadly accuracy.
For mid-to-long range, the M416 remains a top-tier assault rifle. It's reliable, versatile, and performs exceptionally well when kitted out with the right attachments. The ability to control its recoil makes it suitable for engaging enemies at significant distances.
Consider pairing these two. Use the M416 for engaging enemies at range, and switch to the P90 when they push or when you enter close-quarters environments. Always ensure you have ample ammunition for both.
Don't forget utility items. Frag grenades can flush enemies out of cover, smoke grenades provide crucial concealment for revives or repositioning, and Molotov cocktails can deny areas or damage entrenched opponents.
The 50-Kill Masterpiece: Learning from the Best
Achieving 50 kills in a single Solo vs Squads match is the stuff of legends. It requires near-perfect gameplay, incredible skill, and perhaps a bit of luck with the zone and enemy distribution. Watching top players execute such feats is an invaluable learning experience.
These gameplay sessions showcase:
Advanced flanking techniques.
Masterful use of cover and verticality.
Incredible recoil control under pressure.
Perfect timing for engagements and disengagements.
Efficient looting and inventory management.
By studying these high-kill games, you can pick up nuances in strategy, learn new movement techniques, and understand how to maximize your damage output and kill potential. It’s about deconstructing their plays and seeing how you can integrate those elements into your own playstyle.
This level of play requires dedication. It means grinding matches, practicing your aim in the training grounds, and constantly analyzing your own gameplay to identify areas for improvement. The journey to a 50-kill game is paved with countless smaller victories and lessons learned.
Frequently Asked Questions
What is the best landing spot in Solo vs Squads for the new update?
For the latest update, focus on landing in slightly less populated areas on maps like Livik or in the outskirts of larger maps. Prioritize locations with good loot density and quick access to vehicles, allowing for safe gearing up and rapid repositioning.
Is the P90 a good weapon for Solo vs Squads?
Absolutely! The P90 excels in close-quarters combat due to its high rate of fire and large magazine capacity. It's perfect for clearing buildings and engaging enemies up close, making it a valuable addition to your loadout in SVS.
How can I improve my chances of winning Solo vs Squads?
Focus on patience, tactical positioning, and surprise engagements. Avoid direct confrontations with full squads unless you have a clear advantage. Use stealth, flanking maneuvers, and the environment to your benefit. Always prioritize good loot and situational awareness.
Is it better to play aggressive or passive in Solo vs Squads?
A balanced approach is often best. While aggression can lead to quick kills, passivity can help you survive longer and gather intel. The key is to be selectively aggressive – strike when you have the advantage and know you can secure kills, but don't be afraid to play defensively or reposition when necessary.
How important is the zone in Solo vs Squads?
Extremely important. Always be aware of the next zone's location and plan your rotations accordingly. Getting caught outside the zone can be a death sentence, especially in the later stages of the game. Utilizing vehicles and knowing the fastest routes is crucial.
We hope this comprehensive guide empowers you to dominate the PUBG Mobile battlegrounds in Solo vs Squads mode. Mastering the new features and implementing these strategies will undoubtedly elevate your gameplay.
If you found this guide valuable, spread the word! Share it with your squadmates and fellow gamers. Your support fuels our passion and allows us to continue bringing you the cutting edge of gaming content.
For more insights into gaming strategies, speedrun techniques, and world record attempts, keep visiting GamingSpeedrun.com. Your next legendary play starts here!
Got any killer tips or a crazy SVS story? Drop a comment below and share your experiences with the community!