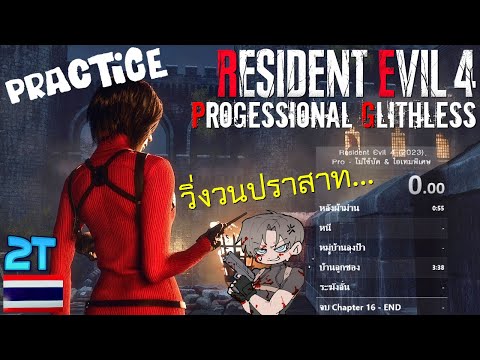
Resident Evil 4 Professional Glitchless: Mastering the Masterclass

Fellow speed demons and survival horror aficionados, welcome back to GamingSpeedrun! If you're anything like me, the allure of a perfectly executed Resident Evil 4 Professional Glitchless run is irresistible. It's the ultimate test of skill, knowledge, and sheer grit. We're talking about shaving milliseconds, mastering enemy AI, and executing every move with surgical precision. This isn't just playing the game; it's dissecting it, optimizing it, and bending it to your will. Forget the shortcuts; we're going for pure, unadulterated mastery.

Welcome to the Gauntlet

You've likely seen the incredible runs, the lightning-fast times, and thought, "How is that even possible?" The Resident Evil 4 Professional Glitchless category is where legends are made. It demands an intimate understanding of every enemy spawn, every item placement, and every subtle animation cancel. This guide is your roadmap to not just completing a run, but truly dominating it. We're going to dive deep into the strategies that separate the contenders from the champions.

The Philosophy: Why Glitchless?

In the world of speedrunning, "glitchless" signifies a purity of execution. It means beating the game using only intended mechanics. For Resident Evil 4, this category is particularly brutal on Professional mode due to the increased enemy damage and aggression. Every bullet counts, and every encounter must be optimized. It forces runners to rely on deep game knowledge, perfect movement, and precise aiming rather than exploiting unintended game behaviors. This is where true skill shines.

Building Your Foundation: Early Game Mastery

The initial moments of a Resident Evil 4 speedrun set the tone. Getting out of the first village section efficiently is paramount. Mastering the timing for melee attacks after headshots or stuns is crucial. Learn the optimal path to grab the shotgun early and how to deal with the initial wave of Ganados. Don't underestimate the power of a well-placed grenade to clear crowds.

Key areas to focus on early:

  • Efficiently clearing the first house sequence.
  • Mastering the church bell puzzle timing.
  • Securing the shotgun without wasting precious seconds.
  • Optimizing routes through the village square.

Section-by-Section Breakdown: Key Areas

Let's break down some of the most critical segments that often determine the success or failure of a Resident Evil 4 speedrun:

The Village Fight

This is the iconic opening gauntlet. Your goal is to survive and move forward with minimal health and ammo loss. Learning to herd enemies and use the environment, like the explosive barrels, is key. Memorizing the spawn points for the various Ganados is non-negotiable. For a Professional Glitchless run, you can't afford to get cornered here.

Cabin Defense

A notorious part of the game. Setting up explosives and using the windows strategically can save you a lot of health. Understanding which enemies are about to break through and prioritizing them is vital. The chainsaw enemies here are particularly deadly on Professional.

"In my experience, the key to the cabin defense isn't just shooting, it's about positioning yourself to maximize your damage output and minimize your exposure. Use those barrels!"

Castle Sequences

The castle introduces new enemy types and more complex layouts. The Novistadors can be a major time sink if not dealt with swiftly. Learning the optimal path through the various halls and avoiding unnecessary combat is crucial for maintaining momentum.

Island Approach

The final stretch. The Regenerators and Iron Maidens require specific strategies, often involving the powerful TMP or the Killer7 handgun. The sheer number of enemies can be overwhelming, so efficient crowd control is paramount.

Conquering the Horde: Enemy & Boss Strategies

Every enemy in Resident Evil 4 presents a unique challenge, especially on Professional. Understanding their AI and weak points is fundamental for a glitchless speedrun.

  • Ganados: Aim for headshots to stun, followed by a melee kick or rifle shot. Learn to group them for maximum effect with explosives.
  • El Gigante: Focus on the parasite on its back once it's stunned. A well-placed rocket launcher shot can end this fight quickly, but ammo is scarce.
  • Del Lago: This aquatic horror requires precise harpoon throws. Learn the timing for dodging its attacks and hitting its weak points.
  • Krauser: The knife fight is infamous. It's a test of parrying and quick-time event execution. Practice this section relentlessly. There are specific animations and timings to learn to make this manageable.
  • Salazar: This boss fight involves destroying tentacles and then dealing with Salazar himself. Use the environment to your advantage.
  • The U-3: Another challenging boss that requires understanding its attack patterns and hitting its weak points.
  • Osun 56 (Regenerators/Iron Maidens): The Killer7 or a fully upgraded TMP are your best friends here. Prioritize hitting the plagas. Using the thermal scope attachment for the rifle is essential.

The Art of Scarcity: Inventory & Ammo

On Professional mode, every resource is precious. Effective inventory management and ammo conservation are as important as combat skill. You simply cannot afford to waste a single bullet.

Key principles:

  • Prioritize Upgrades: Focus on damage and ammo capacity for your most-used weapons. The Shotgun and Rifle are critical early on. The TMP is excellent for crowd control and dealing with Regenerators.
  • Ammo Crafting: Learn the combinations for crafting ammo. Sometimes, it's more efficient to craft than to rely on drops.
  • Strategic Weapon Swapping: Know when to switch weapons to conserve ammo or deal optimal damage. For instance, using the TMP for fodder enemies to save shotgun shells for tougher threats.
  • Knife Usage: The combat knife is invaluable for finishing off stunned enemies or breaking certain objects, saving precious ammo.
"The merchant is your lifeline. Always check his stock for ammo and crucial weapon upgrades. Don't ignore the attache case upgrades either; more space means more efficiency."

Dialing In Your Practice Routine

Consistent, focused practice is the bedrock of any successful speedrun. Simply playing through the game repeatedly isn't enough; you need targeted training.

Effective Practice Techniques:

  • Section Practice: Use save points or chapter select (if available in your version) to isolate and repeat difficult sections. Focus on mastering one segment before moving to the next. For example, spend an hour just on the Krauser knife fight until it's muscle memory.
  • Route Memorization: Study established routes from top runners. Understand the exact path they take, enemy aggro triggers, and optimal movement.
  • Watch and Learn: Analyze top Resident Evil 4 speedrunners. Pay attention to their movement, aiming, inventory management, and decision-making in real-time. Don't just watch; dissect their strategies.
  • Full Run Attempts: Periodically attempt full runs, even if you know you'll be slow. This helps build endurance and identify patterns in your own mistakes across the entire game.
  • RNG Manipulation (Subtle): While it's glitchless, understanding subtle RNG factors like enemy drops or patrol paths can help you adapt.

The Mental Game: Staying Sharp

A Resident Evil 4 Professional Glitchless speedrun is a marathon, not a sprint. Maintaining focus and managing frustration are critical.

  • Take Breaks: Avoid burnout. Step away, stretch, and clear your head. Returning with a fresh perspective often solves problems you were stuck on.
  • Manage Expectations: You won't break world records overnight. Celebrate small victories, like beating a personal best segment time.
  • Stay Positive: Mistakes happen. Don't let a single fumble derail your entire run. Reset and focus on the next section. The psychological aspect is huge in these demanding runs.
  • Community Support: Engage with the speedrunning community. Share your struggles, ask for advice, and celebrate others' successes. Platforms like Discord are invaluable for this.

Frequently Asked Questions

Q1: What is the difference between any% and glitchless speedruns in Resident Evil 4?

Any% allows for the use of any glitches or exploits to finish the game as fast as possible. Glitchless, as the name implies, prohibits the use of any unintended mechanics, focusing purely on optimized gameplay.

Q2: Is Professional mode significantly harder for glitchless runs?

Yes, drastically. Enemies have much more health and deal significantly higher damage, making resource management and precise combat absolutely critical. Every mistake is heavily punished.

Q3: What are the most commonly used weapons for a glitchless speedrun?

Typically, the Shotgun, Rifle, and TMP are heavily utilized for their versatility and stopping power. The Killer7 becomes essential for specific late-game encounters, and the Rocket Launcher is often used for specific boss fights if available.

Q4: How long does a typical Resident Evil 4 Professional Glitchless run take?

Depending on the runner's skill and the specific version of the game, runs can range anywhere from around 1 hour 30 minutes to over 2 hours.

In conclusion, mastering Resident Evil 4 Professional Glitchless is a journey that requires dedication, meticulous practice, and an unwavering spirit. It's about pushing the boundaries of what's possible within the game's intended design. Embrace the challenge, learn from every run, and soon you'll be executing flawless strategies that were once only a dream. Remember to study the routes, hone your combat skills, and never underestimate the power of a well-timed break.

Now, get out there, practice hard, and tell us about your best times and strategies in the comments below! What's your favorite trick for the Krauser fight? Let's build the ultimate community knowledge base!

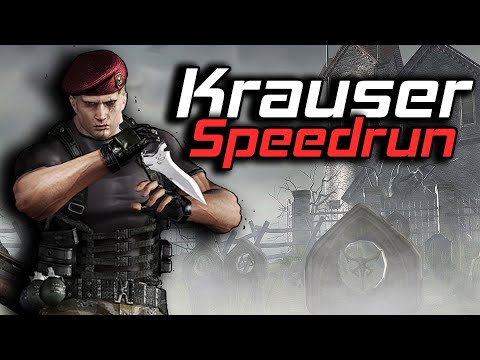
Resident Evil 4: Mastering the Krauser Fight for Speedruns - Strats, Skips, and More!

Introduction: The Krauser Gauntlet

Hey there, speedrunning fanatics! Welcome back to GamingSpeedrun.com. Today, we're diving deep into one of the most intense and skill-testing encounters in any video game: the Krauser fight in Resident Evil 4. Whether you're chasing a world record or just trying to shave seconds off your personal best, mastering this brutal duel is absolutely essential. This isn't just another boss fight; it's a true test of reflexes, strategy, and nerve. Let's break down exactly how to conquer this formidable foe and shave precious time off your runs.

Why the Krauser Fight is Crucial for RE4 Speedruns

In any speedrun, certain segments can make or break your entire attempt. The Krauser fight is undeniably one of those critical choke points in Resident Evil 4. The sheer amount of time you can gain or lose here is staggering. A clean, efficient kill on Krauser sets you up perfectly for the rest of the game. Conversely, a botched encounter can lead to wasted ammo, lost health, and significant time penalties, often forcing a reset.

The fight is designed to be a dramatic escalation, pushing Leon to his limits. For speedrunners, this translates into an opportunity. By understanding his attack patterns, utilizing the right tools, and executing precise movements, you can turn this grueling ordeal into a swift victory. This is where the true art of speedrun strategy comes into play, focusing on efficiency and exploiting every possible advantage.

Optimal Weapon Loadout for the Krauser Encounter

Choosing the right weapons is paramount. For most speedrun categories in Resident Evil 4, the standard loadout you'll have entering the Krauser fight usually includes the Shotgun, Rifles, and Leon's trusty Combat Knife. Some categories might allow for specific weapon upgrades or different loadouts, but generally, you want reliable damage output and crowd control.

The Riot Gun or Striker Shotgun, if upgraded, offers excellent close-range stopping power. The Rifle (especially the semi-auto version) is crucial for hitting weak points from a distance. And of course, the Knife is the star of the show during the initial QTE-heavy phase.

A common strategy involves conserving ammo for bosses. This means relying on your knife and well-placed shots rather than spraying and praying. In my experience, ensuring your most damaging weapons are fully loaded and upgraded before this encounter is non-negotiable. Every bullet counts!

Phase 1: Knife Duel Strats

The first phase of the Krauser fight is iconic. It's a series of quick-time events (QTEs) and precise knife parries. The key here isn't brute force; it's timing and pattern recognition. You'll need to mash buttons and react swiftly to Krauser's aggressive lunges and slashes.

The goal is to survive these sequences while dealing chip damage. Each successful parry or dodge builds your confidence and conserves health. Don't get greedy! Rushing Krauser here will likely result in taking unnecessary damage. Focus on executing the prompts perfectly. Many runners practice these sequences extensively to build muscle memory. It feels less like combat and more like a rhythm game at this point.

The knife duel is less about offense and more about perfect defense. Your primary objective is to survive and conserve resources.

There are specific moments where you can get a few quick knife slashes in between his combos, but these are high-risk, high-reward. For most speedruns, sticking to the QTEs and parries is the safer and more consistent route.

Exploiting Krauser's Patterns

Krauser, like any good boss, has predictable attack patterns. During the knife phase, his lunges and overhead swings have distinct wind-ups. Learning to read these telegraphs allows you to time your parries or dodges perfectly. He often follows a sequence of attacks, and understanding this flow is vital.

For example, after a certain combo, he might pause briefly, presenting a small window for a counter-attack or a quick repositioning. In the second phase, his movements become more varied with the introduction of his mutated arm and machine gun.

The key is observation and practice. The more you fight him, the more ingrained his tells become. This turns what seems like chaotic combat into a choreographed dance where you dictate the rhythm.

Phase 2: The Machine Gun Showdown

Once you've survived the initial onslaught and triggered the cutscene, you enter the second, more open-arena phase. Krauser transforms, wielding a devastating machine gun attachment on his arm. This is where ammo management and tactical positioning become critical.

Your primary goal is to deal as much damage as possible while avoiding his relentless gunfire. The Rifle is excellent here for hitting his glowing weak points (usually the eye or mutated parts) from a safe distance. If you've upgraded the Riot Gun, you can also use it effectively when he closes the distance, but be wary of the spread.

Conserving magnum ammo for later bosses is often a priority, so maximizing damage with the rifle and shotgun is key.

Look for opportunities to flank him or use the environment for cover. Sometimes, he'll pause after a long burst of fire, giving you a window to land several shots. Remember, headshots and weak point hits deal significantly more damage and can stagger him, interrupting his attacks.

Advanced Techniques and Potential Skips

For the truly dedicated speedrunners, there are advanced techniques and even minor glitches that can be exploited. While major skips are rare in this specific encounter due to its scripted nature, optimizing movement and attack windows is where the time is saved.

One common technique involves precise positioning to bait specific attacks, allowing for quicker counter-attacks. Some runners experiment with using grenades or flashbangs at specific moments to create longer stun windows, maximizing damage output. While not game-breaking, these small optimizations add up.

For categories that allow it, certain route optimizations might involve grabbing specific items or performing actions in a way that slightly alters Krauser's AI, potentially leading to faster engagements. Always check the speedrun.com leaderboards and forums for the latest discovered strats. The news section there is invaluable for staying updated on the meta.

RNG Management in the Krauser Fight

Ah, RNG – the bane and blessing of speedrunners everywhere. While many aspects of the Krauser fight are scripted, there can still be minor variations in enemy placement, Krauser's attack timings, or the effectiveness of certain hits. You can't control the Random Number Generator, but you can mitigate its impact.

The best way to manage RNG is through consistency. By perfecting your own execution, you reduce the reliance on fortunate random events. If a run feels slightly off due to bad RNG, a skilled runner can often adapt and compensate without losing significant time. This comes from countless hours of practice and a deep understanding of the game's mechanics.

Consistency in your execution is the best defense against unfavorable RNG.

For instance, if Krauser's initial knife lunges are slightly delayed, you need to be ready to react rather than panic. If his machine gun bursts are longer than usual, you need to know exactly when to seek cover and when it's safe to pop out and shoot.

Practicing the Fight Effectively

Mastering the Krauser fight requires dedicated practice. The best way to improve is to isolate the encounter. Many modern speedrunning tools or even in-game chapter select features allow you to repeatedly practice specific sections without having to play through the entire game.

Focus on one phase at a time. Spend sessions purely on perfecting the knife duel QTEs and parries. Then, move on to Phase 2, concentrating on weapon choice, ammo conservation, and damage optimization. Record your attempts and review them. Look for moments where you took unnecessary damage, missed shots, or hesitated.

Watching top runners can also provide invaluable insights. Analyze their movement, their aim, and how they react to Krauser's attacks. Many runners share their strategies on platforms like YouTube or Twitch, offering a wealth of knowledge for free. This community aspect is what makes gaming and speedrunning so engaging.

Frequently Asked Questions

Q1: What's the fastest way to kill Krauser in Resident Evil 4?

A1: The fastest way involves executing perfect QTEs and parries in Phase 1, followed by exploiting his weak points with the Rifle and Shotgun in Phase 2, minimizing any wasted shots or movement.

Q2: Can you skip the Krauser fight entirely?

A2: No, the Krauser fight is a mandatory story encounter in all standard categories. There are no known skips that bypass this fight.

Q3: Which weapon is best against Krauser in Phase 2?

A3: The Rifle is generally considered the best for hitting weak points from a distance, while the Shotgun (like the Riot Gun or Striker) is effective for close-range damage and staggering him.

Q4: How important is ammo management for this fight?

A4: Extremely important. Conserving ammo for Krauser allows you to save powerful weapons like the Magnum for later bosses, which is crucial for optimal speedrun times.

The Krauser fight is a rite of passage for any Resident Evil 4 speedrunner. It demands precision, knowledge, and nerves of steel. By implementing these strategies, practicing diligently, and understanding the nuances of the encounter, you'll be well on your way to shaving those crucial seconds off your runs. Keep practicing, keep pushing your limits, and maybe we'll see your name climbing those world record boards soon!

What are your go-to strategies for the Krauser fight? Do you have any favorite knife parry timings or QTE tricks? Share your insights in the comments below! Join our Discord community to connect with fellow speedrunners, share tips, and find people to run with. Happy speedrunning!

Resident Evil 4 Professional Speedrun: Mastering the PS5 Meta

```
Welcome, fellow speedrunners and survival horror aficionados, to the ultimate deep dive into *Resident Evil 4* on PlayStation 5, specifically tackling the Professional difficulty! If you've clicked on this article, chances are you're not just looking to beat Leon's harrowing journey through rural Spain, but to obliterate it. You're here to shave precious seconds, master every encounter, and potentially chase that elusive World Record. This guide is crafted for you – the hardcore gamer craving efficiency, strategy, and the thrill of a perfectly executed run. We're going beyond just playing the game; we're dissecting it for speed. Whether you're a seasoned speedrunner looking to refine your existing strats or a newcomer eager to learn the ropes of professional-level play, you've come to the right place. We'll break down the essential techniques, route optimizations, and crucial decision-making points that separate a good run from a legendary one on the PS5. Prepare to learn how to manipulate enemies, conserve resources like a ghost, and exploit every possible shortcut.

Introduction: The Professional Challenge

Professional difficulty in *Resident Evil 4* is no joke. It's designed to test your mastery of the game's mechanics, your resource management, and your nerve. Enemies hit harder, are more aggressive, and crucially, can kill you in one or two hits. For speedrunning, this means every engagement must be deliberate. There's no room for error, no space for casual exploration. We're aiming for precision, efficiency, and ruthless execution. The PS5 version offers slightly different performance characteristics, and understanding how they impact movement and aiming is key.

Professional Difficulty Essentials: More Than Just Ammo Conservation

Survival on Professional isn't just about having enough bullets; it's about knowing when to fight, when to run, and how to make every bullet count. * **Damage Thresholds**: Understand how many hits specific enemies take with your chosen weapons. Knowing that a headshot with the Red9 will stagger a Ganado, allowing you to follow up with a melee attack, is crucial for crowd control and saving ammo. * **Enemy AI Exploitation**: Enemies on Professional are hyper-aggressive. This aggression can be used against them. Luring them into traps, chokepoints, or environmental hazards can clear areas much faster than direct confrontation. * **Resource Management**: This is paramount. Every grenade, every special ammo type, every herb needs a purpose. You won't be crafting stacks of ammo; you'll be meticulously managing what you find. Prioritize selling treasures that offer high Ptas for minimal inventory space. * **The Merchant is Your Best Friend**: Knowing what to buy, when to upgrade, and when to sell is as important as aiming. Early game upgrades can significantly speed up boss fights and tough encounters.

Route Optimization: The PS5 Advantage

The core of any speedrun is the route. For *Resident Evil 4* on PS5, this involves understanding the most efficient path through the game, minimizing backtracking, and executing necessary combat encounters as quickly as possible. * **Minimizing Backtracking**: The map is your guide. Plan your route to collect necessary items and trigger key events in a logical progression. Avoid revisiting areas unless absolutely necessary. * **Cutscene Skips**: While *Resident Evil 4* has fewer skippable cutscenes than some games, knowing which ones can be skipped or how to skip them the moment they become available saves precious seconds. * **Environmental Interaction**: Use ladders, barrels, and explosive objects to your advantage. Triggering an explosion to clear a group of enemies is faster than shooting each one.
In my experience, the initial village encounter is a prime example of route optimization. Instead of clearing every enemy, a well-practiced runner can B-line through, using the environment to bottleneck pursuers and reach the church relatively unscathed.

Combat Strats: Mastering Encounters

Direct combat on Professional is a deadly dance. Here's how to approach it efficiently: * **Staggering Enemies**: Headshots and precise shots with high-power weapons (like the Riot Gun or Broken Butterfly) can stagger enemies. This creates openings for quick melee attacks, which are faster and conserve more ammo than subsequent gunshots. * **Crowd Control**: When faced with multiple enemies, use flash grenades or shotgun blasts to create space or knock them down. Prioritize taking out the most dangerous threats first, often those with ranged attacks or those who can instantly kill you (like chainsaw enemies). * **Knife Usage**: The knife is your best friend for conserving ammo. Use it to finish off downed enemies, break wooden barricades, and even chip away at certain boss health bars during specific phases. Mastering knife lunges can save countless bullets.

Enemy Manipulation & Skips

Sometimes, the fastest way to deal with an enemy is not to deal with them at all. * **Triggering and Running**: Many enemy spawns can be triggered by simply walking into a certain area, and then you can immediately run past them before they fully aggro or become a threat. This requires precise positioning and timing. * **AI Pathing Exploitation**: Enemies have predictable paths. You can often lure them into positions where they won't detect you, or where they are trapped by the environment, allowing you to sneak past or line up a perfect shot. * **Specific Skips**: Throughout the game, there are specific sequences or encounters that can be entirely skipped with precise movement and knowledge of trigger points. For instance, certain groups of Ganados can be bypassed by jumping through windows or using specific climbing points that they won't follow you through immediately.
The infamous "Chainsaw Demo" encounter can be significantly shortened by mastering a specific window jump that most enemies can't immediately follow you through, buying you crucial seconds to escape the initial onslaught.

Boss Fights: Quick Kills

Bosses are often major time sinks. Efficiently dispatching them is key to a good speedrun time. * **El Gigante**: Weak point exploitation is crucial. Using high-damage weapons like the Killer7 or magnum rounds on its exposed parasites after staggering it is key. Grenades can also stagger it effectively. * **Del Lago**: Quick-time events (QTEs) are part of this fight. The faster you mash buttons and aim accurately, the quicker it ends. Conserving harpoons and aiming for the glowing weak spots is vital. * **Krauser**: This fight often involves QTEs and precise aiming. Using the knife during his mutated form's attacks, when timed correctly, can lead to massive damage and stun him for further attacks. * **Salazar**: Exploiting his vulnerable eye with high-damage weapons is the fastest method. Flash grenades can stun him, creating opportunities.

Weapon Choices for Speed

Loadout optimization is critical. You can't carry everything. * **Handgun**: The Red9 with its stock is a popular choice for its stopping power, crucial for staggering enemies on Professional. The Blacktail offers faster firing and reload. * **Shotgun**: The Riot Gun offers excellent tight spread and power for its ammo efficiency, great for crowd control and stagger. The Striker has a massive capacity but is less precise. * **Rifles**: The Stingray (semi-auto) is often preferred for its rate of fire, useful for hitting distant weak points quickly. The SR M1903 (bolt-action) hits harder but is slower. * **Magnum**: The Broken Butterfly or Killer7 are essential for boss damage and taking down heavily armored enemies quickly. * **Special Weapons**: TMP is great for sustained fire and stunning. Rocket Launchers are typically reserved for specific boss strats or emergencies due to their rarity and cost.

Common Mistakes to Avoid

Even experienced players can slip up. Here are common pitfalls on Professional speedruns: * **Over-reliance on Healing**: Taking unnecessary damage forces you to use healing items, which costs time and resources. Focus on avoiding hits entirely. * **Wasting Ammo on Non-Threats**: Don't shoot every single enemy you see. If you can run past them safely, do it. * **Ignoring Merchant Upgrades**: Skipping crucial weapon upgrades (like the Red9's stock or the shotgun's power) will make later encounters significantly harder and slower. * **Poor Inventory Management**: Spending too much time swapping items or discarding treasures inefficiently can add up. Keep your inventory organized. * **Failing QTEs**: Quick Time Events on Professional often result in instant death, costing significant time or ending the run. Practice these inputs.
I once lost a potential PB because I forgot to buy the Riot Gun upgrade. The subsequent crowd in the castle would have taken twice as long to clear, and that's all it takes. Always plan your merchant stops!

Frequently Asked Questions

Q1: Is the PS5 version significantly different for speedrunning compared to other platforms?

The core gameplay remains the same. The PS5 version offers improved performance and loading times, which can shave off seconds overall, especially during scene transitions and asset loading. The core strats are largely transferable, but minor timing adjustments might be needed.

Q2: What is the most important weapon for a Professional speedrun?

This is debatable and depends on the specific route, but generally, a fully upgraded Red9 with stock for staggering and crowd control, and a fully upgraded Riot Gun for close-quarters power and ammo efficiency are considered essential. The magnum is vital for bosses.

Q3: How do I deal with the Regenerators/Iron Maidens quickly?

These enemies require precise targeting of their weak points (the parasitic larvae). Using the Riot Gun or Stingray to hit them during their attacks, or a magnum round, is the most efficient way. The thermal scope attachment for the rifle can also help in later encounters.

Q4: What's the single biggest time-saver in a Professional run?

Mastering enemy manipulation and skips. Knowing exactly which enemies you can ignore, how to bait them, and where the fastest paths are, bypasses entire combat encounters and saves the most significant chunks of time.

Q5: Should I focus on Any% or a specific category for my first speedrun?

For *Resident Evil 4* Professional, an Any% run is usually the most popular and accessible starting point. It focuses on reaching the end credits as fast as possible, often involving sequence breaks and aggressive routing. The journey through *Resident Evil 4*'s Professional mode is a gauntlet that demands skill, knowledge, and unwavering focus. By internalizing these strategies, optimizing your route, and practicing relentlessly, you'll be well on your way to achieving incredible times. Remember, speedrunning is about constant improvement. Analyze your runs, watch other top players, and refine your techniques. What are your go-to strats for Professional? Did we miss any critical techniques? Share your thoughts, tips, and your own speedrun achievements in the comments below! Join our Discord channel to connect with other speedrunners, discuss strategies, and push the boundaries of what's possible in *Resident Evil 4*. Happy running! ```json { "@context": "https://schema.org", "@type": "FAQPage", "mainEntity": [ { "@type": "Question", "name": "Is the PS5 version significantly different for speedrunning compared to other platforms?", "acceptedAnswer": { "@type": "Answer", "text": "The core gameplay remains the same. The PS5 version offers improved performance and loading times, which can shave off seconds overall, especially during scene transitions and asset loading. The core strats are largely transferable, but minor timing adjustments might be needed." } }, { "@type": "Question", "name": "What is the most important weapon for a Professional speedrun?", "acceptedAnswer": { "@type": "Answer", "text": "This is debatable and depends on the specific route, but generally, a fully upgraded Red9 with stock for staggering and crowd control, and a fully upgraded Riot Gun for close-quarters power and ammo efficiency are considered essential. The magnum is vital for bosses." } }, { "@type": "Question", "name": "How do I deal with the Regenerators/Iron Maidens quickly?", "acceptedAnswer": { "@type": "Answer", "text": "These enemies require precise targeting of their weak points (the parasitic larvae). Using the Riot Gun or Stingray to hit them during their attacks, or a magnum round, is the most efficient way. The thermal scope attachment for the rifle can also help in later encounters." } }, { "@type": "Question", "name": "What's the single biggest time-saver in a Professional run?", "acceptedAnswer": { "@type": "Answer", "text": "Mastering enemy manipulation and skips. Knowing exactly which enemies you can ignore, how to bait them, and where the fastest paths are, bypasses entire combat encounters and saves the most significant chunks of time." } }, { "@type": "Question", "name": "Should I focus on Any% or a specific category for my first speedrun?", "acceptedAnswer": { "@type": "Answer", "text": "For Resident Evil 4 Professional, an Any% run is usually the most popular and accessible starting point. It focuses on reaching the end credits as fast as possible, often involving sequence breaks and aggressive routing." } } ] }

¿Dominar la Nueva Dificultad de Resident Evil 4 (2022)? ¡La Guía Definitiva para Conquistarla!

Introducción: El Desafío RE4

¡Compañeros speedrunners y amantes de la supervivencia extrema! Si has destrozado la historia principal de Resident Evil 4 innumerables veces, buscando esa run perfecta, es probable que te hayas preguntado si hay un nuevo límite que superar. Capcom, siempre atenta a nuestra sed de desafío, introdujo en 2022 una nueva **dificultad alternativa** que pone a prueba incluso a los veteranos más curtidos. ¿Estás listo para enfrentarte a enemigos más feroces, recursos más escasos y una presión constante que te hará sudar frío? En esta guía, desglosaremos todo lo que necesitas saber para no solo sobrevivir, sino para destrozar esta nueva modalidad como un auténtico maestro.

La Nueva Dificultad: ¿Qué Esperar?

Esta actualización trajo consigo un soplo de aire fresco y, a la vez, un huracán de desafíos para los jugadores de Resident Evil 4. No se trata solo de aumentar los puntos de vida de los Ganados o hacer que los francotiradores tengan mejor puntería. Estamos hablando de un rediseño sutil pero efectivo de la experiencia:

  • Enemigos más Agresivos: Los plagas son más rápidos, más resistentes y sus ataques tienen un mayor impacto. Preparate para esquivar y contraatacar constantemente.
  • Recursos Racionados: La munición y las hierbas curativas son más escasas que nunca. Cada bala cuenta y cada encuentro puede ser tu último si no gestionas bien tu inventario.
  • Nuevos Patrones de Ataque: Algunos enemigos presentan animaciones y patrones de ataque modificados, obligándote a reaprender sus movimientos.
  • Mayor Énfasis en la Planificación: Ya no puedes simplemente correr y disparar. Cada enfrentamiento requiere una estrategia cuidadosa, considerando el entorno y las armas disponibles.
"En mi experiencia como speedrunner, esta dificultad te obliga a pensar en cada movimiento. Los errores se pagan caro, y la gestión de la munición se convierte en el pilar fundamental para la supervivencia."

Estrategias Clave para la Supervivencia

Para triunfar en esta nueva dificultad, olvida las tácticas que te funcionaron en modos más sencillos. Aquí la supervivencia se basa en la anticipación y la eficiencia:

  • Prioriza los Skips: Identifica y domina los 'skips' de enemigos y secciones. Si puedes evitar un combate innecesario, hazlo. Cada bala ahorrada es un paso más hacia la victoria.
  • Uso Inteligente del Entorno: Aprovecha las trampas del escenario, las barricadas y las explosiones. Dispara a los barriles de aceite, atrae a los enemigos a emboscadas.
  • Evita el Combate Directo Innecesario: No tienes que eliminar a cada enemigo que aparece. Si puedes correr, esquivar y dejar atrás a un grupo, considera esa opción.
  • El Arte de la Evasión: Perfecciona tus mecánicas de esquiva y parry. Una parada exitosa puede darte la apertura necesaria para un contraataque devastador o para escapar de una situación crítica.

Builds Optimizadas: Armas y Atuendos

La elección de tu equipo puede marcar la diferencia entre el éxito y el fracaso. En esta dificultad, no todas las armas poderosas brillan por igual. Debemos enfocarnos en la versatilidad y la eficiencia:

Arma Principal: La Escopeta Táctica (Shotgun)

La escopeta táctica se convierte en tu mejor amiga para el control de masas. Su poder de derribo es crucial para crear distancia y gestionar hordas. Busca mejoras que aumenten su cadencia de disparo y su alcance.

Arma Secundaria: El Lanzamisiles (Rockets Launcher)

Aunque escaso, el lanzamisiles es tu carta de triunfo contra jefes y enemigos de élite. Úsalo con la máxima precisión y solo cuando sea absolutamente necesario. Considera si la ruta de speedrun que sigues permite adquirirlo sin perder demasiado tiempo.

Arma de Mano: La Pistola de Alto Poder (Handgun)

Una pistola bien mejorada sigue siendo vital para rematar enemigos y alcanzar objetivos a distancia. Prioriza las mejoras de daño y precisión.

Atuendo: El Chaleco Táctico

Si existe la posibilidad de equipar atuendos, busca aquellos que ofrezcan una defensa adicional o bonificaciones a la munición. En esta dificultad, cada punto de armadura cuenta.

"Personalmente, he encontrado que una combinación de la escopeta para control de grupo y la pistola de alto poder para remates es la estrategia más rentable en términos de munición y tiempo. El lanzamisiles es un lujo que no siempre es viable en un speedrun estricto."

Gestión de Recursos: Balas y Salud

Este es el núcleo de la supervivencia en la nueva dificultad. Ya no puedes permitirte desperdiciar una sola bala. La clave está en la conservación y la priorización.

  • Recolección Estratégica: Explora cada rincón, pero solo si es seguro y eficiente. A veces, es mejor dejar un recurso si el riesgo de atraer enemigos es alto.
  • Combinación de Hierbas: Aprende las combinaciones óptimas. Una hierba verde para pequeñas curaciones, combinada con una roja para curaciones completas o una azul para resistencia.
  • El Arte del Headshot: Los disparos a la cabeza son tu principal herramienta para ahorrar munición. Practica tu puntería hasta que sea instintiva.
  • Reciclaje Inteligente: Vende las armas secundarias que no vayas a usar y utiliza el dinero para mejorar tus armas principales.

Enfrentando a los Enemigos Más Difíciles

Los jefes finales y los enemigos de élite son donde esta dificultad realmente brilla en su crueldad. Aquí te dejo algunos consejos:

  • Krauser: Su fase de combate cuerpo a cuerpo es brutal. Perfecciona el 'parry' para interrumpir sus ataques y crear aperturas.
  • Salazar: Sus tentáculos son mortales. Apunta a sus puntos débiles y usa explosivos si los tienes a mano.
  • Ganados Especiales: Los Regeneradores y los Garradores requieren un enfoque diferente. Usa armas con alto daño y apunta a sus puntos débiles (plagas expuestas).

Potencial de Speedrun en la Nueva Dificultad

Para la comunidad de speedrun, esta nueva dificultad abre un abanico de posibilidades. Las estrategias que funcionaban antes pueden ser inviables debido a la escasez de recursos. Esto fomenta la innovación y la búsqueda de nuevas rutas y speedrunning strategies. El RNG (Random Number Generation) juega un papel aún más importante, ya que la aparición de recursos puede variar.

Personalmente, estoy emocionado por ver cómo la comunidad descompone esta dificultad. Ya se están viendo records increíbles que demuestran un dominio absoluto de las mecánicas del juego. ¡Es un momento emocionante para ser un fan de los videojuegos rápidos y desafiantes!

Preguntas Frecuentes

¿Es la nueva dificultad de Resident Evil 4 considerablemente más difícil que las existentes?

Sí, la nueva dificultad alternativa ofrece un aumento significativo en el desafío, centrándose en la escasez de recursos y la agresividad de los enemigos, lo que requiere un enfoque más estratégico y preciso que las dificultades previas.

¿Qué arma es la más recomendada para empezar en esta dificultad?

Generalmente, la escopeta táctica y una pistola de alto poder mejorada son las más recomendadas. La escopeta es excelente para control de multitudes, mientras que la pistola es ideal para rematar enemigos y disparos precisos a la cabeza, ahorrando munición.

¿Los 'skips' de enemigos siguen siendo viables en esta dificultad?

Absolutamente. De hecho, los 'skips' se vuelven aún más cruciales. Dado que los recursos son escasos, evitar combates innecesarios es una de las estrategias más efectivas para conservar munición y salud.

¿Hay alguna diferencia en el 'loot' o la aparición de objetos en esta dificultad?

Sí, la aparición de munición, hierbas y tesoros es considerablemente menor, lo que fuerza una gestión de recursos mucho más cuidadosa y estratégica.

¿Recomiendas esta dificultad para jugadores que recién empiezan en Resident Evil 4?

No es recomendable para principiantes absolutos. Se sugiere completar el juego en dificultades menores primero para familiarizarse con la historia, los controles y las mecánicas básicas antes de afrontar este reto extremo.


Conclusión y Llamada a la Comunidad

Dominar la nueva dificultad alternativa de Resident Evil 4 es un logro que exige paciencia, estrategia y una comprensión profunda de las mecánicas del juego. Hemos explorado las claves para la supervivencia, las builds más efectivas y cómo gestionar los escasos recursos. Ahora, el desafío es tuyo. ¿Estás listo para poner a prueba tus habilidades y ver si puedes superar este formidable obstáculo?

¡Comparte tus propios récords y estrategias en los comentarios! ¿Cuál ha sido tu mayor desafío? ¿Qué 'skip' te ha salvado la vida? Únete a nuestro Discord para discutir más sobre speedrunning community y las últimas novedades del mundo del gaming. ¡Nos vemos en el juego!

Resident Evil 4 Speedrun: Conquering Leon's Nightmare in Record Time

Resident Evil 4 Speedrun

The Unrelenting Return

Resident Evil 4. The name itself conjures images of chainsaw massacres, relentless Ganados, and Leon S. Kennedy's stoic struggle for survival. For many, it’s a classic horror experience. For us speedrunners, it’s a meticulously crafted gauntlet, a symphony of precise movements, resource management, and exploiting every quirk the game throws at us. Returning to this masterpiece after some time away, I found myself not just replaying a beloved title, but rediscovering its deepest secrets, the ones that shave off precious seconds and turn a good run into a world-record contender. This isn't just a walkthrough; it's a deep dive into the brutal efficiency required to conquer RE4 at its fastest.

What Drives the RE4 Speedrunner?

When a gamer searches for "Resident Evil 4 Speedrun," they're not typically looking for lore explanations or a casual playthrough. They’re driven by a thirst for **efficiency**, a desire to **master the mechanics**, and an ambition to **achieve the impossible**. The primary intent is to find **strategies and insights** that will help them: * **Achieve faster completion times**: Shaving off seconds, minutes, or even hours from their personal best (PB) or aiming for a new World Record. * **Understand advanced techniques**: Learning about glitches, skips, and optimal routes that are not apparent in a normal playthrough. * **Optimize resource management**: Discovering the best weapon loadouts, ammo conservation methods, and inventory management for speed. * **Learn from the best**: Gaining knowledge from experienced speedrunners who have dedicated countless hours to mastering the game. This guide is built around these core motivations, aiming to be the ultimate resource for anyone looking to tackle Resident Evil 4 at breakneck speed. We're talking about precision, knowledge, and a bit of calculated madness.

Early Game Domination: The Village and Beyond

The opening hours of Resident Evil 4 are critical. Every encounter, every decision, sets the stage for the rest of your run. The iconic **Village** section is a masterclass in crowd control and resource acquisition. * **Initial Gear Management**: You start with limited ammo. Prioritize headshots to conserve bullets and stagger enemies, setting them up for kicks or melee attacks. The Shotgun, once acquired, is your best friend against groups. * **The First Merchant Encounter**: Don't hoard every Peseta. Invest in the Handgun upgrades early, focusing on firepower. The Rifle is a crucial purchase later for distant threats and specific boss encounters. * **Key Item Acquisition**: Knowing the exact path to collect the Ink Ribbons, Green Herbs, and any early treasures is vital. Small optimizations here compound significantly. * **The Cabin Fight**: This is a rite of passage. For speedrunners, it's about setting up explosives (if available) and using the limited space to your advantage. A well-placed Mine Thrower can trivialize this encounter.

Mid-Game Mastery: Castle and Merchant Mayhem

The Castle section introduces more complex environments and tougher enemies like the Zealots and Plagas. This is where meticulous route planning and understanding enemy AI become paramount. * **The Grand Hall Ambush**: This is a classic choke point. Runners often utilize glitches or precise movement to skip significant portions of enemy engagement. * **Del Lago and El Gigante**: These early bosses require specific strategies. For Del Lago, it’s about rapid button prompts and precise throws. El Gigante is often managed with the Rifle or by utilizing environmental hazards if available. * **Merchant Upgrades**: By this point, you should be eyeing upgrades for the Rifle and possibly the Magnum for boss fights. The TMP can be a good addition for sustained fire. * **The El Castillo Arena**: Navigating the puzzles and combat within the castle walls requires a fluid understanding of enemy spawn points and escape routes.

Late Game Push: Island Assault and Final Showdown

The Island segment often features high-intensity combat, more mutated enemies, and the final boss encounters. This is where all your practiced skills and optimized loadouts come to fruition. * **The Krauser Fight**: Whether it's the knife duel or the projectile-heavy phase, mastering Krauser's attack patterns is key. Some runners utilize specific exploits to shorten this fight dramatically. * **Regenerators and Iron Maidens**: These enemies are bullet sponges and require focused fire. The Magnum and Rifle are essential here, and knowing their weak points is crucial. * **Salazar and Saddler**: These final bosses are typically where the most optimized strats and high-powered weapons are deployed. Precise aiming and timing are everything. * **The Final Escape**: The frantic escape sequences are less about combat and more about pure traversal and quick-time event (QTE) mastery.

Unlocking Secrets: The Glitches and Skips

Speedrunning RE4 is as much about playing the game as it is about breaking it in the most efficient way possible. These glitches and skips are the bread and butter of any serious run: * **Menu Glitch**: This is a foundational technique for many RE4 speedruns, allowing for quick inventory manipulation and sometimes enabling out-of-bounds travel. Understanding its nuances is paramount. * **Door Skips**: Certain doors can be bypassed entirely through precise movement techniques and game-breaking maneuvers. This saves massive amounts of time. * **The "Sword Flying" Glitch**: While more prominent in other games, RE4 has its own forms of object manipulation that can lead to unintended movement. Exploring these can reveal new routing possibilities. * **Infinite Ammo Exploits**: Though typically category-dependent, certain exploits can grant temporary or permanent access to infinite ammo, dramatically altering engagement strategies.
The beauty of speedrunning lies in discovering how to make the game work *for* you, not just *within* its intended boundaries.

The Rattlesnake Strategy: Reloading for Victory

One of the most effective and widely used speedrunning techniques in Resident Evil 4 is the "Rattlesnake" strategy, often associated with the Handgun. This involves a specific sequence of aiming, firing, and immediately initiating a melee attack or reload. 1. **Aim for the Head**: Always aim for the enemy's head. A successful headshot staggers them. 2. **Fire and Melee**: Immediately after the headshot lands and the enemy recoils, press the melee button. This executes a quick kick or elbow strike that often bypasses the need for a full reload animation and deals significant damage. 3. **Repeat or Reload**: If the enemy is still standing, repeat the process. If multiple enemies are present, use this window to reposition or switch weapons. This technique drastically reduces the time spent between shots, allowing for faster enemy disposal.

Weapon Loadouts for Speed

Choosing the right weapons and upgrades is critical for a fast run. Here’s a general guideline: * **Primary Weapon**: The SG-09 R Handgun is your workhorse. Prioritize its firepower and capacity upgrades. * **Secondary Weapon**: The Riot Gun Shotgun is essential for crowd control and specific boss phases. Invest in its firepower. * **Long Range**: The Stingray Rifle is invaluable for picking off distant enemies, disabling Plagas, and specific boss damage. * **Boss Killer**: The Broken Butterfly Magnum or the Killer7 (depending on availability and category) are your go-to for high-HP targets. Max out their power. * **Situational**: The TMP can be useful for suppressing fire, but its ammo consumption needs careful management.

Mastering Movement: Beyond the Sprint

Speed isn't just about running; it's about fluid transitions and minimizing downtime. * **Crouching and Quick Turns**: Mastering quick turns and utilizing crouching can sometimes offer slight advantages in positioning and avoiding attacks. * **Knife Usage**: The Knife is not just for last resorts. It can be used to break crates faster, finish off staggered enemies for no ammo cost, and even for specific exploits. * **Camera Manipulation**: In some instances, manipulating the camera angle can grant a few extra frames of movement or allow for more precise aiming.

Dealing with RNG: The Unpredictable Element

No speedrun is truly predictable due to Random Number Generator (RNG). Resident Evil 4 has its share of randomized elements: * **Enemy Placement**: While many enemy spawns are fixed, some minor variations can occur. * Merchant Inventory: The exact items available from the merchant can sometimes vary. * Item Drops: Ammo and health drops have a degree of randomness. The key to dealing with RNG is not to fight it, but to be adaptable. Experienced runners have backup plans and can adjust their strategy on the fly when luck isn't on their side. This is where thousands of hours of practice truly shine.
Adaptability is a speedrunner's greatest weapon. You can have the perfect route, but if you can't adjust to bad drops or enemy spawns, your run will crumble.

Frequently Asked Questions

Q: What is the most common speedrun category for Resident Evil 4?
A: The most popular category is typically "Any%", which means completing the game as fast as possible with no restrictions on glitches or skips. There are also categories like "100%" (collecting all items) or "Glitchless" runs.

Q: Which weapon is considered the best for speedrunning RE4?
A: While loadouts vary, the Handgun (with upgrades) and the Rifle are consistently essential for their efficiency in both combat and boss fights. The Magnum is crucial for high-HP targets.

Q: How do I start speedrunning Resident Evil 4?
A: Begin by watching top speedrunners on platforms like Twitch and YouTube. Study their routes, techniques, and learn the game's mechanics inside out. Practice consistently, focusing on one section at a time.

Q: Are there any major glitches that skip large portions of the game?
A: Yes, RE4 is famous for its glitches and skips, such as various door skips and menu glitches, which are integral to achieving top-tier times.

This brutal return to a classic has shown me that even a game as venerable as Resident Evil 4 still holds layers of secrets waiting to be exploited. The dedication required for a top-tier speedrun is immense, demanding not just skill, but a deep understanding of game mechanics, a willingness to experiment, and the resilience to push through countless failed attempts. It's a constant dance between perfection and embracing the chaos that the RNG throws at you.

So, what are you waiting for? Grab your controller, boot up RE4, and start shaving off those seconds. Share your personal best times and any unique strategies you discover in the comments below! If you’re looking for more in-depth guides and community discussions, join our Discord server. Let's conquer this classic together!

La Guía Definitiva de Speedrun para Resident Evil 4: Domando al 'Niño Más Pesado' (Ashley Graham) y Rompiendo tu PB

La Guía Definitiva de Speedrun para Resident Evil 4: Domando al 'Niño Más Pesado' (Ashley Graham) y Rompiendo tu PB

Portada de la guía de speedrun de Resident Evil 4 con Ashley Graham
¡LEON! ¡HEEEELP! Si has jugado Resident Evil 4, este grito está grabado a fuego en tu cerebro. Es el sonido que precede a un "Game Over", el heraldo de una run fallida, la banda sonora de la frustración. Para un jugador casual, Ashley Graham es una misión de escolta. Para un Speedrunner, es una mecánica compleja, un recurso a gestionar, y el factor RNG que puede destrozar un PB (Personal Best) que parecía seguro. Pero, ¿y si te dijera que esa "carga" puede convertirse en tu mejor herramienta? ¿Que el "niño más pesado" del gaming es, en realidad, la clave para desbloquear tiempos de récord mundial? Aquí en GamingSpeedrun.com, no solo jugamos rápido, jugamos de forma inteligente. En esta guía ultra-detallada, vamos a desglosar cada frame, cada strat y cada glitch para transformar a Ashley de un lastre a un cohete. Prepárate para dominar la escolta más infame de los Videojuegos y pulverizar tus tiempos.

1. Entendiendo a la "Carga": Mecánicas Clave de Ashley Graham

Antes de correr, hay que aprender a caminar. Y en RE4, eso significa entender cómo funciona el "cerebro" de Ashley. No es solo una entidad que te sigue; tiene su propia IA, hitbox y estados.
  • Salud y Estados: Ashley no tiene una barra de vida visible, pero puede recibir daño. Un golpe fuerte la dejará en el suelo, incapacitada temporalmente. Si recibe otro golpe en este estado, muere y se acaba la run. El objetivo es evitar que reciba el primer golpe.
  • La IA de "Sígueme": Por defecto, Ashley intentará mantenerse a una distancia media detrás de Leon. Es predecible, pero se atasca fácilmente en esquinas o con enemigos. Conocer su "radio de seguimiento" es clave para manipularla.
  • El Comando "Espera": Dejarla quieta parece seguro, pero es una trampa para novatos. Un Ganado que no ves puede secuestrarla mientras estás a dos habitaciones de distancia. El comando "Espera" se usa de forma quirúrgica y temporal, nunca como una solución a largo plazo.
  • Puntos de Escondite (Dumpsters): Los contenedores y armarios no son solo para la inmersión. Son herramientas de Estrategia Gaming. Dejar a Ashley en un "dumpster" la hace 100% invulnerable e invisible para los enemigos. El truco es saber cuándo esconderla y, más importante, cuándo sacarla sin perder tiempo.
Dato de Pro: La hitbox de Ashley al ser cargada por un enemigo es enorme. Prioriza siempre a los Ganados que inician la animación de "agarre". Un disparo rápido a la pierna es más efectivo que intentar matar a tres enemigos a su alrededor.

2. Estrategias Fundamentales de Posicionamiento y Mando

Ahora que conoces sus bases, hablemos de las strats que separan a los amateurs de los contendientes al WR (World Record).
  1. La Regla de Oro: El Escudo Humano Inverso. Leon siempre debe estar entre Ashley y la amenaza. Piensa en ella no como alguien a quien proteges, sino como una extensión de tu espalda que no puede recibir daño. En pasillos, corre pegado a una pared para que ella se alinee detrás de ti en el lado seguro.
  2. El Quick Turn es tu Mejor Amigo: El giro rápido de 180° no es solo para el combate. Es la herramienta más potente para re-posicionar a Ashley. ¿Se quedó atrás? Corre hacia adelante, gira, llámala ("Ashley!") para que corra hacia ti, y vuelve a girar. Ahorras segundos vitales en cada zona.
  3. Control de Masas (Crowd Control): Las armas como la Escopeta (Striker) o las granadas de ceguera son tus mejores aliadas. No se usan para matar, sino para crear espacio. Un disparo de escopeta derriba a un grupo de enemigos, dándote a ti y a Ashley el tiempo justo para pasar corriendo.
  4. La "Pesca" de Ashley: A veces, necesitas que esté en un punto exacto para activar un script o un skip. Puedes "pescarla" moviéndote de lado a lado para que su IA corrija su posición y se coloque justo donde la necesitas. Es una técnica sutil que requiere mucha práctica.
Dominar estos conceptos básicos te ahorrará incontables reinicios y frustraciones. Son el pan de cada día en cualquier speedrun de Resident Evil 4.

3. Técnicas Avanzadas: Glitches y Skips que Dependen de Ashley

Aquí es donde la magia ocurre. Los mejores speedrunners no ven a Ashley como un obstáculo, sino como una llave que permite romper el juego. Estas son técnicas de nivel experto.
  • El Famoso "Ditman Glitch": Este es, probablemente, el glitch más importante del juego. Al equipar ciertas armas como la Striker o la TMP y realizar una acción específica, la velocidad de Leon aumenta drásticamente. Lo que muchos no saben es que la velocidad de Ashley también aumenta mientras sigue a un Leon "glitcheado". Esto transforma secciones lentas de "paseo" en sprints de alta velocidad, ahorrando minutos en el cómputo global.
  • Ashley como Activadora de Puertas: En ciertas áreas, como el laberinto de setos del castillo, puedes dejar a Ashley en un punto de presión o cerca de una puerta. Luego, te alejas una distancia específica. Su "presencia" mantiene la puerta abierta o el puzle activado, permitiendo a Leon realizar skips que de otra manera serían imposibles.
  • El Salto de la Vagoneta (Minecart Skip): Una de las strats más difíciles pero más gratificantes. En el Capítulo 4-1, con un posicionamiento frame perfect, es posible usar a Ashley para activar un checkpoint mientras Leon se sale de los límites del mapa (Out of Bounds), saltándose por completo una de las secciones más largas y peligrosas de la vagoneta. Un skip que puede decidir un world record.
  • Manipulación de la IA enemiga: Los enemigos a menudo priorizan a Ashley. Puedes usar esto a tu favor. Colócala como cebo en un lado de una habitación mientras tú te encargas de un objetivo en el otro. Es arriesgado, pero en una Challenge Run o un speedrun optimizado, es una táctica viable.
Para ver estas técnicas en acción, te recomiendo encarecidamente visitar la página de Resident Evil 4 en Speedrun.com, donde encontrarás videos de los mejores jugadores del mundo ejecutando estas maniobras a la perfección.

4. El Debate del Traje Especial 2: ¿La Armadura es para Cobardes o para Genios?

Al completar el juego una vez, desbloqueas el Traje Especial 2: una armadura de caballero para Ashley. Con ella, es completamente invulnerable. No puede recibir daño y los enemigos ni siquiera pueden levantarla.
¿Usarla es hacer trampa? En el mundo del speedrunning, la respuesta es: depende de la categoría.
Las runs en la categoría principal (Any% New Game) no permiten este traje. Sin embargo, existe la categoría New Game+, donde sí está permitido. ¿Cuál es su utilidad estratégica?
  • Práctica de Rutas (Routing): Es una herramienta de entrenamiento increíble. Puedes perfeccionar tus movimientos, probar skips y optimizar tu gestión de inventario sin la variable aleatoria de que Ashley sea capturada.
  • Seguridad en Runs Largas: Para categorías como 100% Completionist, donde la run dura horas, un solo error con Ashley puede ser devastador. La armadura elimina ese factor de estrés.
  • Un Estilo de Juego Diferente: Con Ashley invulnerable, las Estrategias de Juego cambian. Puedes usarla para bloquear proyectiles o incluso para hacer "bodyblock" a ciertos enemigos en pasillos estrechos. ¡Es POG!
No subestimes el poder de la armadura. No te dará el récord en la categoría principal, pero te hará un mejor jugador y te abrirá las puertas a otras formas de competir.

5. Análisis en Video: Cuando Todo Sale Mal (y Cómo Evitarlo)

A veces, la mejor forma de aprender es viendo el caos en estado puro. El siguiente video, aunque presentado con un tono de comedia por el gran AuronPlay, encapsula perfectamente la esencia de la frustración gamer cuando las cosas no salen como planeamos. Míralo no como una guía, sino como un recordatorio de cada error que estamos aprendiendo a evitar. Cada grito de pánico es un recordatorio para mantener la calma y seguir la estrategia.
Ver estos momentos nos ayuda a apreciar la habilidad y la precisión milimétrica que se requiere para una run perfecta. Cada vez que veas a un jugador entrar en pánico, piensa: "¿Qué haría yo aquí? ¿Escopeta? ¿Giro rápido? ¿Esconder a Ashley?". Ese es el mindset de un verdadero speedrunner.

Preguntas Frecuentes (FAQ) para Speedrunners de RE4

Aquí respondemos algunas de las dudas más comunes que surgen al intentar rushear este clásico.

¿Cuál es la categoría de speedrun más rápida para Resident Evil 4?

La categoría más popular y rápida es la de Any% en dificultad Profesional. Esta categoría permite el uso de la mayoría de glitches y skips, incluyendo el famoso 'Ditman Glitch', para terminar el juego en el menor tiempo posible, que actualmente ronda los 70-80 minutos por los mejores runners.

¿El traje de 'Armadura de Caballero' para Ashley está permitido en los speedruns?

Sí, pero en su propia categoría. Usar el Traje Especial 2 (la armadura) que hace a Ashley invencible, te coloca en la categoría 'New Game+'. Las categorías principales como Any% o 100% se corren en 'New Game', donde no tienes acceso a estos desbloqueables. Usar la armadura es una excelente forma de practicar las rutas sin preocuparte por ella.

¿Qué es el 'Ditman Glitch' y cómo afecta a Ashley?

El 'Ditman Glitch' es un exploit que se activa al apuntar con ciertas armas (como la Striker o la TMP) y abrir el inventario en un frame específico. Esto aumenta la velocidad de movimiento de Leon en un 50%. Curiosamente, Ashley también se beneficia de este aumento de velocidad mientras sigue a Leon, lo que la hace mucho más eficiente para atravesar zonas rápidamente y un pilar fundamental en las Speedrunning Strategies de alto nivel.

¿Cuál es el skip más importante que involucra a Ashley?

Uno de los skips más cruciales es el 'Minecart Skip' en el capítulo 4-1. Permite saltarse una gran sección del recorrido en vagoneta, ahorrando varios minutos. Requiere una manipulación precisa de la posición de Ashley para que active un 'checkpoint' mientras Leon realiza un 'out of bounds' (salirse de los límites del mapa). Es una estratagema de alto riesgo pero con una recompensa de tiempo masiva.

Conclusión: De Carga a Campeona

Ashley Graham no es el personaje más pesado de YouTube, es una de las mecánicas de speedrunning más profundas y complejas de la historia. Dominarla es dominar Resident Evil 4. Requiere paciencia, precisión y un conocimiento casi enciclopédico del juego, pero la recompensa es inmensa: la satisfacción de ver tu tiempo en el cronómetro bajar segundo a segundo, sabiendo que has convertido el mayor obstáculo del juego en tu arma secreta. Ahora tienes las herramientas. Sal ahí fuera, empieza una nueva partida y aplica estas estrategias. Deja de temer ese grito de "¡LEON!" y empieza a verlo como una señal de que estás llevando el juego al límite. ¡Ahora te toca a ti! ¿Cuál es tu PB actual en Resident Evil 4? ¿Qué estrategia de manejo de Ashley te ha salvado más veces? Comparte tus récords y tus mejores trucos en los comentarios de abajo y únete a nuestra Comunidad de Jugadores!