Resident Evil 3 Nemesis GameCube Speedrun: Master the Nemesis in Record Time!

Ready to face the relentless pursuit of Nemesis and conquer Raccoon City at breakneck speed? If you've ever watched a speedrun and thought, "I could do that faster," then this guide is your launchpad. We're diving deep into the heart-pounding, adrenaline-fueled world of Resident Evil 3 Nemesis on the GameCube, focusing on what it takes to shave off every precious second and achieve a blistering clear time.

Introduction: The Thrill of RE3 Speedrunning

Resident Evil 3 Nemesis is a masterpiece of survival horror, but for speedrunners, it transforms into a high-octane race against the clock. Your goal? To navigate the decaying streets of Raccoon City, outsmart the terrifying Nemesis, and reach the epilogue faster than ever before. This isn't just about beating the game; it's about mastering its every mechanic, exploiting its every shortcut, and pushing the boundaries of what's possible.

Fundamentals of Resident Evil 3 Nemesis Speedrunning

Before you can even think about world records, you need a rock-solid foundation. Mastering the basics of RE3 speedrunning is non-negotiable. It's about efficiency, precision, and understanding the game at a granular level.

1. Optimal Route Planning

Every second counts. The single most crucial element of any speedrun is an optimized route. You need to know exactly where to go, what items to pick up, and in what order, to minimize backtracking and maximize forward momentum. This often involves memorizing item locations and planning your traversal to hit key objectives in the most efficient sequence possible.

  • Scout hidden paths and shortcuts.
  • Prioritize essential ammo and healing items.
  • Plan your route to minimize enemy encounters where possible.

2. Precise Movement and Dodge Techniques

In RE3, Jill's dodge mechanic is a lifesaver in a normal playthrough, but in a speedrun, it's a time-saving tool. Mastering quick turns, perfectly timed dodges against Nemesis's attacks, and fluid movement through tight spaces can shave crucial seconds off your overall time. Every stutter step, every missed dodge, adds up.

"The difference between a good run and a world record often comes down to the precision of Jill's dodges. Nail those, and you're already ahead."

3. Resource Management

Unlike a casual playthrough where you might hoard every bullet, a speedrun demands ruthless efficiency. You need *just enough* ammo to take down necessary enemies, *just enough* healing items for critical moments, and to know precisely which weapon to use for each situation. Wasting a single bullet or a healing herb can cost you valuable time later on.

Advanced Strategies for the Speedrunning Enthusiast

Once you've got the fundamentals down, it's time to explore the techniques that separate the good from the gods. These advanced strats are what truly define top-tier RE3 speedruns.

1. Skip Cutscenes and Dialogues

This might seem obvious, but knowing *exactly* when and how to skip every cutscene and dialogue box is paramount. Some skips are timed, and missing them can lead to awkward pauses or even force you to watch content you don't need to. Familiarize yourself with the button inputs for each skip.

2. Exploit Glitches and Sequence Breaks

The Resident Evil 3 Nemesis speedrun community has unearthed numerous glitches and sequence breaks over the years. These aren't bugs to be feared; they are tools to be mastered. Whether it's clipping through walls, skipping entire encounters, or triggering events out of order, understanding and executing these exploits can dramatically slash your completion time. The trickiest part is often the precise setup and execution required.

"Discovering a new glitch or mastering a tricky sequence break is one of the most rewarding aspects of the speedrunning hobby. It's a constant evolution."

3. Study World-Record Runs

The best way to learn is to watch the masters. Analyze current world-record runs on sites like speedrun.com. Pay close attention to their movement, their item usage, their positioning, and how they handle specific encounters or boss fights. You'll often find subtle tricks and optimizations that you might have missed.

  • Observe enemy manipulation tactics.
  • Note the exact positioning for skips and glitches.
  • Understand the inventory management between sections.

Embracing the Speedrunning Community

Speedrunning is often a solitary pursuit, but the community is what makes it thrive. Don't hesitate to connect with other RE3 speedrunners. Share your progress, ask questions, and participate in community events. The collective knowledge and support can be invaluable for your journey. Joining Discords, watching streams, and discussing strategies are all part of the fun!

"The RE3 community is full of passionate players. Sharing tips, celebrating PBs, and even friendly competition pushes everyone to get better."

Whether you're aiming for your first sub-2-hour clear or gunning for the world record, mastering Resident Evil 3 Nemesis on GameCube is a challenge that rewards dedication and skill. Keep practicing, keep learning, and most importantly, have fun outrunning the monster!

Frequently Asked Questions

  • What is the current world record for Resident Evil 3 Nemesis on GameCube?
    World records change frequently! The best place to check is always speedrun.com/re3nio, where you can see the latest times and categories.
  • Which version of Resident Evil 3 is best for speedrunning?
    For GameCube, the specifics of the release can matter. Generally, runners choose versions that allow for the most consistent execution of known glitches and fastest loading times. Always check community resources for the preferred version.
  • Is Resident Evil 3 Nemesis difficult to speedrun?
    Yes, it's considered a moderately to highly difficult speedrun due to Nemesis's unpredictable AI, the precision required for dodges, and the complexity of some glitches.
  • Where can I find more resources and guides for RE3 speedruns?
    Websites like speedrun.com, YouTube channels dedicated to speedrunning, and community Discord servers are excellent places to find detailed guides, tutorials, and connect with other runners.

What are your personal best times for RE3 Nemesis on GameCube? Any specific strategies you swear by? Share your thoughts and experiences in the comments below! Join our GamingSpeedrun Discord to connect with fellow speedrunners and share your achievements!


Monster Hunter Rise Sunbreak: Mastering the Insane 1'47"63 Gaismagorm Bow Solo Speedrun in Devil's Reincarnation

If you're deep into the heart of Monster Hunter Rise Sunbreak, you know the thrill of the hunt. This game has absolutely taken the gaming world by storm, and the community's passion, especially for speedruns, is undeniable. Today, we're diving headfirst into one of the most exhilarating challenges: the Gaismagorm Bow Solo Speedrun in Devil's Reincarnation. Forget just beating the monster; we're talking about obliterating it in a blistering 1 minute and 47.63 seconds. Let's break down how it's done.

What is Speedrunning?

For the uninitiated, speedrunning is more than just playing a game; it's an art form. The core objective is to complete a video game, or a specific segment within it, as fast as humanly possible. This isn't about casual playthroughs; it's about pushing the game's engine, mechanics, and your own skills to their absolute limits. Speedrunners often employ precise strategies, discover hidden exploits, and master intricate move combinations. They are the elite athletes of the gaming community, turning hours of gameplay into mere minutes.

Understanding the Gaismagorm Bow Solo Speedrun

The Gaismagorm Bow Solo Speedrun in the Devil's Reincarnation quest of Monster Hunter Rise Sunbreak is a testament to this dedication. Achieving a time of 1'47"63 isn't just fast; it's world-record territory for a solo bow user. This particular speedrun demands an almost telepathic understanding of Gaismagorm's attack patterns and a flawless execution of offensive and evasive maneuvers. It's a delicate dance between raw aggression and pinpoint accuracy, where every second counts.

In my experience, the Gaismagorm fight for speedruns is less about brute force and more about exploiting openings created by its own aggressive AI. You have to anticipate its moves before it even makes them.

Mastering the Gaismagorm Strat: Essential Techniques

This speedrun hinges on a very specific set of strategies, often referred to as the "strat." For the Gaismagorm Bow Solo, this means:

  • Optimal Bow Choice and Loadout: Selecting the right bow is paramount. Usually, this involves a bow with high raw damage and the appropriate coatings. Decorations and armor skills need to be meticulously chosen to maximize damage output, critical hits, and stamina management. Skills like Weakness Exploit, Critical Boost, Bow Charge Plus, and Stamina Surge are non-negotiable.
  • Precise Shot Placement: Every arrow needs to count. Focusing damage on critical hit zones (usually the head and chest) is vital. Knowing which shot type (e.g., Spread, Pierce, Rapid) is most effective against Gaismagorm's hitboxes at different ranges is key.
  • Stamina Management: Bow gameplay is heavily reliant on stamina. Mastering the Dodgebolt (or Substitute) and Courage Shot (or Rapid Fire) maneuvers, along with consuming Dash Juices or using skills that boost stamina recovery, is crucial to maintain a constant offensive pressure without running out of steam.
  • Exploiting Monster Openings: Gaismagorm has specific attack animations that leave it vulnerable. Identifying these windows and unleashing a full charge shot or a rapid volley during these moments is where the significant damage comes from. For instance, after certain powerful attacks, it might pause for a crucial second or two.
  • Elemental Weaknesses (If Applicable): While raw damage is often king in bow speedruns, understanding if Gaismagorm has a significant elemental weakness that your chosen bow can exploit can shave off precious seconds.

The sheer speed required means there's very little room for error. A single mistimed dodge or a missed critical hit can cost you the run.

The Importance of Practice and Preparation

As with any elite-level speedrun, practice isn't just important; it's the bedrock of success. Hours upon hours spent in the training area and repeating the Devil's Reincarnation quest are necessary. This practice involves:

  • Monster Pattern Recognition: Learning every single attack Gaismagorm can throw at you, its tells, its range, and its recovery time.
  • Execution Mastery: Perfecting the muscle memory for charging shots, aiming, coating management, and evasive maneuvers. This includes chaining combos seamlessly.
  • Route Optimization: Minimizing movement time. Every step, every dash, needs to be efficient. Knowing the exact positioning to land the most damaging shots consistently is vital.
  • RNG Manipulation (Where Possible): While some aspects of Monster Hunter are random (RNG), speedrunners try to influence or adapt to these factors. This could mean resetting the quest if the monster spawns in an unfavorable position or hoping for specific monster behaviors that lead to quicker openings.
There's a saying in the speedrunning community: "You don't beat the game, you learn its secrets." This is especially true for a fight like Gaismagorm.

Optimizing Your Run for Insane Times

To shave those crucial milliseconds and reach sub-1:48 times, consider these advanced optimizations:

  • Consumables Management: Efficient use of Mega Potions, Dash Juices, and Demondrugs. Knowing exactly when to pop each one for maximum uptime.
  • Wirebug Usage: Mastering the use of Wirebugs for quick repositioning, aerial attacks, or extending combos. Skills like Wirebug Whisperer can be invaluable.
  • Specific Skill Synergies: Finding niche skill combinations that might offer a slight edge, like Dragon Conversion if using specific elemental bows, or Status Trigger if a specific status weapon is viable.
  • Mitigation of "Bad RNG": Developing strategies to cope with less-than-ideal monster movements or attack patterns. Sometimes, a speedrunner can subtly influence the monster's AI with their positioning or attacks to bait a desired move.

Going Viral with Your Speedrun

Achieving a time like 1'47"63 is, frankly, spectacular and deserves to be shared. If you've managed to nail an incredible run, here's how to get it seen:

  • Record High Quality Footage: Use reliable capture software and ensure your commentary (if any) is clear and engaging. Good visual and audio quality are essential.
  • Platform Powerhouses: Upload your run to YouTube. Create engaging thumbnails and titles. Share clips and highlights on Twitter. Consider streaming your practice sessions or successful runs live on Twitch.
  • Community Engagement: Post your run on relevant subreddits like r/MonsterHunter and r/speedrun. Engage with comments and be open to feedback.
  • Collaborate and Compete: Connect with other speedrunners. Participate in community events or tournaments. Friendly competition can drive innovation and exposure for everyone involved. Sharing your world record attempt or achieved time can spark massive interest.

Remember, sharing your passion for speedrunning can inspire others and contribute to the vibrant gaming culture.

Frequently Asked Questions

Q1: What is the fastest weapon for solo speedrunning in Monster Hunter Rise Sunbreak?

A1: While bows (especially Spread and Rapid types) excel in many scenarios for raw damage and mobility, other weapons like the Switch Axe, Great Sword, and even certain Charge Blade setups can achieve incredibly fast times depending on the specific monster and quest. The Gaismagorm Bow run is a prime example of bow dominance.

Q2: How much practice is needed for a speedrun like this?

A2: For a world-class speedrun like the Gaismagorm Bow solo, expect to dedicate hundreds, if not thousands, of hours. It involves not just playing the game, but dissecting every mechanic and optimizing every action.

Q3: Are glitches and exploits allowed in speedruns?

A3: It depends on the category. "Any%" categories typically allow all glitches and exploits to finish the game as fast as possible. "100%" or "glitchless" categories have stricter rules. For a specific quest speedrun like this, the community usually decides the acceptable techniques.

Q4: What makes the Devil's Reincarnation quest suitable for speedrunning?

A4: This quest often features a specific monster with predictable AI and attack patterns, making it ideal for developing and executing a tight speedrun strategy. Gaismagorm's aggressive nature also provides consistent openings.

Monster Hunter Rise Sunbreak continues to offer an incredible playground for dedicated players looking to push their limits. Mastering a run like the Gaismagorm Bow Solo is a journey that demands dedication, precision, and an unyielding passion for the game. If you've achieved impressive times or have your own strategies to share, drop them in the comments below! Let's build the ultimate speedrunning community for Monster Hunter!

Join our Discord channel to connect with fellow speedrunners, share tips, and stay updated on the latest world records!

Resident Evil 4 Remake: Master the Professional & NG+ Speedruns

Hey fellow gamers and speedrunning fanatics! So, you’ve got your sights set on conquering the Resident Evil 4 Remake like a true pro, right? The whispers of insane runs on Professional difficulty and the allure of an NG+ dash are in the air. You're not just looking to finish; you're looking to blaze through it. Well, you've come to the right place. This isn't just about beating the game; it's about mastering its deepest secrets and shaving off every precious second. Whether you're a seasoned runner or just starting to get that itch for extreme efficiency, we're diving deep into the strategies that make the difference between a good run and a legendary one.

Resident Evil 4 Remake Professional Speedrun

Alright, let's talk about the Mount Everest of RE4 Remake runs: the Professional difficulty speedrun. This isn't your average playthrough. This is where precision, knowledge, and sheer nerve come into play. Every bullet counts, and one wrong move can send your entire run spiraling down the drain. The goal here is pure survival and maximum efficiency under the most brutal conditions the game throws at you. Forget about taking hits; you have to be a ghost, a shadow moving through hell.

Inventory Management: The Lifeline

Your attaché case is your best friend and your worst enemy. On Professional, space is tighter than a Ganado's grip. You absolutely must optimize what you carry. Prioritize essentials: ammo, health, and key items. Anything else is dead weight. My personal strategy? If I haven't used a specific ammo type in the last hour of gameplay, it's probably gone. Don't waste precious seconds agonizing over your inventory layout mid-combat. Quick drops are your friend. Learn what items are crucial for the next section and ditch everything else. Remember, you can always backtrack for essentials if absolutely necessary, but wasting time organizing when you should be moving is a run-killer.

"In Professional runs, every square centimeter of your attaché case is prime real estate. Treat it like gold."

Weapons are a huge part of this. You'll need to make tough choices about which firearms to keep and which to leave behind, or sell. The SG-09 R pistol is reliable early on, but you'll want to upgrade its firepower. The Riot Gun is a beast for crowd control, but ammo can be scarce. Always think about the upcoming encounters. Do you need piercing rounds for armored enemies, or raw stopping power for a charging foe?

Mastering Quick-Time Events (QTEs)

The QTEs in Resident Evil 4 Remake can be absolute run-enders if you’re not prepared. On Professional, they happen faster and have less room for error. The trick isn't just reacting; it's anticipating. You need to know exactly *when* and *where* a QTE will trigger. Some runners develop an almost subconscious rhythm, pressing the button prompt fractions of a second before it fully appears on screen. This requires practice, loads of it. Run these sections repeatedly in lower difficulties to internalize the timing. Missing a QTE means either taking damage, getting into a bad position, or even dying outright, costing you valuable time.

Pay attention to environmental cues. Sometimes Leon’s animations or enemy movements give away an impending QTE. Mastering these moments is crucial for boss fights and intense scripted sequences. For example, dodging those chainsaw attacks from Dr. Salvador requires perfect timing, and a missed dodge on Professional is usually fatal.

Resident Evil 4 Remake NG+ Speedrun

Now, let's shift gears to the NG+ speedrun. This is where you can really flex your muscles with an arsenal that would make a small army jealous. Starting with all your upgraded weapons and treasures from a previous playthrough drastically changes the game's pacing. You’re not struggling for survival; you’re demolishing everything in your path. The challenge here shifts from resource management to absolute speed and exploiting every advantage.

Weapon & Ammo Optimization

With NG+, you can bring the full power of your upgraded arsenal. This means prioritizing the weapons that offer the best damage-per-second (DPS) and ammo efficiency for speedrunning. The Stingray rifle with its infinite ammo upgrade, the fully upgraded Infinite Rocket Launcher (if you’re going for a specific category that allows it, check the rules!), or the devastating Primal Knife become absolute powerhouses. You'll still need to manage ammo for certain weapons, but the pressure is significantly reduced. Focus on using the most powerful tools for the job, ensuring you have enough ammo for key encounters and bosses. Don't get stingy with ammo you’ll easily replenish!

"NG+ isn't just about having better gear; it's about knowing exactly how to use that gear to obliterate obstacles in seconds."

Your inventory management becomes less about survival and more about carrying the absolute best loadout for maximum damage output. Maybe you carry the Punisher for hitting multiple enemies through shields, alongside the Killer7 magnum for critical boss damage. Think synergistic loadouts.

Exploiting Glitches and Shortcuts

This is where the true speedrunning magic happens in NG+. Advanced runners delve deep into the game's code and level design to find glitches and shortcuts that shave off minutes. These can range from sequence breaks, out-of-bounds exploits, or clever uses of game mechanics to bypass entire combat encounters or puzzles. Knowing the map inside and out is critical. You need to understand enemy AI, collision detection, and level triggers to pull off these advanced techniques reliably.

For instance, certain wall clips can allow you to bypass large sections of the village or castle. There are also known strategies to manipulate enemy pathing to group them up for easy elimination with powerful area-of-effect weapons, or even skip them entirely. Websites like speedrun.com are invaluable resources for discovering and verifying these advanced strats.

Mastering these requires dedication. You'll be watching top runners, practicing specific trick sequences over and over, and failing. A lot. But that’s the thrill of the speedrun. Finding that perfect sequence of movements and exploits is incredibly rewarding.

Frequently Asked Questions

Q1: What's the biggest difference between a Professional and an NG+ speedrun in RE4 Remake?
A1: The Professional speedrun focuses on extreme survival, resource management, and precise execution with limited resources. The NG+ speedrun leverages powerful, upgraded gear from a previous playthrough to focus on raw speed and exploiting skips/glitches.

Q2: Do I need to learn specific glitches for a basic NG+ speedrun?
A2: While advanced glitch exploitation is key for top-tier runs, a solid NG+ run can be achieved by simply using your powerful weapons effectively and taking optimal routes. However, learning a few key shortcuts can significantly improve your time.

Q3: How important are the Quick-Time Events (QTEs) in a Professional speedrun?
A3: Extremely important. QTEs on Professional are faster and unforgiving. Mastering their timing is crucial to avoid damage, death, and wasted seconds.

Q4: Where can I find the latest speedrun strategies and routes?
A4: The best place is the Resident Evil 4 Remake page on speedrun.com. You can find leaderboards, guides, and videos from top runners.

In conclusion, diving into the Resident Evil 4 Remake speedruns on Professional or NG+ is an incredible challenge that tests your skill, knowledge, and dedication. Whether you're aiming for the absolute fastest time or just want to improve your personal best, the key is practice, study, and a willingness to push the boundaries of what's possible. Don't be discouraged by failures; every attempt is a learning opportunity. Keep grinding, keep learning, and maybe you'll be the next world record holder!

What are your favorite tricks or strats for these runs? Did we miss anything crucial? Let us know in the comments below, and join our Discord server to connect with fellow speedrunners!

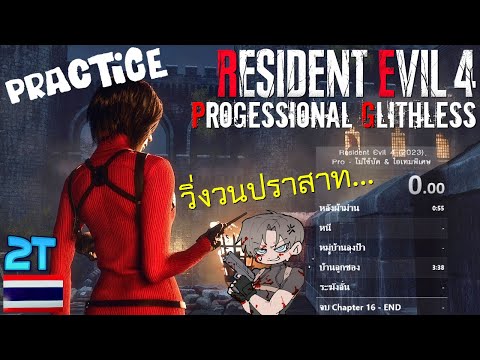
Resident Evil 4 Professional Glitchless: Mastering the Masterclass

Fellow speed demons and survival horror aficionados, welcome back to GamingSpeedrun! If you're anything like me, the allure of a perfectly executed Resident Evil 4 Professional Glitchless run is irresistible. It's the ultimate test of skill, knowledge, and sheer grit. We're talking about shaving milliseconds, mastering enemy AI, and executing every move with surgical precision. This isn't just playing the game; it's dissecting it, optimizing it, and bending it to your will. Forget the shortcuts; we're going for pure, unadulterated mastery.

Welcome to the Gauntlet

You've likely seen the incredible runs, the lightning-fast times, and thought, "How is that even possible?" The Resident Evil 4 Professional Glitchless category is where legends are made. It demands an intimate understanding of every enemy spawn, every item placement, and every subtle animation cancel. This guide is your roadmap to not just completing a run, but truly dominating it. We're going to dive deep into the strategies that separate the contenders from the champions.

The Philosophy: Why Glitchless?

In the world of speedrunning, "glitchless" signifies a purity of execution. It means beating the game using only intended mechanics. For Resident Evil 4, this category is particularly brutal on Professional mode due to the increased enemy damage and aggression. Every bullet counts, and every encounter must be optimized. It forces runners to rely on deep game knowledge, perfect movement, and precise aiming rather than exploiting unintended game behaviors. This is where true skill shines.

Building Your Foundation: Early Game Mastery

The initial moments of a Resident Evil 4 speedrun set the tone. Getting out of the first village section efficiently is paramount. Mastering the timing for melee attacks after headshots or stuns is crucial. Learn the optimal path to grab the shotgun early and how to deal with the initial wave of Ganados. Don't underestimate the power of a well-placed grenade to clear crowds.

Key areas to focus on early:

  • Efficiently clearing the first house sequence.
  • Mastering the church bell puzzle timing.
  • Securing the shotgun without wasting precious seconds.
  • Optimizing routes through the village square.

Section-by-Section Breakdown: Key Areas

Let's break down some of the most critical segments that often determine the success or failure of a Resident Evil 4 speedrun:

The Village Fight

This is the iconic opening gauntlet. Your goal is to survive and move forward with minimal health and ammo loss. Learning to herd enemies and use the environment, like the explosive barrels, is key. Memorizing the spawn points for the various Ganados is non-negotiable. For a Professional Glitchless run, you can't afford to get cornered here.

Cabin Defense

A notorious part of the game. Setting up explosives and using the windows strategically can save you a lot of health. Understanding which enemies are about to break through and prioritizing them is vital. The chainsaw enemies here are particularly deadly on Professional.

"In my experience, the key to the cabin defense isn't just shooting, it's about positioning yourself to maximize your damage output and minimize your exposure. Use those barrels!"

Castle Sequences

The castle introduces new enemy types and more complex layouts. The Novistadors can be a major time sink if not dealt with swiftly. Learning the optimal path through the various halls and avoiding unnecessary combat is crucial for maintaining momentum.

Island Approach

The final stretch. The Regenerators and Iron Maidens require specific strategies, often involving the powerful TMP or the Killer7 handgun. The sheer number of enemies can be overwhelming, so efficient crowd control is paramount.

Conquering the Horde: Enemy & Boss Strategies

Every enemy in Resident Evil 4 presents a unique challenge, especially on Professional. Understanding their AI and weak points is fundamental for a glitchless speedrun.

  • Ganados: Aim for headshots to stun, followed by a melee kick or rifle shot. Learn to group them for maximum effect with explosives.
  • El Gigante: Focus on the parasite on its back once it's stunned. A well-placed rocket launcher shot can end this fight quickly, but ammo is scarce.
  • Del Lago: This aquatic horror requires precise harpoon throws. Learn the timing for dodging its attacks and hitting its weak points.
  • Krauser: The knife fight is infamous. It's a test of parrying and quick-time event execution. Practice this section relentlessly. There are specific animations and timings to learn to make this manageable.
  • Salazar: This boss fight involves destroying tentacles and then dealing with Salazar himself. Use the environment to your advantage.
  • The U-3: Another challenging boss that requires understanding its attack patterns and hitting its weak points.
  • Osun 56 (Regenerators/Iron Maidens): The Killer7 or a fully upgraded TMP are your best friends here. Prioritize hitting the plagas. Using the thermal scope attachment for the rifle is essential.

The Art of Scarcity: Inventory & Ammo

On Professional mode, every resource is precious. Effective inventory management and ammo conservation are as important as combat skill. You simply cannot afford to waste a single bullet.

Key principles:

  • Prioritize Upgrades: Focus on damage and ammo capacity for your most-used weapons. The Shotgun and Rifle are critical early on. The TMP is excellent for crowd control and dealing with Regenerators.
  • Ammo Crafting: Learn the combinations for crafting ammo. Sometimes, it's more efficient to craft than to rely on drops.
  • Strategic Weapon Swapping: Know when to switch weapons to conserve ammo or deal optimal damage. For instance, using the TMP for fodder enemies to save shotgun shells for tougher threats.
  • Knife Usage: The combat knife is invaluable for finishing off stunned enemies or breaking certain objects, saving precious ammo.
"The merchant is your lifeline. Always check his stock for ammo and crucial weapon upgrades. Don't ignore the attache case upgrades either; more space means more efficiency."

Dialing In Your Practice Routine

Consistent, focused practice is the bedrock of any successful speedrun. Simply playing through the game repeatedly isn't enough; you need targeted training.

Effective Practice Techniques:

  • Section Practice: Use save points or chapter select (if available in your version) to isolate and repeat difficult sections. Focus on mastering one segment before moving to the next. For example, spend an hour just on the Krauser knife fight until it's muscle memory.
  • Route Memorization: Study established routes from top runners. Understand the exact path they take, enemy aggro triggers, and optimal movement.
  • Watch and Learn: Analyze top Resident Evil 4 speedrunners. Pay attention to their movement, aiming, inventory management, and decision-making in real-time. Don't just watch; dissect their strategies.
  • Full Run Attempts: Periodically attempt full runs, even if you know you'll be slow. This helps build endurance and identify patterns in your own mistakes across the entire game.
  • RNG Manipulation (Subtle): While it's glitchless, understanding subtle RNG factors like enemy drops or patrol paths can help you adapt.

The Mental Game: Staying Sharp

A Resident Evil 4 Professional Glitchless speedrun is a marathon, not a sprint. Maintaining focus and managing frustration are critical.

  • Take Breaks: Avoid burnout. Step away, stretch, and clear your head. Returning with a fresh perspective often solves problems you were stuck on.
  • Manage Expectations: You won't break world records overnight. Celebrate small victories, like beating a personal best segment time.
  • Stay Positive: Mistakes happen. Don't let a single fumble derail your entire run. Reset and focus on the next section. The psychological aspect is huge in these demanding runs.
  • Community Support: Engage with the speedrunning community. Share your struggles, ask for advice, and celebrate others' successes. Platforms like Discord are invaluable for this.

Frequently Asked Questions

Q1: What is the difference between any% and glitchless speedruns in Resident Evil 4?

Any% allows for the use of any glitches or exploits to finish the game as fast as possible. Glitchless, as the name implies, prohibits the use of any unintended mechanics, focusing purely on optimized gameplay.

Q2: Is Professional mode significantly harder for glitchless runs?

Yes, drastically. Enemies have much more health and deal significantly higher damage, making resource management and precise combat absolutely critical. Every mistake is heavily punished.

Q3: What are the most commonly used weapons for a glitchless speedrun?

Typically, the Shotgun, Rifle, and TMP are heavily utilized for their versatility and stopping power. The Killer7 becomes essential for specific late-game encounters, and the Rocket Launcher is often used for specific boss fights if available.

Q4: How long does a typical Resident Evil 4 Professional Glitchless run take?

Depending on the runner's skill and the specific version of the game, runs can range anywhere from around 1 hour 30 minutes to over 2 hours.

In conclusion, mastering Resident Evil 4 Professional Glitchless is a journey that requires dedication, meticulous practice, and an unwavering spirit. It's about pushing the boundaries of what's possible within the game's intended design. Embrace the challenge, learn from every run, and soon you'll be executing flawless strategies that were once only a dream. Remember to study the routes, hone your combat skills, and never underestimate the power of a well-timed break.

Now, get out there, practice hard, and tell us about your best times and strategies in the comments below! What's your favorite trick for the Krauser fight? Let's build the ultimate community knowledge base!