Yatoro's Naga Siren: A Masterclass in Dota 2 Carry Gameplay from 2014

Introduction: The Legend of Yatoro's Naga

Welcome, fellow gamers and speedrun enthusiasts, to GamingSpeedrun.com! Today, we're diving deep into a legendary piece of gaming history, a performance that still echoes in the annals of Dota 2 pro play. We're talking about Yatoro's absolutely insane carry performance as Naga Siren, specifically from a match played on March 25th, 2014. Forget mere wins; this was a masterclass, a spectacle of skill that demanded attention. If you're here, you're likely looking to dissect what made this play so legendary, how it was achieved, and perhaps, how you can incorporate similar brilliance into your own games. Get ready, because we're about to break down a performance that set the standard.

Deconstructing the [25/3/14] Performance

Dota 2, a game built on intricate strategy, split-second decisions, and unyielding teamwork, often presents moments that transcend normal play. Yatoro's Naga Siren on that fateful day in 2014 was one such moment. This wasn't just about picking a strong hero; it was about wielding Naga Siren like a scalpel, dissecting the enemy team with surgical precision. The game itself, a MOBA requiring players to destroy the enemy's Ancient, became Yatoro's playground.

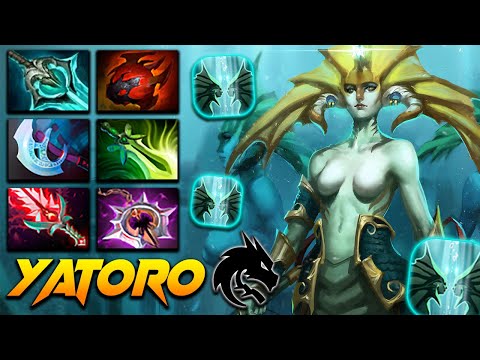
Naga Siren, a hero notorious for her ability to dominate the late game through split-pushing, crippling disables, and devastating physical damage, was in the perfect hands. Yatoro didn't just play Naga; he *became* Naga. His decision-making was impeccable, a testament to his deep understanding of the game's mechanics and flow. Every movement, every farming pattern, every calculated risk felt deliberate and impactful.

In team fights, Yatoro was a force multiplier. His ability to control engagements with Song of the Siren, followed by devastating illusions and targeted Ensnare, often turned the tide. Ganks were executed flawlessly, and his split-pushing pressure forced the enemy into impossible choices. This wasn't just good gameplay; it was a performance that any Dota 2 player, from novice to veteran, could learn immensely from. The sheer efficiency and calculated aggression displayed are hallmarks of top-tier speedrun mindset, even outside of a formal speedrun context.

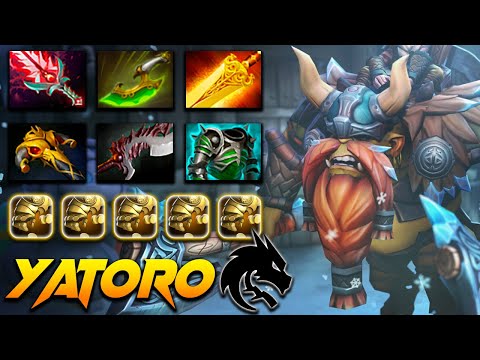
Yatoro's gameplay as Naga Siren on March 25th, 2014, was exceptional. He demonstrated superb decision-making skills, flawless execution, and an impressive understanding of the game mechanics.

Let's look at some specific elements that made this game stand out:

  • Farming Efficiency: Naga Siren is a premier hard carry. This means she thrives on gold. Yatoro's ability to maximize his farm per minute was crucial. He utilized his illusions to farm multiple creep waves simultaneously, drastically accelerating his item progression.
  • Illusion Management: The true power of Naga lies in her illusions. Yatoro didn't just send them down lanes; he used them to scout, create pressure, and even bait enemy spells. His control over these phantom copies was masterful.
  • Ultimate Usage: Song of the Siren is a game-changing ultimate. Yatoro used it not only defensively to save himself or allies but offensively to initiate fights, catch fleeing enemies, or secure objectives uncontested.
  • Itemization: The item build Yatoro opted for was perfectly tailored to his strategy and the game's state. Items like Radiance, Manta Style, and Diffusal Blade amplified his strengths, turning him into an unstoppable force.

Mastering Naga Siren: Core Strategies

For those of you looking to emulate this level of play, or even just climb the ranks with Naga Siren, understanding the core principles is key. Based on Yatoro's performance and the hero's strengths, here are the fundamental strategies you need to master:

  1. Prioritize Farming: As mentioned, Naga is a hard carry. Your absolute priority in the early to mid-game is to farm. Use your hero and eventually your illusions to clear creep waves and jungle camps as quickly and safely as possible. Don't be afraid to stay in lanes that seem empty if you can farm safely.
  2. Effective Split Pushing: Naga Siren excels at applying pressure across multiple lanes simultaneously. Send your illusions to push lanes while your main hero farms safely or applies pressure elsewhere. This forces the enemy team to constantly react, creating opportunities elsewhere on the map.
  3. Strategic Illusion Usage: Your illusions aren't just for pushing. Use them to scout dangerous areas, create diversions, or even bait out crucial enemy spells like Black Hole or Ravage. Mastering the micro-management of these illusions is vital for both survival and offensive pressure.
  4. Mastering Disables: Ensnare is Naga's primary single-target disable. Learn its range, cast time, and cooldown. It's invaluable for catching fleeing heroes, setting up kills for your team, or interrupting important enemy channels.
  5. Ultimate Timing is Everything: Song of the Siren is a powerful tool, but its long cooldown means timing is critical. Use it to initiate fights on your terms, isolate key enemy heroes, save yourself or allies from impending doom, or secure Roshan uncontested. A poorly timed ultimate can be disastrous.

Learning Naga Siren takes time and practice. Don't get discouraged if your early games feel slow. Focus on improving your farming patterns and understanding when to push versus when to join your team. The payoff for a well-played Naga Siren is immense.

If you're new to Dota 2 or just starting to learn Naga Siren, here are a few tips to keep in mind. First, focus on farming and itemization. Naga Siren is a hard carry hero, which means that she needs to farm a lot of gold to become effective.

Key Takeaways for Aspiring Carries

Yatoro's performance on this day wasn't just a display of individual skill; it was a lesson in calculated aggression and game sense. The way he navigated the map, understood power spikes, and leveraged his hero's strengths is the essence of what it means to be a great carry.

He understood that Dota 2 is a game of **resource management**, not just gold, but time and map control. His split-pushing wasn't reckless; it was strategic, forcing the enemy team to divide their attention and resources. This allowed his team to control objectives and gain advantages elsewhere.

The execution of his disables, particularly Ensnare, was precise. He knew when to commit to a kill and when to hold his disables for a more opportune moment. This level of game awareness is what separates good players from great ones. It’s the kind of precision you often see in dedicated world record attempts, where every second counts.

In essence, Yatoro's Naga Siren game is a testament to understanding your hero's role, maximizing your farm, and applying pressure effectively. It’s a blueprint for how to dominate the late game and carry your team to victory.

Frequently Asked Questions

  • What makes Naga Siren a good carry hero? Naga Siren is considered a strong carry due to her exceptional late-game scaling, ability to farm extremely fast with illusions, powerful split-pushing potential, and strong disables that can control fights.
  • Is Naga Siren difficult to play effectively? Yes, Naga Siren has a steep learning curve. Mastering her illusion micro-management, efficient farming patterns, and strategic use of her ultimate, Song of the Siren, requires significant practice and game knowledge.
  • What are the most important items for Naga Siren? Core items often include Radiance (for farming and aura damage), Manta Style (for dispel, stats, and illusion generation), and Diffusal Blade (for mana burn and a strong active disable). The exact build can vary based on the game's needs.
  • How can I improve my split-pushing with Naga Siren? Focus on using your illusions to push lanes simultaneously while your hero farms safely or pressures another objective. Always be aware of the enemy's map position to avoid getting caught out.

In conclusion, Yatoro's performance as Naga Siren on March 25th, 2014, remains an iconic moment in Dota 2 history. It's a masterclass in carry play, showcasing unparalleled decision-making, flawless execution, and a deep understanding of game mechanics. Whether you're a seasoned veteran looking to refine your strategy or a newcomer eager to learn the ropes, this gameplay offers invaluable lessons. So, take the time to watch, learn, and perhaps even be inspired to craft your own legendary moments on the battlefield.

What are your thoughts on Yatoro's Naga Siren? Did you witness this game live? Share your experiences and strategies in the comments below! Join our Discord channel to discuss more speedrun strategies and amazing plays!

Yatoro's Legendary 35-Kill Ursa: Mastering the Bear Warrior in Dota 2 Pro Gameplay

Hey there, fellow gamers and speedrunning enthusiasts! Welcome back to GamingSpeedrun.com, your ultimate hub for all things fast-paced and high-skill in the gaming world. Today, we're diving deep into a truly legendary performance in Dota 2: **Yatoro's absolutely monstrous 35-kill Ursa game**. This isn't just a match; it's a masterclass in aggression, farming, and strategic dominance, showcasing what makes Ursa, the Bear Warrior, such a terrifying force when played at the highest level. If you're looking to learn how to utterly crush your opponents, optimize your farming patterns, and execute game-winning plays, you've come to the right place. Prepare to watch and learn as we break down the strategies, the key moments, and the sheer skill on display.

What Makes This Ursa Performance So Special?

In the hyper-competitive landscape of gaming, particularly in a game as complex as Dota 2, exceptional performances stand out. Yatoro's 35-kill Ursa game is a prime example. It's not just about the kill count; it's about the efficiency, the decision-making under pressure, and how every action contributed to overwhelming the enemy team. This game demonstrates a near-perfect execution of Ursa's potential, pushing the limits of what the hero can achieve. We're going to dissect how this dominance was achieved, from the initial lane aggression to the final game-winning pushes.

Early Game Domination: Setting the Stage for Carnage

The foundation of any dominant game, especially for a hero like Ursa, is a strong early game. This involves efficient last-hitting, securing creep equilibrium, and understanding when to apply pressure. In Yatoro's case, we see an aggressive laning phase, often capitalizing on Ursa's innate strength and burst damage. * **Lane Presence**: Ursa thrives on being near the enemy heroes. Yatoro likely used his Overpower and Fury Swipes to zone out opponents or secure crucial early kills. * **Farming Efficiency**: Even with aggressive plays, maintaining a high GPM (Gold Per Minute) is vital. Yatoro's focus on securing jungle camps between lane creeps would have accelerated his item timings. * **Rosh Pit Control**: A key part of Ursa's identity is the Aegis of the Immortal. Securing early Roshan allows for aggressive map plays and makes Ursa even more formidable.
The early game sets the tempo. A strong start for Ursa means the enemy has to constantly respect his kill potential, limiting their own aggressive plays.

Mid-Game Power Spike: The Ursa Rampage Begins

Once Ursa hits key item timings, like a Mask of Madness or an early Blink Dagger, their threat level skyrockets. This is where the 35-kill potential really starts to manifest. * **Ganking and Pickoffs**: With Blink and Overpower, Ursa becomes an incredible ganker. Yatoro likely utilized this to hunt down isolated enemy heroes, snowballing his gold and experience advantage. * **Objective Taking**: Ursa excels at taking objectives quickly, especially towers and Roshan. After securing kills, pushing towers becomes the priority to open up the map. * **Teamfight Impact**: While not a traditional initiator, Ursa's burst damage can quickly decimate enemy cores. A well-timed Blink-in can turn the tide of a mid-game teamfight.

Late Game Carry: Securing the World Record Pace

In the late game, a farmed Ursa with the right items becomes an unstoppable force. The 35 kills in this scenario suggest Yatoro was not only carrying his team but also actively hunting down every enemy hero possible. * **High Ground Sieges**: With Aegis and a strong damage output, Ursa can be instrumental in breaking high ground defenses. * **Chasing Down Escapes**: Ursa's attack speed and damage mean few heroes can escape once engaged. This leads to high kill counts as the game progresses. * **Maintaining Momentum**: The key to such a high kill count is maintaining pressure and not letting the enemy team recover. Every engagement, if won, should lead to further map pressure or objective taking.

Key Strategies and Itemization

To achieve such a feat, specific item builds and strategic decisions are paramount. For Ursa, common core items include: * Blink Dagger: Essential for initiation and closing the gap. * Mask of Madness: Provides attack speed and lifesteal, amplifying Ursa's damage output and sustain. * Echo Sabre : Offers a slow and a double-attack proc, perfect for locking down targets. * Assault Cuirass : Great for both offensive and defensive capabilities, boosting armor and attack speed for the whole team. * Black King Bar (BKB) : Crucial for surviving magical burst and teamfight control.
The choice between early aggression items and core survivability items is a constant strategic decision Yatoro navigates perfectly.
Understanding when to transition into late-game items like a Scythe of Vyse or Daedalus also plays a role, depending on the enemy lineup. This game likely saw a heavy emphasis on damage and sustain to maximize kill potential.

Understanding Ursa's Strengths

Ursa, the Bear Warrior, is defined by his raw, overwhelming burst damage, especially against single targets. His ultimate, Enrage , provides a massive bonus to his damage output, making him a terrifying opponent during its duration. * Fury Swipes: This ability is Ursa's core damage amplifier. Each attack applies a stacking debuff that deals percentage-based damage over time. The longer the fight, the more potent this becomes. * Overpower: Grants a significant temporary boost to attack speed, allowing Ursa to apply Fury Swipes stacks much faster. * Earthshock: A small AoE stun and damage ability, useful for interrupting channels or securing kills on fleeing enemies. These abilities, combined with a good understanding of farming and engagement timings, make Ursa a hero capable of carrying games single-handedly.

The Yatoro Edge: Beyond Basic Gameplay

What separates a good Ursa player from a legendary one like Yatoro? It's often the small details and the risk assessment: * **Map Awareness**: Constantly knowing where the enemy is allows for calculated aggression and avoiding dangerous situations. * **Resource Management**: Efficient use of mana and cooldowns is critical, especially for a hero reliant on abilities like Overpower and Enrage. * **Aggression Timing**: Knowing precisely when to commit to a fight and when to back off is a skill honed through countless hours of gameplay. Yatoro's ability to find the perfect moment to strike is key to his success and likely a reason for this massive kill count. * **Item Build Flexibility**: While core items are important, adapting the build to counter specific enemy heroes or strategies is a hallmark of top-tier players. This performance is a testament to not just mechanical skill but also deep game knowledge and strategic foresight, crucial elements for any aspiring speedrun or high-level player.

Frequently Asked Questions

Is Ursa a viable hero in the current Dota 2 meta?

Ursa's viability often fluctuates with patches, but his core strengths of high burst damage and objective-taking make him consistently relevant, especially in certain matchups or when played aggressively.

What is the fastest way to farm for Ursa?

Focus on efficient creep wave clearing combined with jungle camp farming. Prioritize items that boost your farm speed like Mask of Madness and Echo Sabre . Securing an early Aegis also significantly speeds up your ability to take objectives.

How do I counter an aggressive Ursa?

Heroes with strong disables, high magic damage burst, or escape mechanisms can counter Ursa. Wards to spot his Blink Dagger initiations and staying spread out can also mitigate his effectiveness.

What's the difference between playing Ursa for kills and playing for a speedrun?

While this gameplay focused on racking up kills, a speedrun would prioritize the fastest route to completing the game's objectives, which might involve different item builds and kill timings focused solely on map progression and Roshan kills.

How important is Roshan for Ursa?

Roshan is incredibly important for Ursa. The Aegis of the Immortal provides a crucial safety net and allows for aggressive pushes and teamfight engagements that might otherwise be too risky. It's often a primary target for Ursa players.

Conclusion: The Art of the Bear Warrior

Yatoro's 35-kill Ursa game is more than just a high-score; it's a demonstration of mastery over one of Dota 2's most iconic aggressive heroes. It highlights the power of focused aggression, efficient farming, and smart decision-making. Whether you're aiming for a personal best, a new world record, or simply want to improve your own Dota 2 gameplay, studying performances like this is invaluable. It reminds us that in Dota 2, understanding your hero's potential and executing flawlessly can lead to truly legendary outcomes. What are your favorite Ursa strategies? Have you ever seen a game with this many kills? Let us know in the comments below or join the discussion on our Discord channel! We love hearing from our community! ```json

Mastering Alchemist: Yatoro's Money-Making Machine in Dota 2 - A Speedrunner's Guide

Hello, fellow gamers and aspiring speedrunners! Welcome to GamingSpeedrun.com, your premier destination for all things fast-paced and efficient in the gaming world. Today, we're diving deep into a strategy that's less about reflexes and more about pure economic dominance: Yatoro's Alchemist money-making machine in Dota 2. If your goal is to break game time records by simply out-farming everyone, you've come to the right place. We're not just watching a pro play; we're dissecting it with a speedrunner's precision, looking for every possible optimization, every gold advantage, and every micro-second saved. This isn't just a highlight reel. This is your chance to learn the intricate mechanics behind a potent gold-generation strategy that can define the pace of any Dota 2 match. We'll break down item builds, farm patterns, and crucial decision-making points that allow heroes like Alchemist, under the masterful control of players like Yatoro, to become unstoppable economic powerhouses. Prepare to watch and learn, because this guide is designed to elevate your gameplay, whether you're aiming for a personal best or a new world record.

Understanding Alchemist's Core Mechanics

At its heart, Alchemist is a hero built around one primary ability: Greevil's Greed. This passive grants him bonus gold from creeps, neutral camps, and towers. The more Alchemist farms, the more gold he gets, creating a powerful snowball effect. This core mechanic is the bedrock of his "money-making machine" identity. Understanding the nuances of this passive, such as how it interacts with runes and bounty runes, is crucial.
In my experience, players often underestimate how much gold bounty runes provide, especially when combined with Greevil's Greed. It's a significant early-game boost that can't be ignored.
His ultimate, Chemical Rage, further amplifies his farming speed by providing attack speed, damage, and regeneration. This allows him to take down neutral camps faster and clear creep waves with devastating efficiency. The synergy between Greevil's Greed and Chemical Rage is what makes Alchemist a fearsome farming threat.

Yatoro's Strategic Approach: Beyond the Obvious

While the mechanics are simple, Yatoro's application of them is where the magic happens. He doesn't just farm aimlessly; his approach is calculated and optimized for maximum gold per minute (GPM). This involves precise lane management, efficient jungle pathing, and understanding when to push objectives versus when to continue farming.
Yatoro often prioritizes securing the safe lane for maximum farm potential early on. He utilizes Acidic Spray to accelerate creep wave clear, allowing him to hit his item timings faster. Furthermore, his understanding of Roshan timings and potential gank opportunities allows him to farm aggressively, often deep within enemy territory, knowing he can escape or turn fights with Chemical Rage.

Early Game Farm Efficiency: The Foundation of the Machine

The first 10-15 minutes are critical. Yatoro's early game is characterized by relentless farming. He maximizes his gold by:
  • Taking every last hit in lane.
  • Clearing creep waves as quickly as possible with Acidic Spray.
  • Utilizing Unstable Concoction to secure runes or pick off isolated heroes for bonus gold.
  • Aggressively farming neutral camps between creep waves, often pulling them to his lane to maximize farm.
The goal here is to reach key item timings as quickly as possible. For Alchemist, this often means securing an early Brown Boots and then rushing towards a Power Treads and eventually, his signature Radiance. Each step is timed to maximize the return on investment, ensuring that his GPM continues to climb exponentially.
The difference between a good Alchemist player and a great one like Yatoro is the ability to identify and exploit even the smallest farming windows. No creep should go un-last hit, no neutral camp should be left untouched if it's safe to farm.

Mid-Game Power Spike and Map Control

Once Yatoro secures his core items, typically Radiance and potentially an Armlet of Mordiggian, Alchemist transforms into a monster. This is when his money-making machine starts printing gold at an unprecedented rate. His high GPM allows him to purchase items much faster than his opponents, giving him a significant statistical advantage. This advantage translates directly into map control. With items like Radiance, Alchemist can easily push out lanes, forcing enemy heroes to respond. This creates space for his team to take objectives or for himself to continue farming safely in uncontested areas. Speedrunners often look for these moments to exploit map control for objectives, but with Alchemist, the objective *is* the gold. His ability to farm quickly also means he can afford crucial defensive or offensive items much earlier, such as Black King Bar (BKB) or even an early Mjollnir, further amplifying his farming and fighting potential.

Itemization Choices for Maximum GPM

Yatoro's item builds are always geared towards efficiency. While flexibility is key in Dota 2, his Alchemist builds consistently prioritize items that enhance his farming speed and survivability.
  • Power Treads: Essential for stats and attack speed.
  • Radiance: The cornerstone of his GPM strategy. The burn damage significantly speeds up both creep and neutral camp clearing.
  • Armlet of Mordiggian: Provides a massive damage and armor boost, allowing for aggressive farming and survivability during Chemical Rage.
  • Black King Bar (BKB): Crucial for teamfights and split-pushing, allowing him to farm or fight without being interrupted.
  • Situational Items: Depending on the game, items like Manta Style, Shiva's Guard, or even a Desolator can further enhance his capabilities.
The core principle remains: every item purchased should contribute to faster farming or securing more farm. This laser focus on gold generation is what defines the "money-making machine."

Speedrunning Implications of Alchemist's GPM

For a speedrunner, an Alchemist strategy focused on maximizing GPM presents unique opportunities and challenges. The primary goal in a speedrun is to complete the game as quickly as possible. While Alchemist's GPM is high, it doesn't always translate to a faster *game* completion directly, unless that gold is used to facilitate rapid objective taking. However, a well-executed Alchemist run can significantly shorten the time needed to acquire essential damage items, allowing for faster Roshan kills or quicker destruction of enemy barracks and Ancient. The challenge lies in balancing pure farming with the need to push objectives.
The dream speedrun with Alchemist involves perfectly timed Chemical Rages to farm ancients, secure Roshan, and then push high ground before the enemy team can even react. It's all about efficient transitions.
A key aspect for speedrunners is optimizing the jungle pathing. Knowing the most efficient routes to clear neutral camps, stacking them when possible, and minimizing travel time between camps and lanes is paramount. This requires deep knowledge of the map and spawn timers, areas where speedrun practice truly shines.

Common Pitfalls to Avoid

Even with Alchemist's innate gold advantage, mistakes can be costly. Here are some common pitfalls to watch out for:
  • Over-farming and neglecting objectives: While gold is king, you need to win the game. Too much farming without pushing can allow the enemy to catch up or win through superior map control.
  • Poor positioning in fights: Alchemist can be vulnerable if caught out of position before activating Chemical Rage.
  • Inefficient item builds: Straying too far from core items like Radiance can cripple his farming potential.
  • Ignoring enemy threats: High GPM doesn't make you invincible. Enemy ganks or well-coordinated pushes can still shut down an Alchemist.
  • Wasting Unstable Concoction: Using it inefficiently for farm or without a clear kill potential is a loss of mana and a potential setup for an enemy counter-attack.
Mastering Yatoro's approach means understanding when to farm and when to fight, when to push and when to defend. It's a delicate balance, but the rewards are immense.

Frequently Asked Questions

Q1: What is the most crucial item for Alchemist's money-making strategy?

The most crucial item is undoubtedly Radiance. It dramatically increases farming speed through its burn effect, allowing Alchemist to clear creep waves and neutral camps much faster, significantly boosting his GPM.

Q2: How can I optimize my jungle pathing as Alchemist?

Efficient jungle pathing involves knowing camp spawn timers, stacking camps when possible, and minimizing travel time. Prioritize clearing camps that are close to each other and utilize Acidic Spray to speed up clearing multiple creeps. Always consider pulling neutral camps to your lane creeps to maximize farm.

Q3: Is Alchemist a viable hero for casual games or only for speedrunning?

Alchemist is viable in both casual games and speedruns. His immense farming potential makes him a strong pick in any game where you can secure a stable farming environment. In speedruns, his GPM can directly translate to faster objective taking if executed correctly.

Q4: What are the biggest risks associated with playing Alchemist?

The biggest risks include being shut down early by aggressive opponents, poor itemization choices that delay key timings, and neglecting to push objectives once a significant gold advantage is established. He can also be vulnerable to silences and disables if caught without BKB.

Yatoro's Alchemist strategy is a masterclass in efficient gold acquisition in Dota 2. By focusing on core mechanics, optimizing farm patterns, and making smart item choices, you can transform Alchemist into a veritable money-making machine. Whether you're a seasoned speedrunner looking to shave seconds off your times or a player aiming to dominate your pubs, understanding these principles is key.

What are your favorite Alchemist strats or moments? Did Yatoro's approach inspire you? Share your thoughts and experiences in the comments below! Join our Discord server to discuss strategies, find teammates, and become part of the ultimate speedrun community!