Welcome, fellow gamers and speedrunning enthusiasts, to GamingSpeedrun! If you've landed here, you're likely chasing that perfect run, seeking to shave off precious seconds, or simply looking to understand the bleeding edge of Age of Empires 4 multiplayer. Today, we're diving headfirst into one of the most chaotic yet rewarding modes: the 4v4 CBA Random Civilizations Battle. Forget meticulously planned team compositions; this is about raw adaptation, quick thinking, and mastering the art of coordinated mayhem. Prepare to transform your multiplayer experience from a gamble into a calculated assault.
Table of Contents
- What is the 4v4 CBA Random Civilizations Battle?
- Communication is King: The Unsung Hero
- Strategic Drafting & Synergy: Adapting to the Random
- Resource Management for Speed
- Unit Composition and Counter-Play
- Speedrunning Strategies in CBA
- Monetizing Your Passion: Speedrunning Your Blog
- Frequently Asked Questions
What is the 4v4 CBA Random Civilizations Battle?
At its core, the 4v4 CBA Random Civilizations Battle mode in Age of Empires 4 throws you and three teammates into a high-stakes match against another coordinated team of four. The twist? Each player's civilization is chosen at random. This isn't your standard pre-game meta; it's a dynamic environment where no two matches are ever the same. Your primary objective is simple: outmaneuver, outproduce, and ultimately overwhelm the enemy team. Success hinges on rapid adaptation and exploiting the unique strengths of your randomly assigned civs.
In my many hours spent grinding this mode, I've found that the initial moments of a match are crucial. Scouting isn't just about finding the enemy; it's about understanding your team's potential synergies and weaknesses from the get-go. Did you get a defensive civ like the Abbasids and your teammate drew the aggressive Mongols? That's a powerful combo waiting to happen.
Communication is King: The Unsung Hero
This is where most teams crumble. In a mode defined by unpredictability, clear and concise communication is your golden ticket. Without it, your grand offensive plans dissolve into a scattered mess of units attacking isolated targets. Use voice chat, ping systems, or whatever tools are available to maintain constant contact.
"The most critical element in 4v4 CBA isn't your APM, it's your comms. A synchronized push, even with weaker units, will often beat a disorganized swarm."
When I first started playing this mode competitively, I underestimated the power of a simple "Enemy pushing my base, need help" call. It changed everything. It allows teammates to react, re-route, and reinforce effectively. Always be communicating your intentions, enemy movements, and resource needs. This builds trust and allows for seamless execution of complex strategies.
Strategic Drafting & Synergy: Adapting to the Random
While the civilizations are random, your approach to them shouldn't be entirely passive. Once you see your civ and your teammates', immediately start thinking about potential synergies. The English longbowmen, for example, pair incredibly well with French Knights for a strong offensive push. Conversely, a defensive civ like the Byzantines can hold the line while faster, raiding civs like the Huns exploit the enemy's overextended forces.
My go-to strategy when I get a civ I'm not familiar with is to immediately consult a quick reference guide or ask in chat about its core strengths. Is it early aggression? Late-game siege? Strong economy? Knowing this allows you to tailor your build order and strategic focus.
Consider these potential team compositions:
- Rush Composition: Aztecs (Eagle Warriors), Mongols (Mangudai), Malians (Infantry), Huns (Horsemen). This team aims for overwhelming early-game aggression.
- Defensive/Boom Comp: Byzantines (Defensive Units), Holy Roman Empire (Economic Bonuses), Chinese (Villager Production), Delhi Sultanate (Tech Cost Reduction). This team focuses on building a robust economy and strong defenses before launching a powerful late-game assault.
- Balanced Comp: A mix of cavalry, infantry, ranged, and siege units, ensuring flexibility against various enemy threats.
Resource Management for Speed
In any Age of Empires 4 match, especially one focused on speed and efficiency, resource management is paramount. You need to strike a delicate balance between gathering resources and producing military units. Sending too many villagers to gather wood when you need gold for upgrades is a common mistake. I always try to keep my economy running smoothly without overproducing villagers, as idle villagers are wasted potential.
Prioritize gathering the resources needed for your immediate strategic goal. If you're planning an early rush, focus on food and gold. If you're aiming for a strong defensive posture, ensure you have ample wood and stone. Effective scouting of enemy resource nodes can also inform your own gathering priorities.
"Don't just gather resources; gather them *smartly*. Know what you need and when you need it. Every second spent gathering the wrong resource is a second lost to your opponent."
Upgrades are often overlooked in the heat of battle, but they are essential for maintaining your edge. A fully upgraded spearman can often defeat two un-upgraded ones. Make sure to research key economic and military upgrades as soon as your resource income allows.
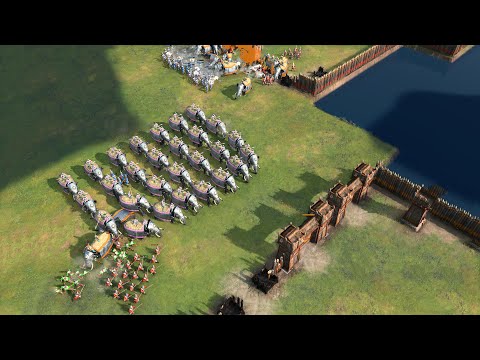
Unit Composition and Counter-Play
Understanding unit counters is fundamental to winning any Age of Empires 4 match. However, in CBA, this becomes a fluid dance. You can't rely on a single 'death ball' unit composition. Instead, focus on adapting your army to counter what the enemy is fielding, and communicate potential threats to your teammates.
For instance, if the enemy team is massing spearmen, you'll want to pivot towards cavalry or ranged units. If they're spamming archers, spearmen and siege units become your best friends. The key is not just having the counter units, but having them in sufficient numbers and adequately upgraded.
The beauty of the random nature means you'll often face unexpected unit combinations. This is where creative problem-solving comes in. Perhaps your opponent has a strong infantry core, but they've neglected air or naval defenses. Identifying these weaknesses and exploiting them is crucial for gaining an advantage.
Speedrunning Strategies in CBA
Applying speedrunning principles to a team-based, random mode like CBA presents unique challenges. The core idea remains the same: efficiency and minimizing downtime. This means:
- Minimizing Villager Idle Time: As mentioned, keep your economy humming.
- Optimized Build Orders: Even with random civs, a general understanding of efficient early-game builds will save you time.
- Rapid Unit Production: Queue units constantly. Don't wait until you're under attack to start producing defenders.
- Strategic Map Control: Secure key resources and choke points early. This reduces the need for defensive recalls later.
- Effective Scouting and Information Relay: Knowing what the enemy is doing *now* allows you to react faster than them.
A speedrunning mindset here translates to relentless pressure and maximizing every second. In my experience, the team that establishes map control and economic superiority within the first 10-15 minutes has a significantly higher chance of winning. Rushing specific objectives, like securing a vital trade route or eliminating an undefended enemy town center, can shave off significant time from a potential match, bringing you closer to that desired world record.
Monetizing Your Passion: Speedrunning Your Blog
For those of you running your own gaming blogs or content sites, the principles of speedrunning can even apply to your growth. High-quality, engaging, and informative content, like this deep dive into Age of Empires 4, is your primary asset. By consistently delivering valuable insights and guides, you build authority and attract a loyal audience. This, in turn, makes your blog more attractive to advertisers. Focus on creating content that answers player questions, solves their problems, and keeps them engaged – much like a speedrunner optimizes their route to finish a game faster.
Think of it as a different kind of speedrun: the speedrun to building a thriving community and a successful online presence. Offer comprehensive guides, quick tips, and engaging discussions that keep readers coming back. This establishes you as a trusted source, paving the way for potential monetization through ads or affiliate marketing.
Frequently Asked Questions
What is CBA in Age of Empires 4?
CBA stands for "Civilizations Battle Arena." In this mode, players are randomly assigned a civilization, leading to unpredictable team compositions and dynamic gameplay.
How important is communication in 4v4 CBA?
Communication is absolutely critical. Due to the random nature of the civilizations, teams must coordinate effectively to leverage their strengths, cover weaknesses, and execute joint strategies.
Can I apply traditional speedrunning techniques to CBA?
While direct speedrunning routes are less applicable due to the random elements, the core principles of efficiency, minimizing downtime, optimizing build orders, and rapid decision-making are highly relevant and can significantly improve your performance.
What's the best way to counter a strong enemy push in CBA?
The best counter involves a combination of clear communication with your team to call for reinforcements, adapting your unit production to counter their composition, and utilizing defensive structures or terrain to your advantage.
The 4v4 CBA Random Civilizations Battle in Age of Empires 4 is a thrilling test of skill, adaptability, and teamwork. By focusing on clear communication, smart adaptation to random civs, efficient resource management, and understanding unit counters, you can elevate your gameplay. Embrace the chaos, coordinate with your team, and strive for that perfect, optimized run. Remember, every match is a new puzzle to solve, a new opportunity to push your limits.
What are your favorite CBA strategies? Have you pulled off any incredible comebacks or achieved personal bests in this mode? Share your experiences and tips in the comments below! Join our Discord channel to connect with fellow speedrunners and strategists. Let's conquer the battlefield together!
For all your #gaming and #speedrun needs, keep it locked on GamingSpeedrun.com!